
By Mya L. Koch
Congrats! You’ve done it! You took the dive and decided to make that love of baking more than just a hobby.
You’ve got your very own little pie-in-the-sky-turned-reality business. You’ve thought of everything: Which cookies, pies or cupcakes to put on the menu; where your storefront will be; how many tables you’ll offer and how much you’ll charge for grandma’s famous custard pie.
Often, one of the last things that comes to mind is to-go packaging for your goodies. But here at MrTakeOutBags, we have made that easy for you with a vast range of supplies, including utensils, labels, baking cups, tissue liners and much more.
And yes, that includes bakery boxes to showcase your sweets.
Our bakery boxes come in an ever-growing range of sizes and colors, including kraft, white, pink strawberry and chocolate brown – some with windows, some without – but all designed to complement your business.
One of the more popular styles of bakery box – for their economy and style – are lock corner bakery boxes. If you’re just starting out, no doubt you’ve explored the various styles and learned the terms. But just in case, let’s dive in a little.
What is a lock corner bakery box?
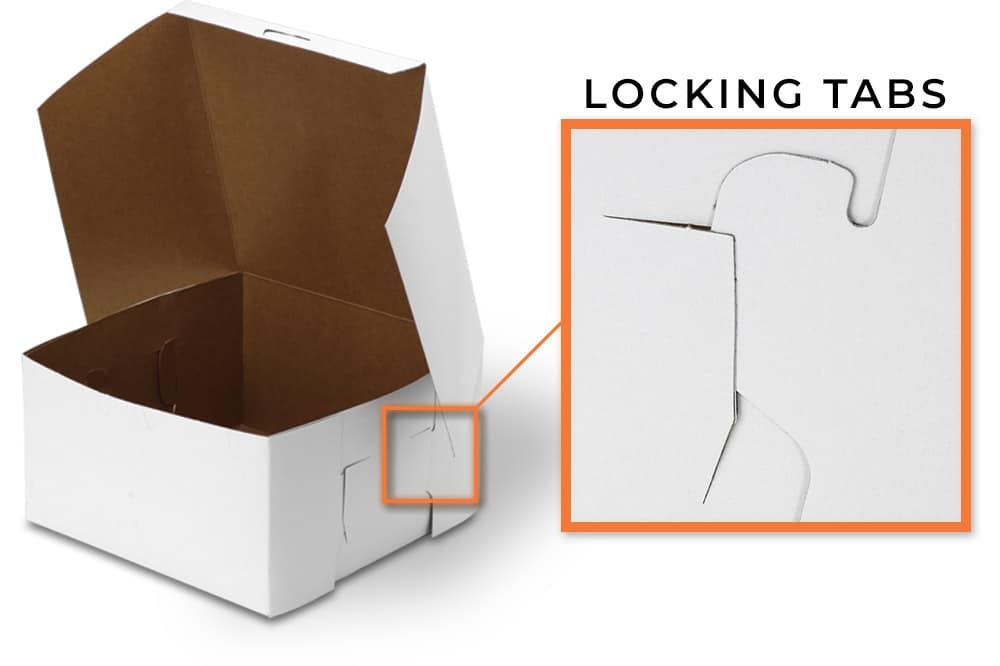
It’s a one-piece construction, paperboard bakery box that you assemble prior to loading up using interlocking tabs – this is in contrast to glued corner or pre-assembled style boxes.
They come in all those great colors I mentioned and can show off that buttercream and sprinkles with a window – or keep it all as a surprise without.
There are several “plusses” to them:
- They ship flat, which lowers your shipping cost
- They’re are simple and classic in design – meaning they’re not difficult to manufacture – a phenomenal value for a lower cost.
- They can be stored as flat boxes, or pre-folded and “nested” to save your valuable inventory space.
- They’re sturdier and more secure than other types of boxes.
About the only disadvantage is that you’ll need to put them together yourself – but hey, that’s a … well…. A piece of cake!
Step by step box instructions
Grab some clear tape and follow these simple steps:
Step 1 – Crease the panels before folding. This makes the box easier to assemble. Crease the main panels, then the side tabs.

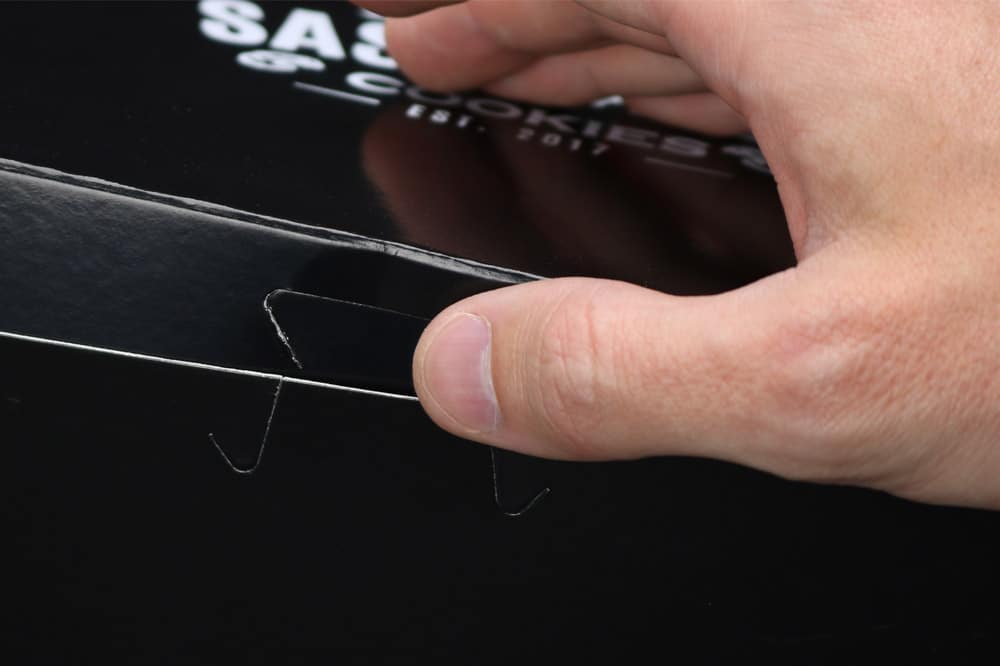
Step 2 – Lock the corners. Fold the top up and insert side tabs into the slots on the side panel. Hint: Start at the corners closest to the hinge.
Step 3 – Tuck and tape. Tuck the front tab into the slot on the lid, and use tape to secure the sides.
Some folks prefer to tuck the lid side panels into the box, but this does expose the lock-corners. This isn’t quite as pretty looking and it could damage your product.
To recap, just:
- Crease the panels
- Lock the corners
- Tuck and tape.
Voila! You’ve got a sturdy, good-looking box to showcase all of your hard work. And the other beauty of them is that they are fully customizable with your bakery’s brand or logo.
Here’s a link for a video to walk you through it: https://www.mrtakeoutbags.com/product/videos/vid-how-to-fold-bakery-boxes-lock-corner.html
There you go – one less thing to worry about. Now get baking, fling open those doors and welcome your new fans. We’re here to help!
Subscribe to our channel, Facebook page and newsletter for new videos, deals, tips, tricks and more.