Why Brown Take Out Boxes Are a Smart Choice for Food Service
Brown take out boxes are one of the most popular packaging choices for restaurants, bakeries, caterers, and food trucks — and for good reason.
Here’s a quick summary of what makes them worth considering:
Feature
What It Means for You
Material
Made from natural kraft paperboard, often with a poly or PLA lining
Leak & grease resistant
Holds saucy, oily, and moist foods without seeping through
Microwave & freezer safe
Customers can reheat or store leftovers with no extra containers
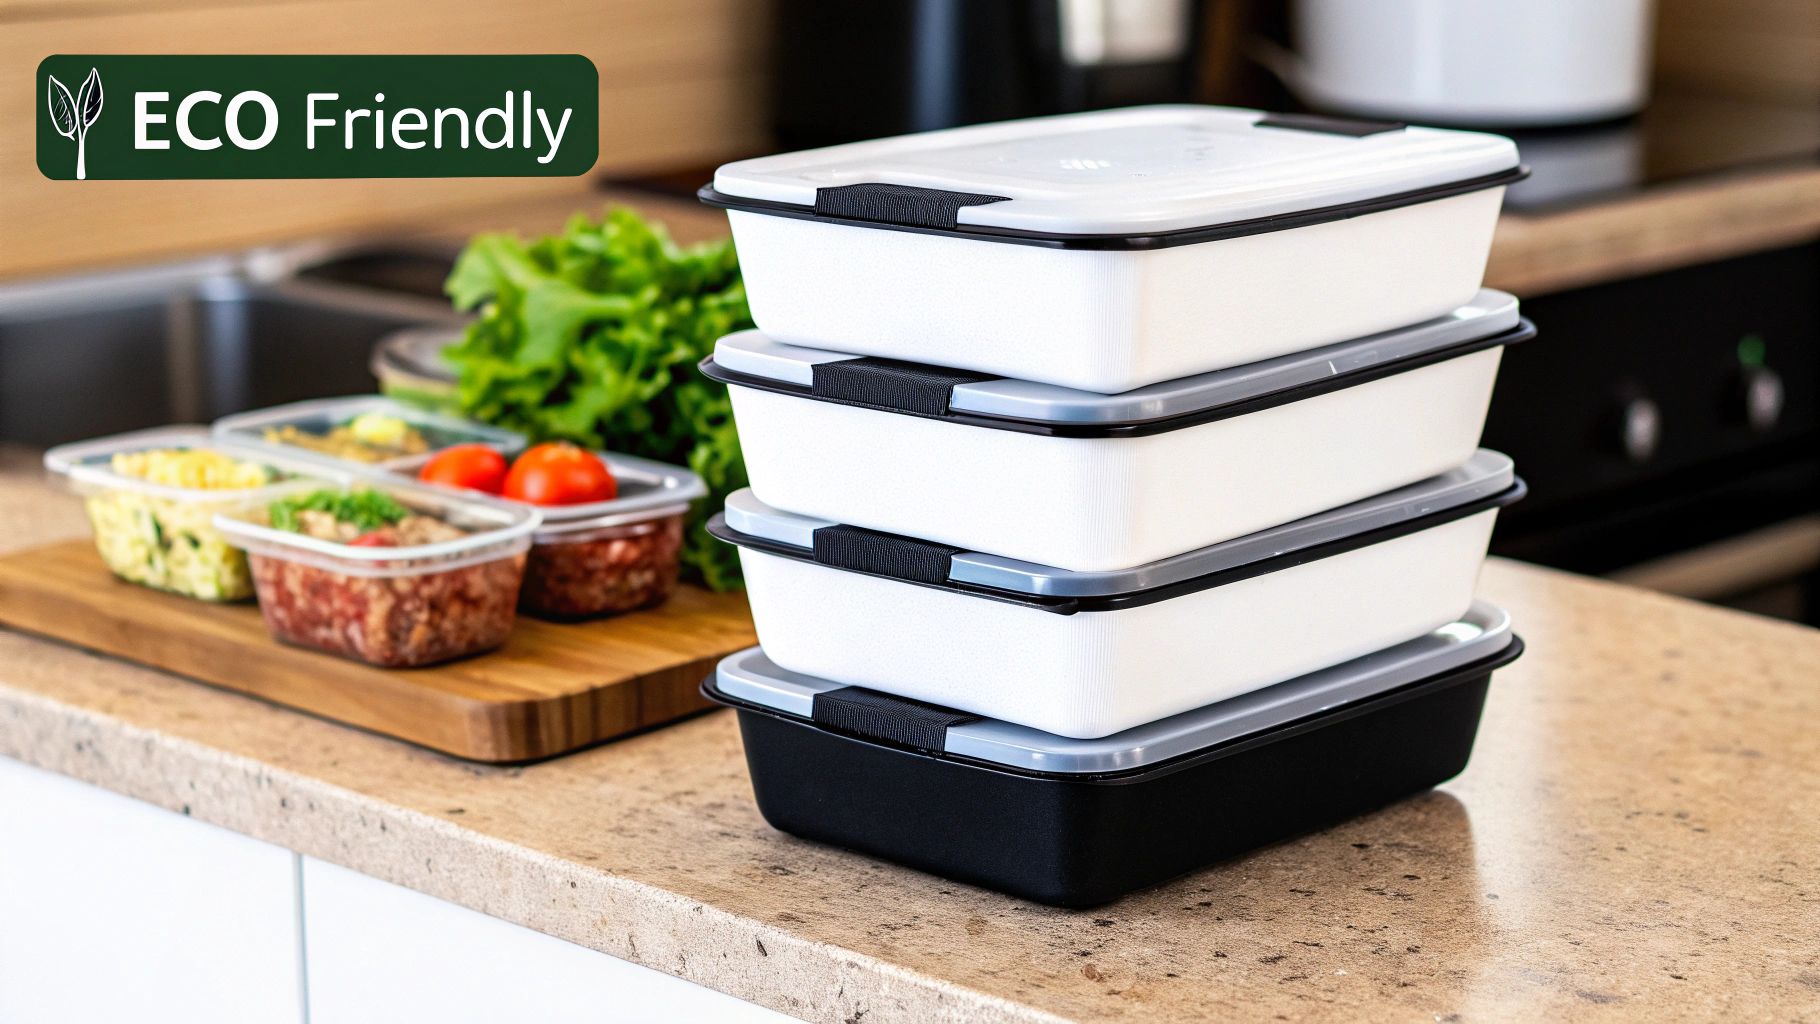
Eco-friendly
Many options use recycled content, are PFAS-free, and are recyclable when clean
Sizes available
Ranges from small 8 oz Chinese-style boxes to large 110 oz folded containers
Best for
Restaurants, catering, meal prep, bakeries, parties, and food trucks
Brown kraft boxes check a lot of boxes at once (pun intended). They look clean and natural, they handle hot and greasy foods well, and they’re a much more sustainable option than foam or plastic alternatives.
Whether you’re packaging stir-fry, sandwiches, cookies, or catering platters — there’s a brown take out box built for the job.
This guide walks you through everything: materials, sizes, performance, eco credentials, and where to buy in bulk.
Materials and Styles: From Kraft Paper to Chinese-Style Boxes
When we talk about brown take out boxes, we are usually referring to containers made from kraft paperboard. The term “kraft” comes from the German word for strength, which is fitting because these boxes are designed to be much tougher than your average sheet of paper.
What’s Inside the Box? (Literally)
Most brown take out boxes start with natural kraft paper stock. To make them functional for food service, manufacturers often use a few specific processes:
Chlorine-Free Process: Many eco-friendly boxes are made using a chlorine-free manufacturing process, which keeps harsh chemicals out of the production cycle.
Poly-Lining: A thin polyethylene coating is often applied to the interior. This acts as a moisture barrier, ensuring that the box doesn’t get soggy when filled with steaming hot noodles or saucy wings.
PLA Lining: For those seeking a 100% biodegradable option, some boxes use PLA (polylactic acid), a biosourced polymer derived from renewable resources like corn starch.
Soy Eco-Wax: Some heavy-duty containers utilize an integrated soy blend eco-wax. This provides grease resistance without relying on traditional petroleum-based waxes.
The natural aesthetic of these materials is a huge hit with customers. It signals a “farm-to-table” or “artisan” vibe that bleached white or plastic containers simply can’t match. If you’re already using Kraft Poly Lined Coffee Bags for your beans, these take out boxes will perfectly complement your brand’s look.
Popular Sizes and Shapes
One of the best things about brown take out boxes is the sheer variety of shapes. Whether you’re serving a side of slaw or a full rack of ribs, there is a size that fits.
Chinese-Style Pails: These are the classic “oyster pails” we all know and love. They are often available in 8 oz, 16 oz, and 32 oz sizes. Interestingly, many modern versions are made without the traditional wire handle, making them 100% microwavable.
Folded Paperboard Boxes: These are the workhorses of the industry. They usually come in numbered sizes:
#1 Size: Small and compact (approx. 22 oz), perfect for sides or small appetizers.
#3 Size: A medium-sized favorite (approx. 30-45 oz) for entrees like salads or pasta.
#8 Size: Large and deep (approx. 45-55 oz), great for shared appetizers or large meals.
Why have these boxes become the gold standard for modern delivery? It comes down to a mix of performance and presentation.
Leak-Proof and Grease Resistant
There is nothing worse than a customer receiving a brown paper bag with an oil spot growing on the bottom. High-quality brown take out boxes feature poly-coated or wax-lined interiors specifically designed to hold greasy foods without liquids seeping through. This makes them ideal for fried chicken, buttery pastries, or fries.
Heat Retention and Steam Venting
Kraft paperboard is a natural insulator. It helps keep hot food hot during the trip from the kitchen to the customer’s front door. Many designs also feature a tab-lock closure that is secure but allows for a tiny amount of steam to escape, preventing fried foods from becoming soggy.
Stackable and Space-Saving
In a busy commercial kitchen, space is at a premium. Most brown take out boxes are designed to be stackable. They often come nested in cases, taking up significantly less room than pre-assembled foam clamshells. Once filled, their flat tops and sturdy construction allow delivery drivers to stack multiple orders safely.
Performance in Professional Kitchens
We know that restaurant environments are tough. These boxes are built to handle the heat:
Cut Resistance: The heavy-duty paperboard can withstand the use of plastic cutlery without being punctured.
Heat Lamp Tolerance: Many kraft boxes are heat-lamp resistant, meaning they won’t melt or warp if they sit on the pass for a few minutes before pickup.
One-Piece Design: Most of these containers feature an integrated lid. This means you don’t have to manage a separate inventory of lids and bases, which speeds up the packing process during a rush.
Sustainability: Recyclability and Eco-Friendly Certifications
In today’s market, customers care about where their packaging goes after the meal is finished. Brown take out boxes are widely considered one of the most eco-friendly disposables available.
Post-Consumer Content and PFAS-Free
Many of the boxes we provide are made from up to 95% post-consumer recycled content. This means they are giving a second life to paper that has already been used and recycled. Furthermore, modern health standards have led many manufacturers to ensure their products are “PFAS-free” (meaning no “forever chemicals” were added for grease resistance) and gluten-free.
Certifications to Look For
When shopping for sustainable options, keep an eye out for endorsements from organizations like the Green Restaurant Association. This tells you that the product has met rigorous standards for environmental friendliness. If you are looking to round out your eco-friendly presentation, consider pairing your boxes with Recycled Shopping Bags.
How to Recycle and Compost Brown Take Out Boxes
This is where it gets a little technical. While the paper itself is highly recyclable, there are two main rules for your customers:
Clean and Dry: For a box to be recycled in standard municipal bins, it must be relatively clean and free of heavy food residue. A few small grease spots are usually okay, but a box soaked in sauce should go in the trash or compost.
Check Local Facilities: Because many boxes have a poly-coating for leak resistance, some local recycling centers handle them differently. However, boxes that use PLA (biosourced) linings are often commercially compostable.
To help your customers carry their eco-friendly meals home, we also suggest using Brown Kraft Paper Shopping Bags, which are easy to recycle and complete the natural look.
Frequently Asked Questions
Are Brown Take Out Boxes Microwave and Freezer Safe?
Yes! Most modern brown take out boxes are microwave-safe, provided they don’t have metal wire handles. This allows customers to pop their leftovers directly into the microwave for a quick reheat. They also hold up well in the freezer for short-term storage, as the poly-coating helps prevent freezer burn.
Do These Containers Leak with Greasy Foods?
They are specifically engineered not to. The poly-coated interior or soy eco-wax creates a barrier that keeps grease and sauces inside the box. Whether it’s a salad with heavy dressing or a side of greasy wings, these containers are built to stay dry on the outside.
Where Can I Buy Bulk Takeout Packaging?
While you can find small packs at big-box retailers, the most cost-effective way for a business to buy is through a dedicated supplier like us. Buying in case quantities (often 150 to 450 units per carton) significantly lowers your cost-per-unit.
Conclusion
At MrTakeOutBags.com, we understand that your packaging is an extension of your food. As a family-run business since 2005, we’ve spent nearly two decades helping restaurants find the perfect balance between functionality and sustainability.
Brown take out boxes offer a unique “triple threat”: they are tough enough for the kitchen, convenient for the customer, and kind to the planet. From the classic #1 size for appetizers to the large #8 for family dinners, these containers provide a professional, eco-conscious look that customers love.
If you have questions about which size is right for your menu, or if you’re interested in custom branding to make your boxes truly stand out, our team in Pittsburgh is ready to help. We offer personalized support and a deep inventory of food service essentials to keep your business running smoothly.
The Essential Guide to Takeout Container Dimensions
Choosing the right takeout container size is crucial for ensuring your food arrives in perfect condition. It’s a balance between the type of food, portion size, and the delivery trip itself. The right container keeps food looking good, prevents spills, and keeps customers happy.
Understanding Standard Sizes
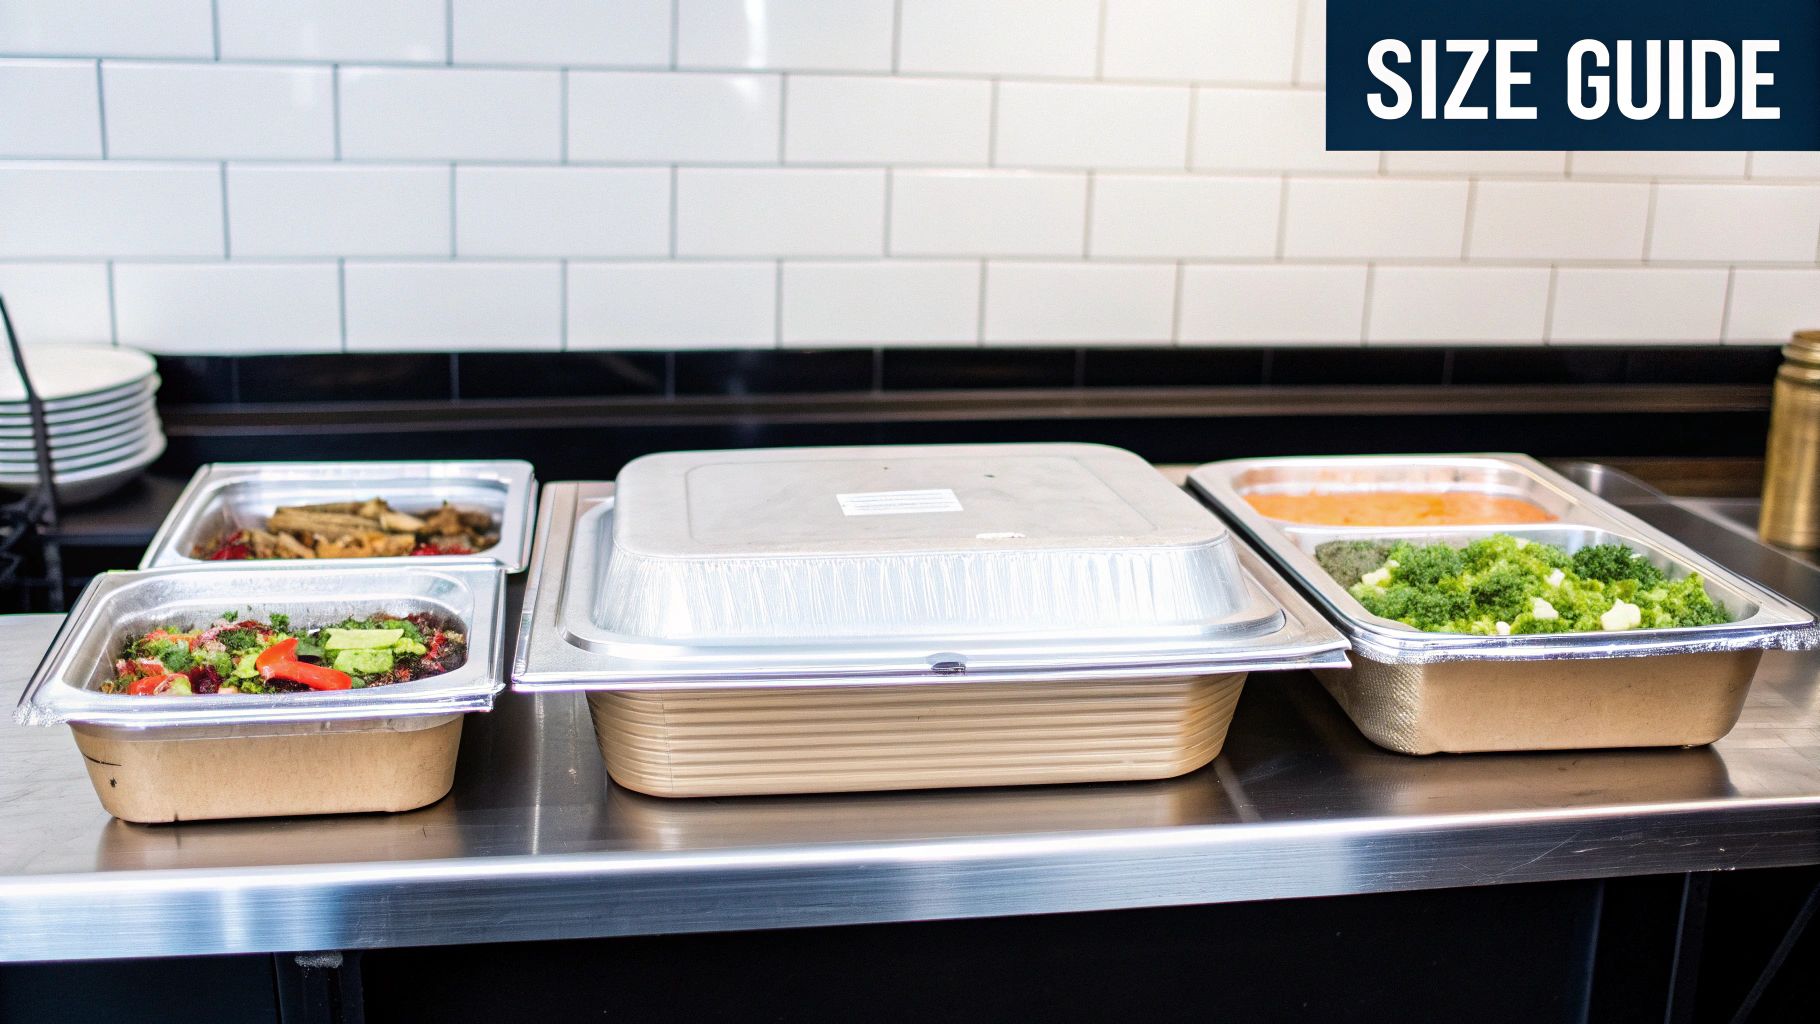
Takeout containers, like clothing, come in a range of sizes. From small sauce cups to large family-style containers, there’s a fit for every dish. Sizes are measured in ounces (oz) or milliliters (ml) for volume, and in inches or centimeters for dimensions.
Small containers (8-16 oz): Perfect for sauces, sides, or small appetizers.
Medium containers (24-32 oz): Great for individual entrees, salads, and sandwiches.
Large containers (48+ oz): Best for family meals, combination platters, or large portions.
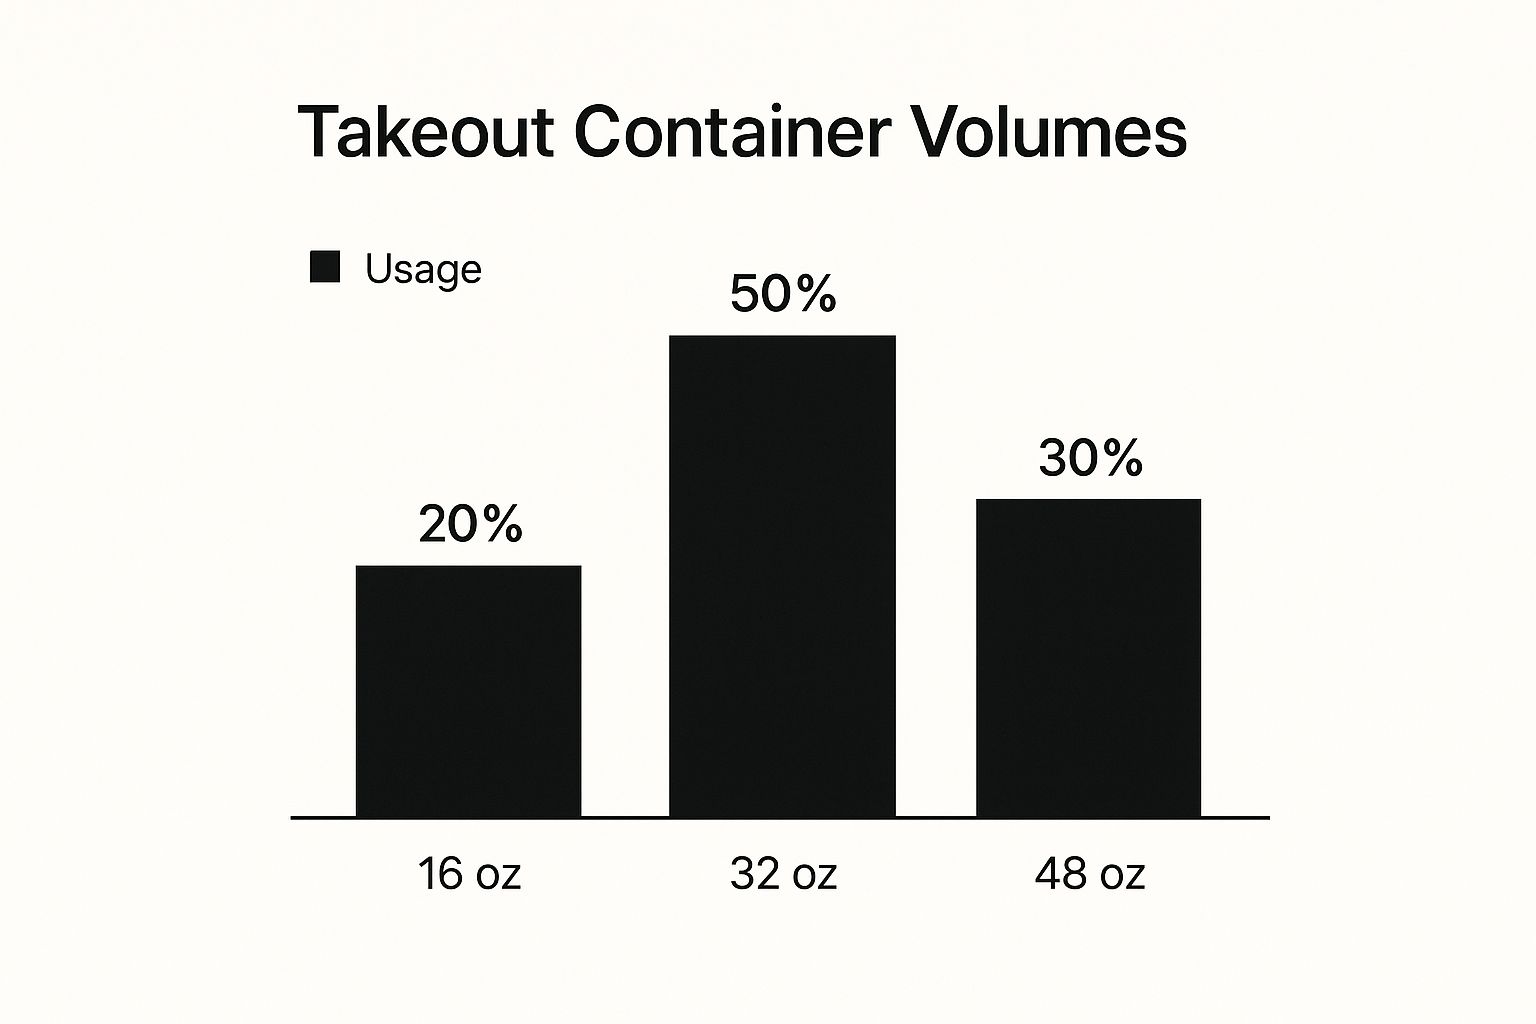
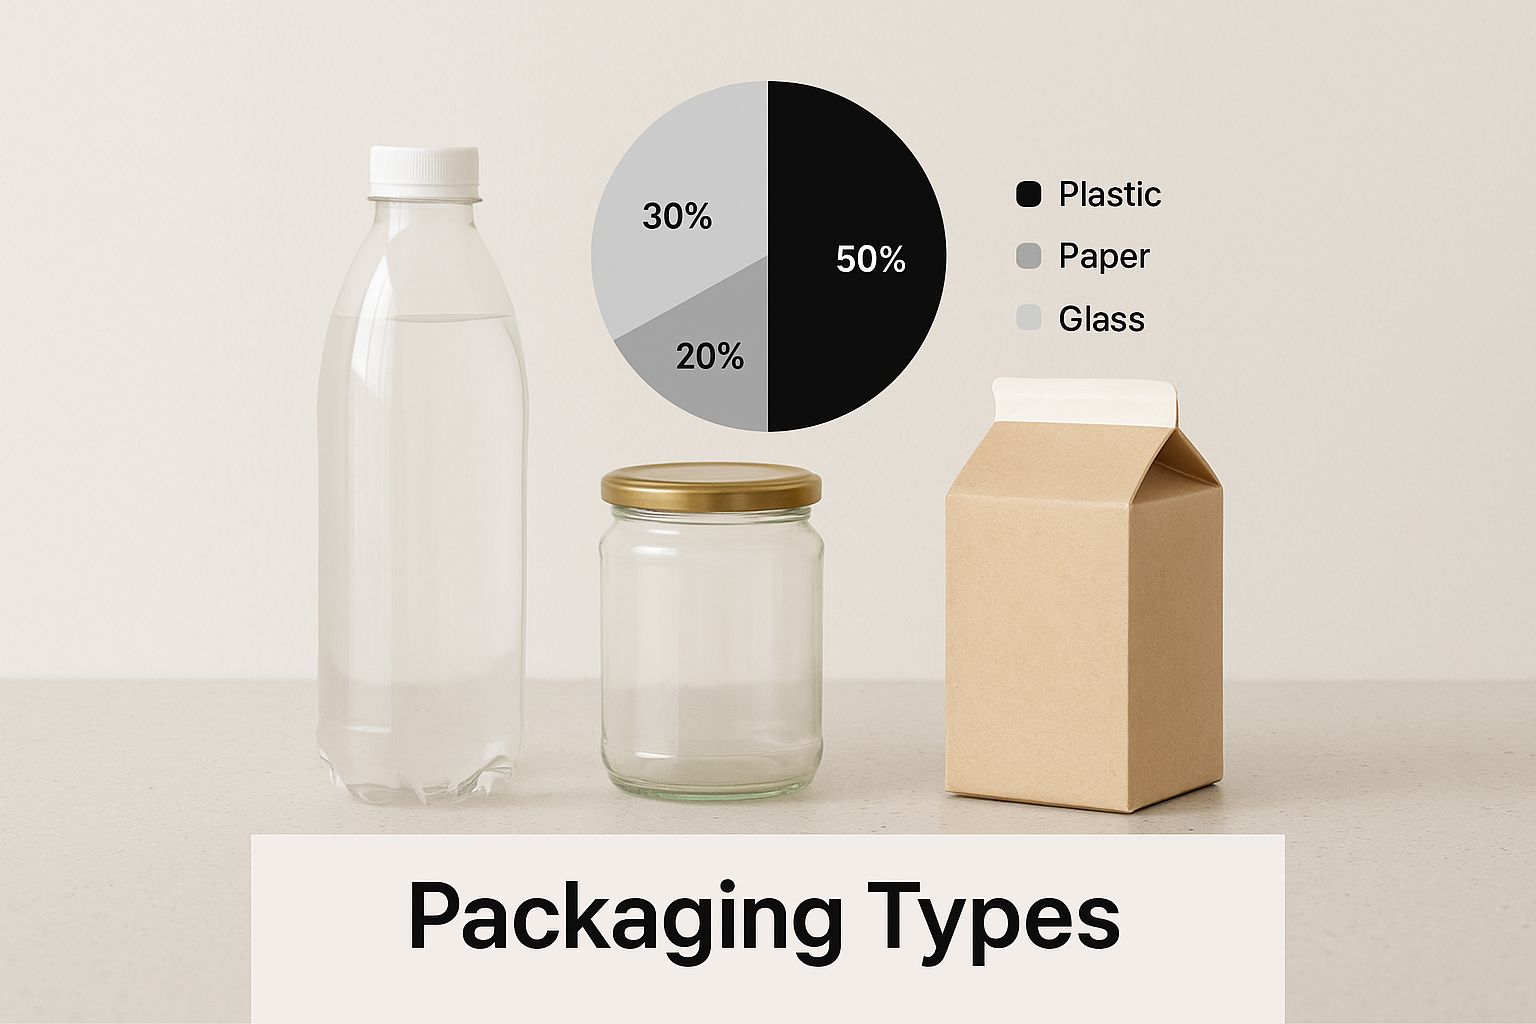
To help illustrate the distribution of container sizes, take a look at the infographic below:
The 32 oz container is the most popular, with 50% usage. The 48 oz container follows at 30%, and the 16 oz at 20%. This shows the demand for medium to large containers for takeout, reflecting the trend of individual entrees and shareable portions.
Why Dimensions Matter
The right container dimensions are vital for a positive customer experience. They prevent messy spills and keep food presentable, making a good first impression. They also help maintain serving temperature.
A shallow container will cool food faster than a deep one. This small detail can make a big difference in how much someone enjoys their meal. Happy customers are more likely to order again.
To further explore container sizes, let’s look at a comparison of standard takeout container sizes:
Standard Takeout Container Sizes Comparison
A comprehensive comparison of common takeout container dimensions with their typical uses and food capacity
Container Size
Dimensions (inches)
Volume (oz)
Best For
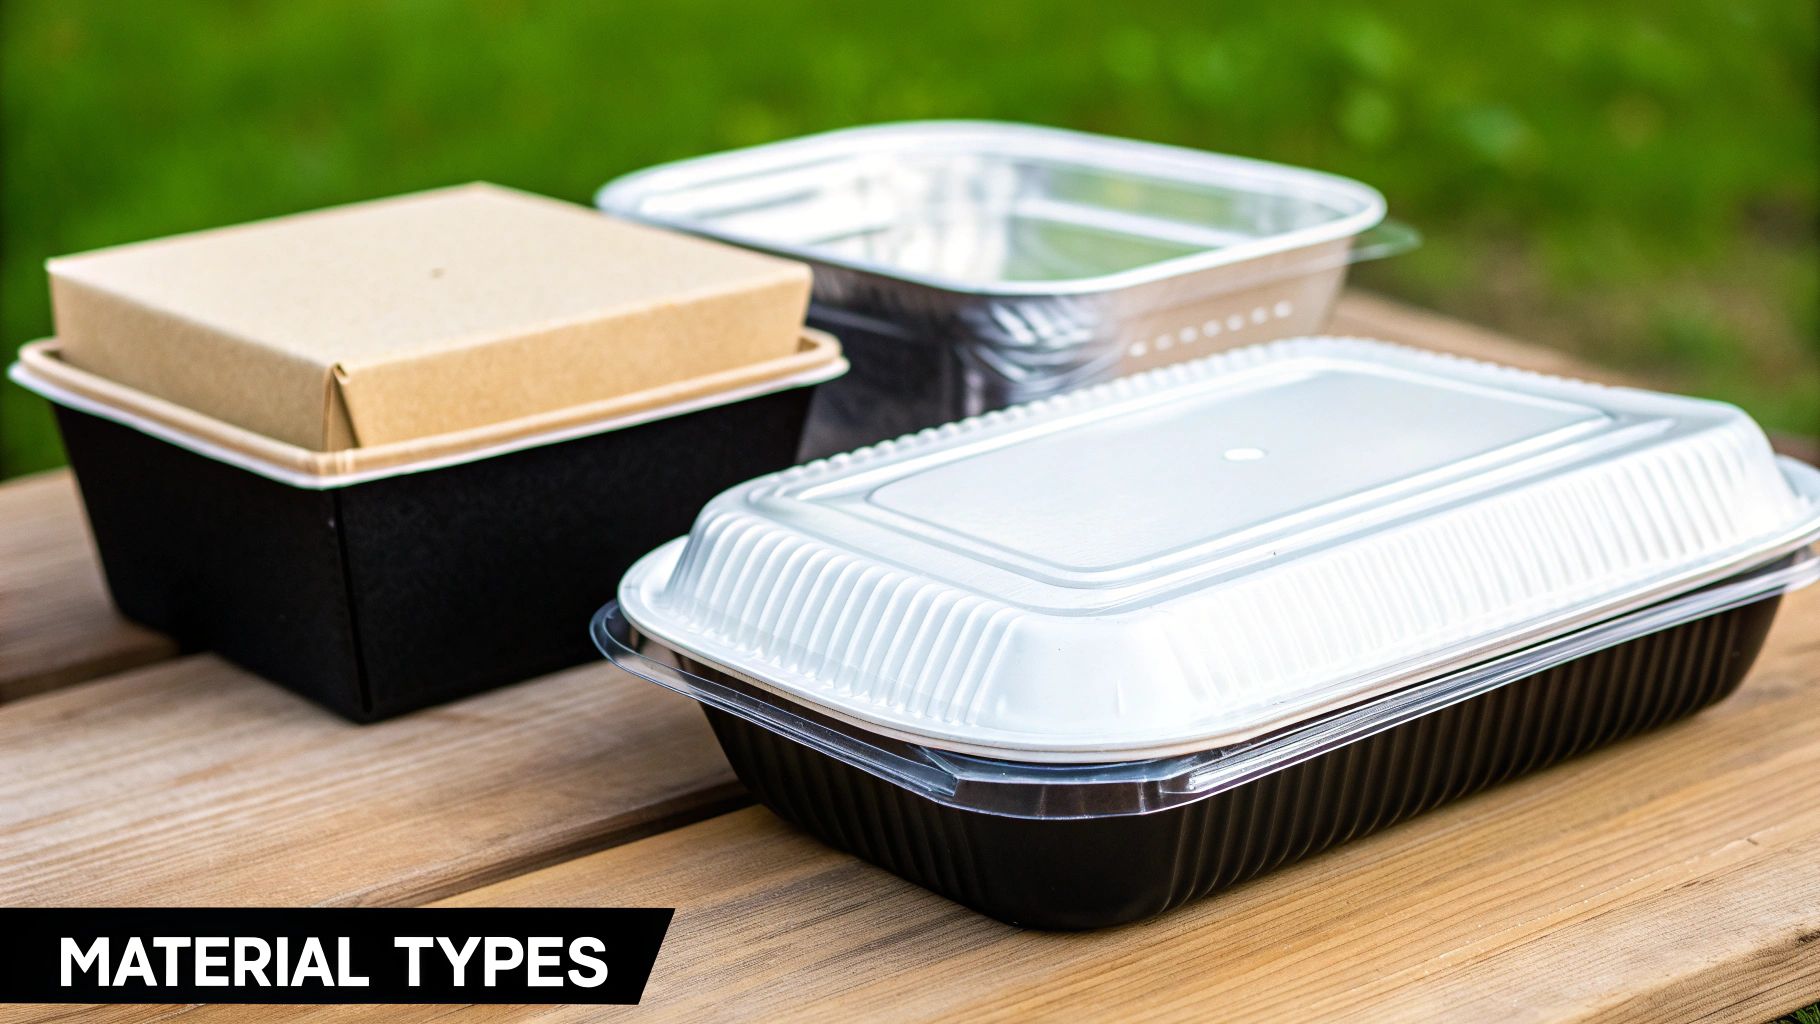
Common Materials
Small
4x4x2 (example)
8-16
Sauces, sides, small appetizers
Plastic, paperboard
Medium
6x6x3 (example)
24-32
Individual entrees, salads, sandwiches
Plastic, paperboard, foam
Large
8x8x4 (example)
48+
Family-style meals, combination platters
Plastic, foam, aluminum
This table gives a general overview of common sizes. Note that dimensions and volumes can vary based on the manufacturer. It’s always a good idea to check with your supplier for precise measurements. Choosing the appropriate material also ensures the quality and integrity of the food during transport.
The Growing Takeout Market and Container Demand
The takeout industry is booming, and so is the demand for containers. The global takeout containers market is expected to reach USD 228.12 billion by 2030, with a CAGR of about 4.1% from 2024 to 2030.
This growth is fueled by the rise of food delivery services and quick-service restaurants. You can find more detailed statistics on the Maximize Market Research website. Choosing the right container size is key to meeting the needs of this expanding market. It ensures efficient use of resources and happy customers.
How Delivery Apps Are Reshaping Container Standards
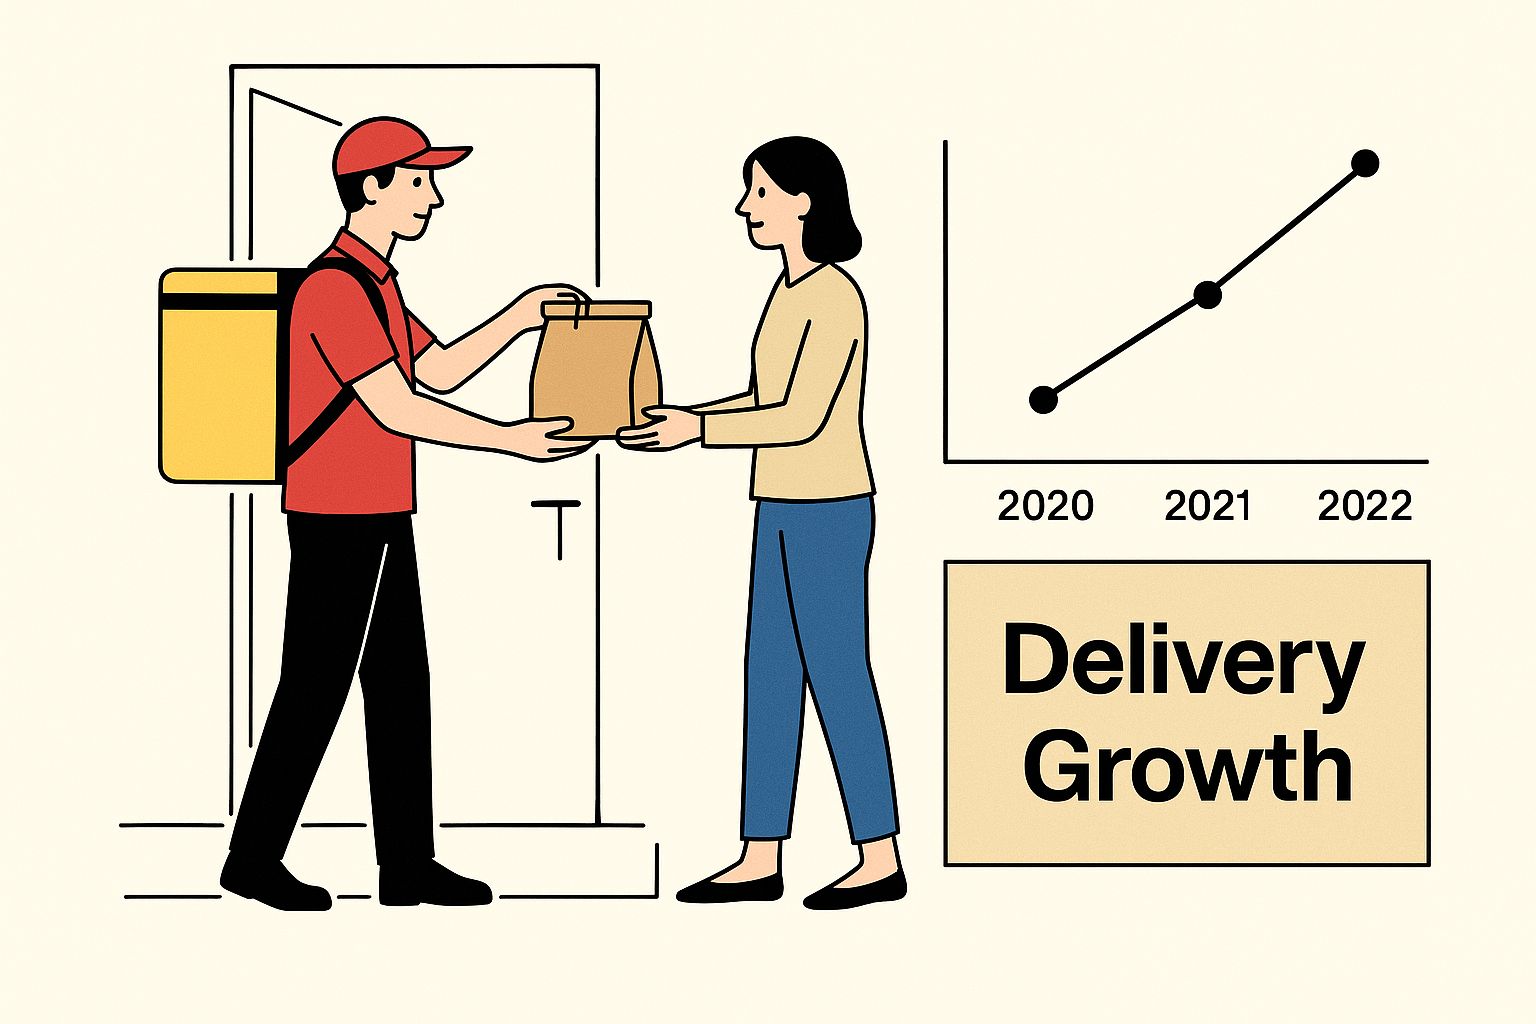
The rise of delivery apps like Uber Eats and DoorDash has dramatically changed the takeout landscape. Takeout is no longer just a quick trip; it’s about meals traveling across town, sometimes taking 30 minutes or more to reach their destination. This shift in consumer behavior has placed new demands on takeout container sizes and their ability to maintain food quality over longer delivery times. Restaurants must now consider factors beyond simple portioning when choosing their containers.
Temperature Maintenance and the Delivery Dilemma
Maintaining optimal food temperature during delivery presents a significant challenge. A hot dish arriving cold, or a cold dish arriving warm, can quickly ruin the dining experience. Choosing the right takeout container size plays a vital role in temperature control.
Deeper containers often retain heat better than shallow ones. Insulated containers can help maintain the temperature of both hot and cold items. For example, a deep, insulated container is perfect for soups and stews, while a shallow container might suffice for a salad.
Customer Expectations and the Unboxing Experience
Customer expectations have changed alongside the delivery boom. The “unboxing experience” has become an extension of the restaurant itself.
A visually appealing container, securely sealed to prevent spills, and appropriately sized for the meal enhances the customer experience. A burger crammed into a too-small container or soup sloshing around in an oversized one creates a negative impression. This impacts customer satisfaction and potentially future orders, emphasizing the need for containers that both preserve food quality and elevate the overall dining experience.
Container Innovation in the Virtual Kitchen Age
The rise of virtual kitchens, also known as ghost kitchens, has further spurred container innovation. These delivery-only operations prioritize efficiency and often lead the way with new packaging approaches. They’ve been key in adopting multi-compartment containers and tamper-evident seals.
The rapid growth of the online food delivery industry has significantly impacted takeout container sizes. By 2023, global takeout container demand was estimated at USD 40 billion, with projections to hit USD 65 billion by 2032. The growth of platforms like Uber Eats and DoorDash has fueled the need for containers that ensure safe, hygienic, and temperature-controlled food transport. Find more detailed statistics here. This highlights the increasing importance of selecting the appropriate takeout container size for delivery success.
Pairing Perfect Containers With Specific Food Types
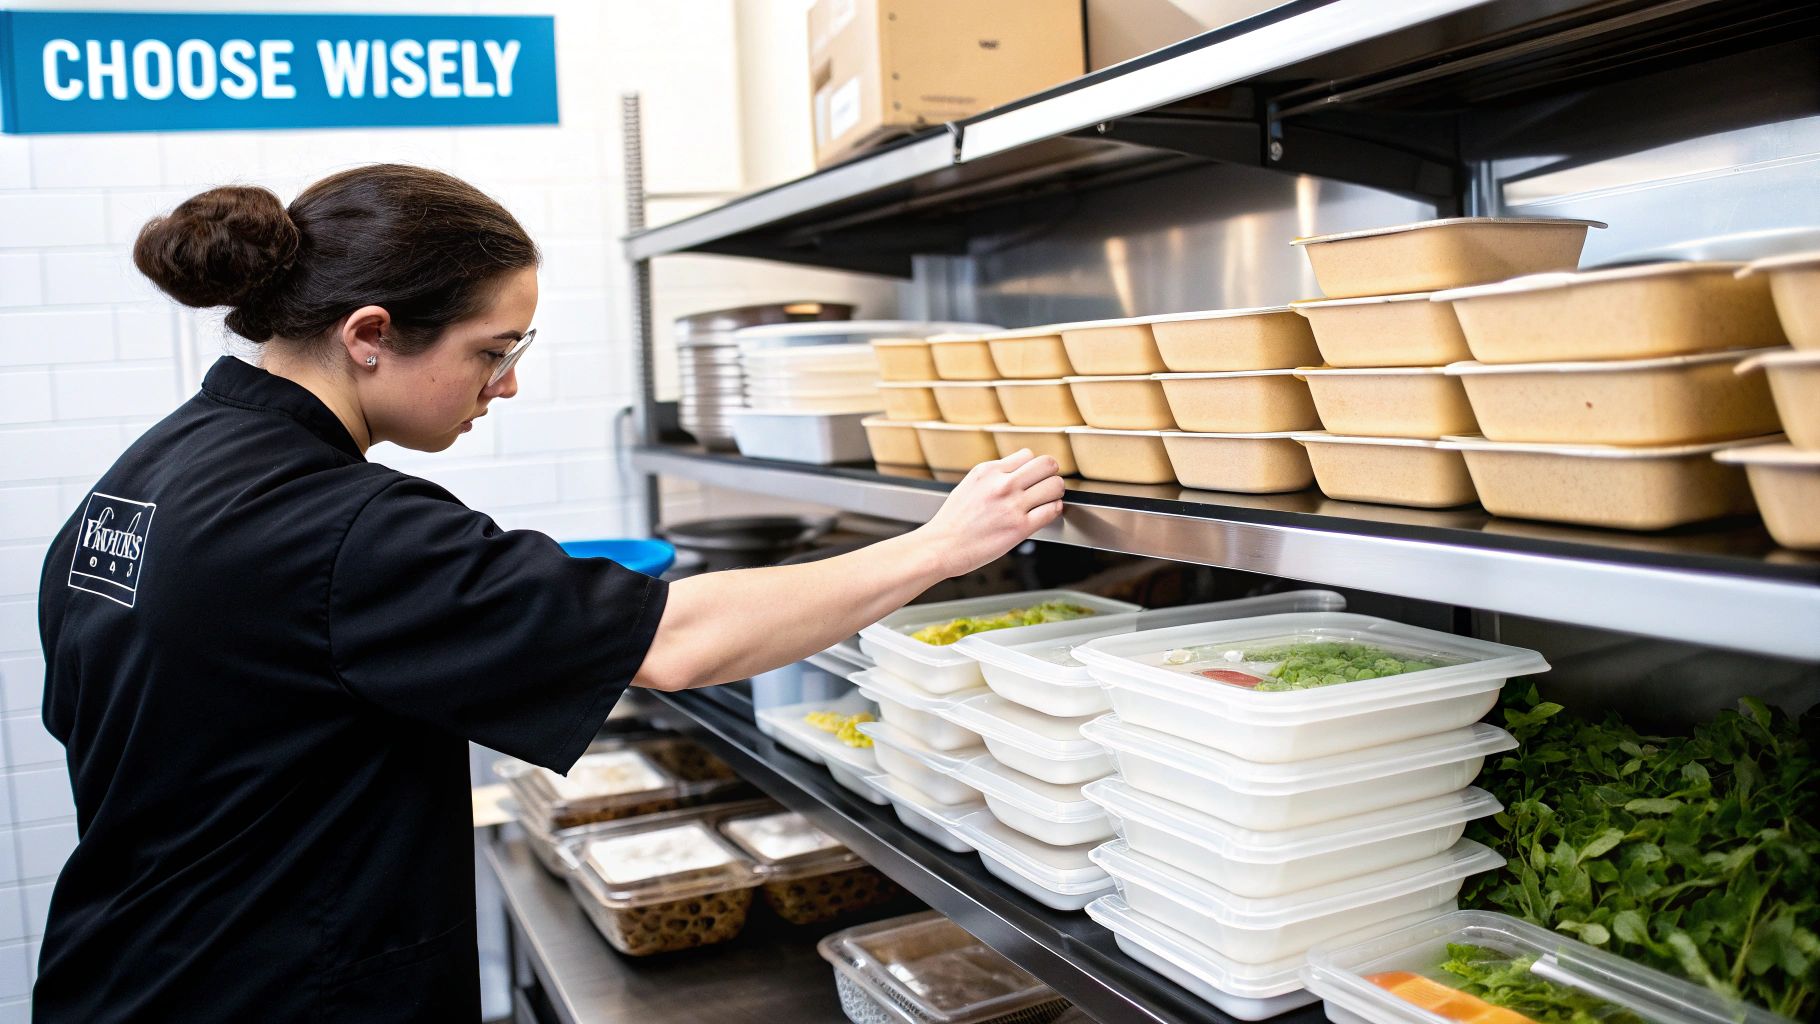
The success of a takeout order depends heavily on the container. Choosing the right size can make the difference between a delightful and a disappointing meal. By considering factors like moisture content and serving temperature, restaurants can ensure their food arrives in perfect condition. This section explores how choosing the right container preserves food quality and improves the takeout experience.
Matching Containers to Food Characteristics
Different foods have different needs. A delicate pastry won’t have the same packaging requirements as a hearty curry. Moisture content is a key consideration. For instance, nobody wants a soggy salad. A container with ventilation or a separate compartment for dressing is crucial.
Serving temperature also plays a significant role. Hot foods need containers that retain heat and prevent leaks. Cold foods, on the other hand, require containers that maintain a cool temperature and prevent condensation. This guarantees the food arrives as intended.
Preventing Leaks and Maintaining Texture
Food texture is another critical factor. Crispy foods, like french fries or fried chicken, need containers that prevent them from getting soggy. Vented containers or those with absorbent liners can help maintain that satisfying crunch.
Saucy dishes and broths require leak-proof containers with secure lids. This not only prevents messy spills during delivery but also keeps the dish intact.
Expert Techniques for Optimal Presentation
Many restaurants use special techniques to keep food looking its best during transit. Compartmentalized containers are a great way to keep different parts of a dish separate, preventing flavors from mixing and maintaining an appealing presentation.
A bento box, for example, keeps rice, vegetables, and protein separate until the customer is ready to eat. This thoughtful approach enhances the dining experience and demonstrates attention to detail.
Container Dimensions: From Appetizers to Entrees
The size of the takeout container is paramount. Smaller appetizers might fit perfectly in a 4x4x2 inch container, holding approximately 8 oz. A larger entree might need a 6x6x3 inch container, which can hold 24-32 oz.
Some restaurants even use specialized containers for dishes that continue cooking after packaging, such as certain types of noodles. These containers often have ventilation to release steam, preventing the food from overcooking.
Real-World Examples of Strategic Sizing
Leading restaurants understand the importance of choosing the right container size. They tailor their container choices to specific dishes to ensure optimal quality and presentation. Some high-end restaurants even use custom-designed containers perfectly suited to their signature dishes. This personalized approach elevates the takeout experience and reinforces brand identity.
Optimal Container Sizes By Food Type
To help illustrate the relationship between food type and container size, the following table offers specific recommendations. It provides detailed guidance on choosing the optimal container based on food category and special considerations.
Optimal Container Sizes by Food Type
Detailed recommendations for container sizes based on specific food categories and special considerations
Food Category
Recommended Container Size
Special Considerations
Alternative Options
Salads
Medium (24-32 oz)
Separate dressing container
Large (48 oz) for family-style salads
Soups/Stews
Medium or Large (depending on portion)
Leak-proof lid essential
Insulated containers for temperature maintenance
Fried Foods
Vented containers or those with absorbent liners
Ensure proper ventilation to prevent sogginess
Compartmentalized containers to separate dipping sauces
Noodles/Pasta
Containers with some ventilation
Prevent sticking and overcooking
Specialized containers designed for specific pasta types
Desserts
Small or medium containers (depending on portion size)
Secure lids to prevent spills
Compartmentalized containers for layered desserts or toppings
By carefully selecting the right size takeout container for each dish, restaurants show a commitment to quality and enhance the customer experience. This attention to detail can greatly improve customer satisfaction and foster loyalty.
Global Perspectives on Takeout Container Dimensions
Takeout containers might seem like a simple necessity, but their sizes and designs vary significantly across the globe. These differences offer a fascinating glimpse into cultural norms surrounding food, portioning, and even dining rituals. Let’s explore how these seemingly mundane choices reflect deeper cultural values.
North America: The Land of Large Portions
North America, especially the United States, is well-known for its generous portion sizes. This preference is directly reflected in the size of its takeout containers. Fast-food chains, cloud kitchens, and fast-casual restaurants have significantly shaped the market, often opting for larger containers.
This trend impacts not just individual restaurants, but the entire supply chain, influencing packaging manufacturers and distributors. In fact, North America holds a dominant position in the takeaway container market, setting a precedent that often influences global standards. In 2025, the North American takeaway container market held significant value, contributing to a global market projected to grow from approximately USD 113.3 billion in 2025 to USD 159.9 billion by 2035, with a CAGR of 3.5%. You can learn more about this growing market here.
Europe: A Focus on Portion Control
European countries present a stark contrast to North American trends. They typically use smaller takeout containers, mirroring a cultural emphasis on portion control and minimizing food waste. European restaurants generally prioritize quality over quantity, reflecting a different dining philosophy. This focus on smaller portions also contributes to less packaging waste, aligning with broader sustainability efforts. Consequently, European takeout packaging often emphasizes compact and efficient designs.
Asia: Innovation in Multi-Compartment Solutions
Asian takeout containers frequently feature multiple compartments. This design reflects the cultural importance of balanced meals and the desire for distinct flavors within a single meal. The classic bento box is a perfect example, keeping different food elements separate, allowing for diverse flavors and textures without compromising individual components. This innovative approach to container design maximizes both food presentation and practicality.
Emerging Markets: Driving Packaging Innovation
Emerging markets are often leading the charge in packaging innovation. Driven by factors like cost-effectiveness and environmental concerns, these regions are exploring new materials and designs. They are often at the forefront of adopting biodegradable and compostable containers, demonstrating a growing awareness of sustainability in the food industry.
This focus on eco-friendly solutions positions these markets as key players in shaping the future of takeout packaging. Furthermore, these regions frequently prioritize space-efficient designs and containers optimized for shared meals, reflecting the cultural emphasis on communal dining experiences in many emerging markets.
Eco-Friendly Options Across the Size Spectrum
Sustainability is a growing concern for consumers. This makes eco-friendly takeout container sizes a smart move for restaurants. Thankfully, today’s options are better than ever. This section explores how restaurants can make eco-conscious choices for their takeout packaging without compromising quality.
Right-Sizing for a Greener Footprint
Right-sizing is essential for minimizing waste. Choosing the right size container for each item reduces unnecessary material usage. For instance, a small container for a side dish instead of a large one conserves resources. This approach benefits the environment and can even cut costs.
Plant-Based Powerhouses: Material Selection
Different plant-based materials offer unique advantages. Bagasse, derived from sugarcane, is a strong, compostable choice. Bamboo is rapidly renewable, durable, and visually appealing. However, it’s typically more expensive.
PLA (Polylactic Acid), made from cornstarch, is compostable in the right conditions. It’s a good option for cold items but less heat-resistant. Understanding these differences allows restaurants to choose the optimal material for their needs. Learn more in our article about eco-friendly takeout containers.
Performance Comparison: Sustainable vs. Traditional
Comparing the performance of sustainable and traditional materials is vital. Moisture resistance, heat retention, and structural integrity are all key factors.
Some plant-based options excel in moisture resistance but may not retain heat as well as traditional plastic. Careful selection based on food type and delivery distance is important. The container size also matters, as larger containers may need stronger materials.
Transitioning to Sustainable Packaging
Switching to sustainable packaging can be a smooth process. Start by identifying your most used takeout container sizes. Then, explore eco-friendly alternatives in those sizes. A small-scale trial with specific menu items allows for feedback before a full transition.
Size Recommendations by Menu Category
Here’s a general guide for choosing sustainable takeout container sizes:
Small containers (8-12 oz): Sauces, dips, small sides. Bagasse or PLA are good choices.
Medium containers (16-24 oz): Individual entrees, salads, sandwiches. Bagasse, bamboo, or molded fiber offer good performance.
Large containers (32+ oz): Family meals, large portions. Molded fiber or sturdy bamboo are recommended.
These are guidelines. The ideal choice depends on the food and your restaurant’s needs.
By considering materials, performance, and menu specifics, restaurants can confidently choose eco-friendly takeout container sizes. This move towards sustainability benefits the planet and strengthens a restaurant’s brand image with eco-conscious customers.
The Financial Impact of Smart Container Sizing
Takeout container sizes have a surprising impact on a restaurant’s finances. While it might seem like a minor detail, choosing the correct container can boost profits, while the wrong one can negatively affect them. This section explores the financial aspects of takeout packaging and how strategic container choices influence a restaurant’s bottom line.
Right-Sizing: Reducing Costs and Improving Customer Satisfaction
Right-sizing, which means selecting the appropriate container size for each dish, offers significant cost savings. Using smaller containers for smaller portions reduces material costs and shipping weight. This efficiency directly increases profit margins.
Right-sizing also improves the customer experience. Customers appreciate receiving the right amount of food in a properly sized container, leading to positive reviews and increased customer loyalty. This, in turn, generates repeat business. For further information on selecting the right containers, check out this helpful resource: How to choose disposable food containers.
Hidden Expenses of Poorly Chosen Containers
Choosing the wrong containers can lead to hidden expenses that significantly affect profitability. Oversized containers increase both material and shipping costs. They also raise the risk of spills during delivery, resulting in remakes, refunds, and lost customers.
Conversely, undersized containers can make portions appear smaller than they are, leading to customer dissatisfaction and negative reviews. This can damage a restaurant’s reputation and discourage future orders.
Cost Comparisons Across Container Sizes and Materials
The material of the container also plays a role in cost. While styrofoam containers are often the most affordable option, they are not environmentally friendly and can negatively affect a restaurant’s image. Eco-friendly options like bagasse or bamboo cost more but align with the increasing consumer demand for sustainable practices.
The table below compares the costs of different container sizes and materials:
Container Size
Material
Approximate Cost per Unit
Small (8oz)
Styrofoam
$0.10
Small (8oz)
Bagasse
$0.25
Medium (16oz)
Styrofoam
$0.15
Medium (16oz)
Bagasse
$0.35
Large (32oz)
Styrofoam
$0.20
Large (32oz)
Bagasse
$0.50
Optimizing Container Inventory and Reducing Storage Space
Effective container management optimizes inventory and minimizes storage requirements. Standardizing container sizes reduces the variety of containers a restaurant needs, which simplifies both ordering and storage. This also increases efficiency during packing and reduces the chances of using the wrong container size.
Standardizing sizes can also lead to better pricing negotiations with suppliers. Larger orders of fewer container types can unlock volume discounts.
Premium vs. Standard: When to Splurge and When to Save
The decision between premium and standard containers depends on their intended use. Premium containers enhance presentation and are ideal for high-value dishes or special occasions. Standard containers are a suitable choice for everyday takeout orders.
Understanding your target audience and the type of food you serve will help you decide when to invest in premium packaging and when standard options are sufficient.
Ready to improve your takeout packaging and boost your profits? Explore a wide variety of high-quality, cost-effective takeout containers at MrTakeOutBags.com. They offer various sizes, materials, and customization options to meet your specific business needs.
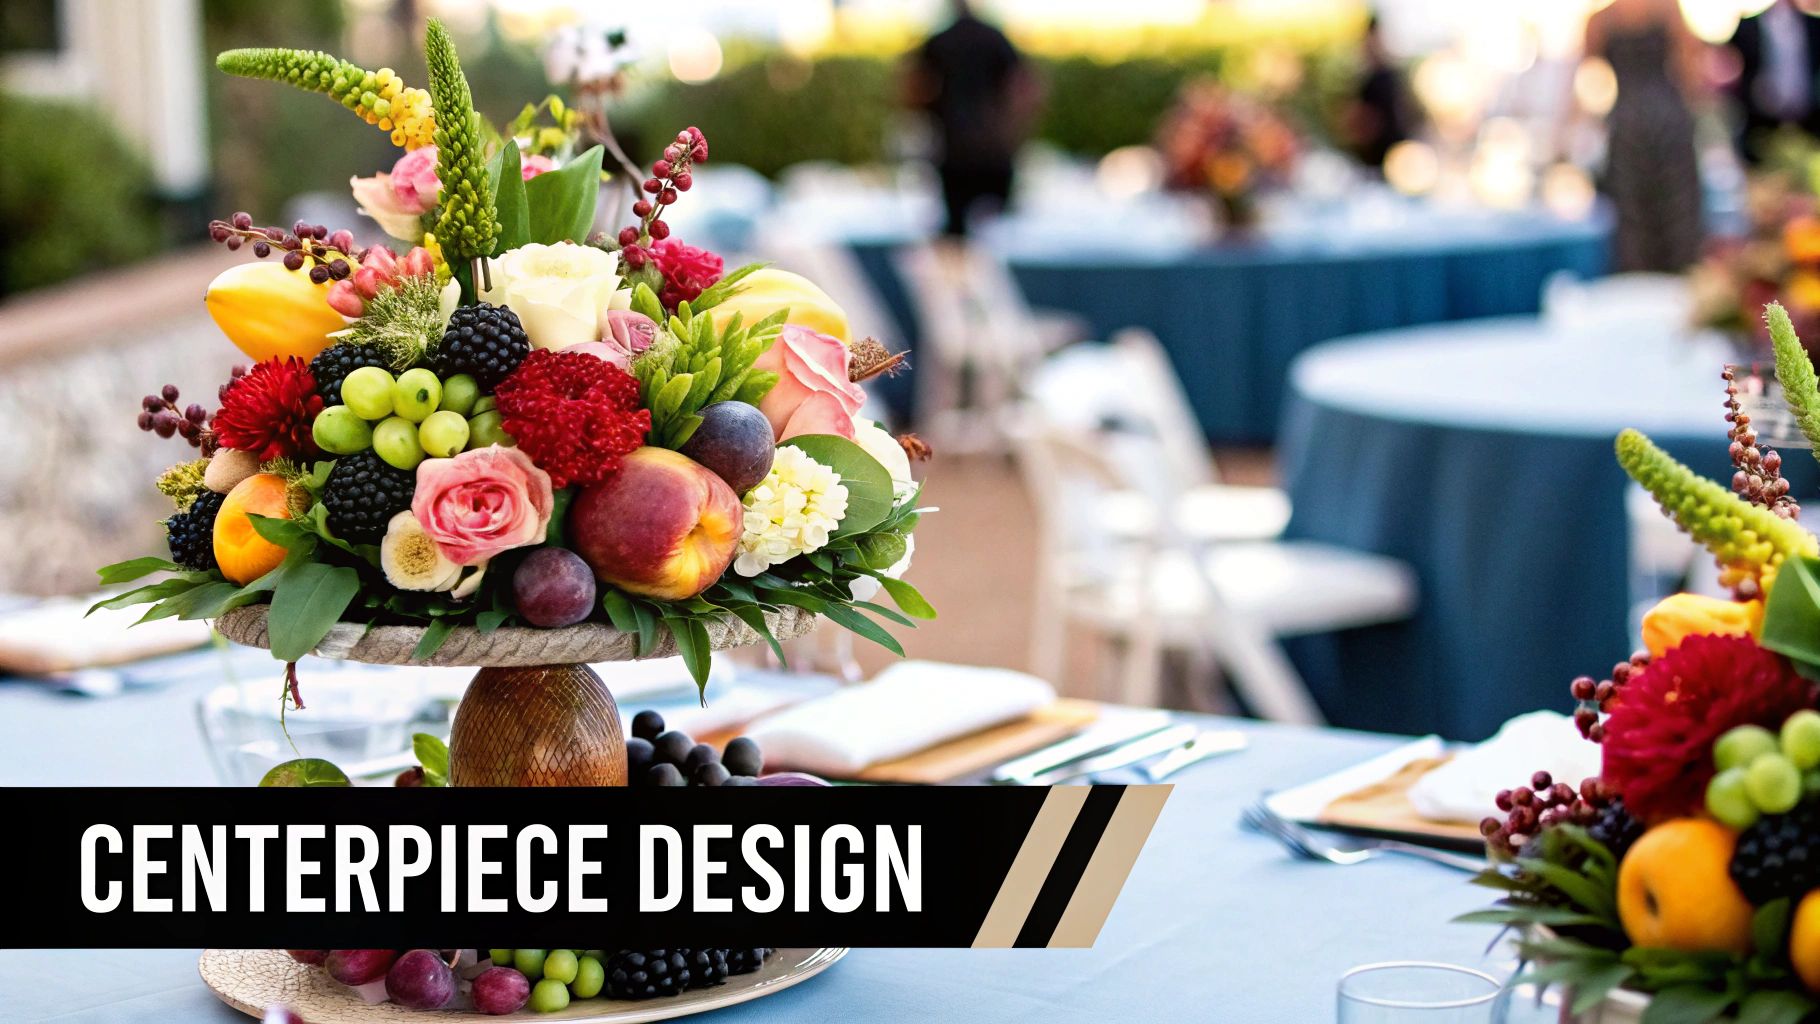
Presentation matters. Guests at catered events form initial impressions long before they sample the food. This first visual experience significantly impacts their overall perception of the food and the event itself. Well-designed catering displays don’t just showcase the food; they create a powerful psychological impact. This shapes the entire guest experience.
First Impressions and Perceived Value
A key aspect of this psychology is perceived value. A visually appealing display instantly elevates the perceived quality of the food. A simple arrangement of colorful fruits on a tiered stand looks far more enticing than the same fruit piled in a bowl.
Visually stimulating displays tap into our desire for aesthetically pleasing experiences. This influences both anticipation and enjoyment of the food. Using professionally printed displays can enhance your catering presentation.
The strategic use of negative space also plays a critical role. Just as a framed artwork benefits from surrounding matting, leaving space around food items can make them appear more special. This prevents a cluttered look and allows each dish to stand out.
Guiding Guest Behavior Through Design
Catering display ideas go beyond just aesthetics; they can subtly guide guest behavior. Strategic placement can create natural social hubs. Positioning dessert stations or interactive food stations centrally can draw guests together and encourage mingling.
Thoughtful display design enhances social dynamics, contributing to a more lively atmosphere. Furthermore, the layout can effectively manage traffic flow. Strategically arranging food stations and using clear signage prevents bottlenecks and ensures smooth serving. This is crucial for larger events where long lines can negatively impact the experience. For tips on managing supplies, see How to master disposable catering supplies.
To further illustrate how display elements influence guest perception, consider the following table:
Impact of Display Elements on Guest Perception
This table shows how different display elements affect guest perception and behavior at catered events.
Display Element
Guest Impact
Satisfaction Increase
Tiered stands for desserts
Creates a sense of elegance and abundance
15%
Interactive food stations
Encourages guest participation and mingling
20%
Clear signage and labels
Reduces confusion and improves flow
10%
Use of negative space
Enhances visual appeal and perceived value
12%
Themed decor
Creates a cohesive and immersive experience
25%
The table highlights the significant impact of visual elements on guest satisfaction. From tiered displays to interactive stations, each element contributes to a more positive and engaging event experience.
The global catering market’s growth underscores the importance of display. The US catering market reached $72 billion in 2023 and is projected to grow at a 6.2% CAGR, reaching $124 billion by 2032. Find more detailed statistics here. Captivating displays resonate with guests and enhance their overall experience. Ultimately, appealing presentations contribute to higher satisfaction and positive word-of-mouth—essential for success in the competitive catering industry.
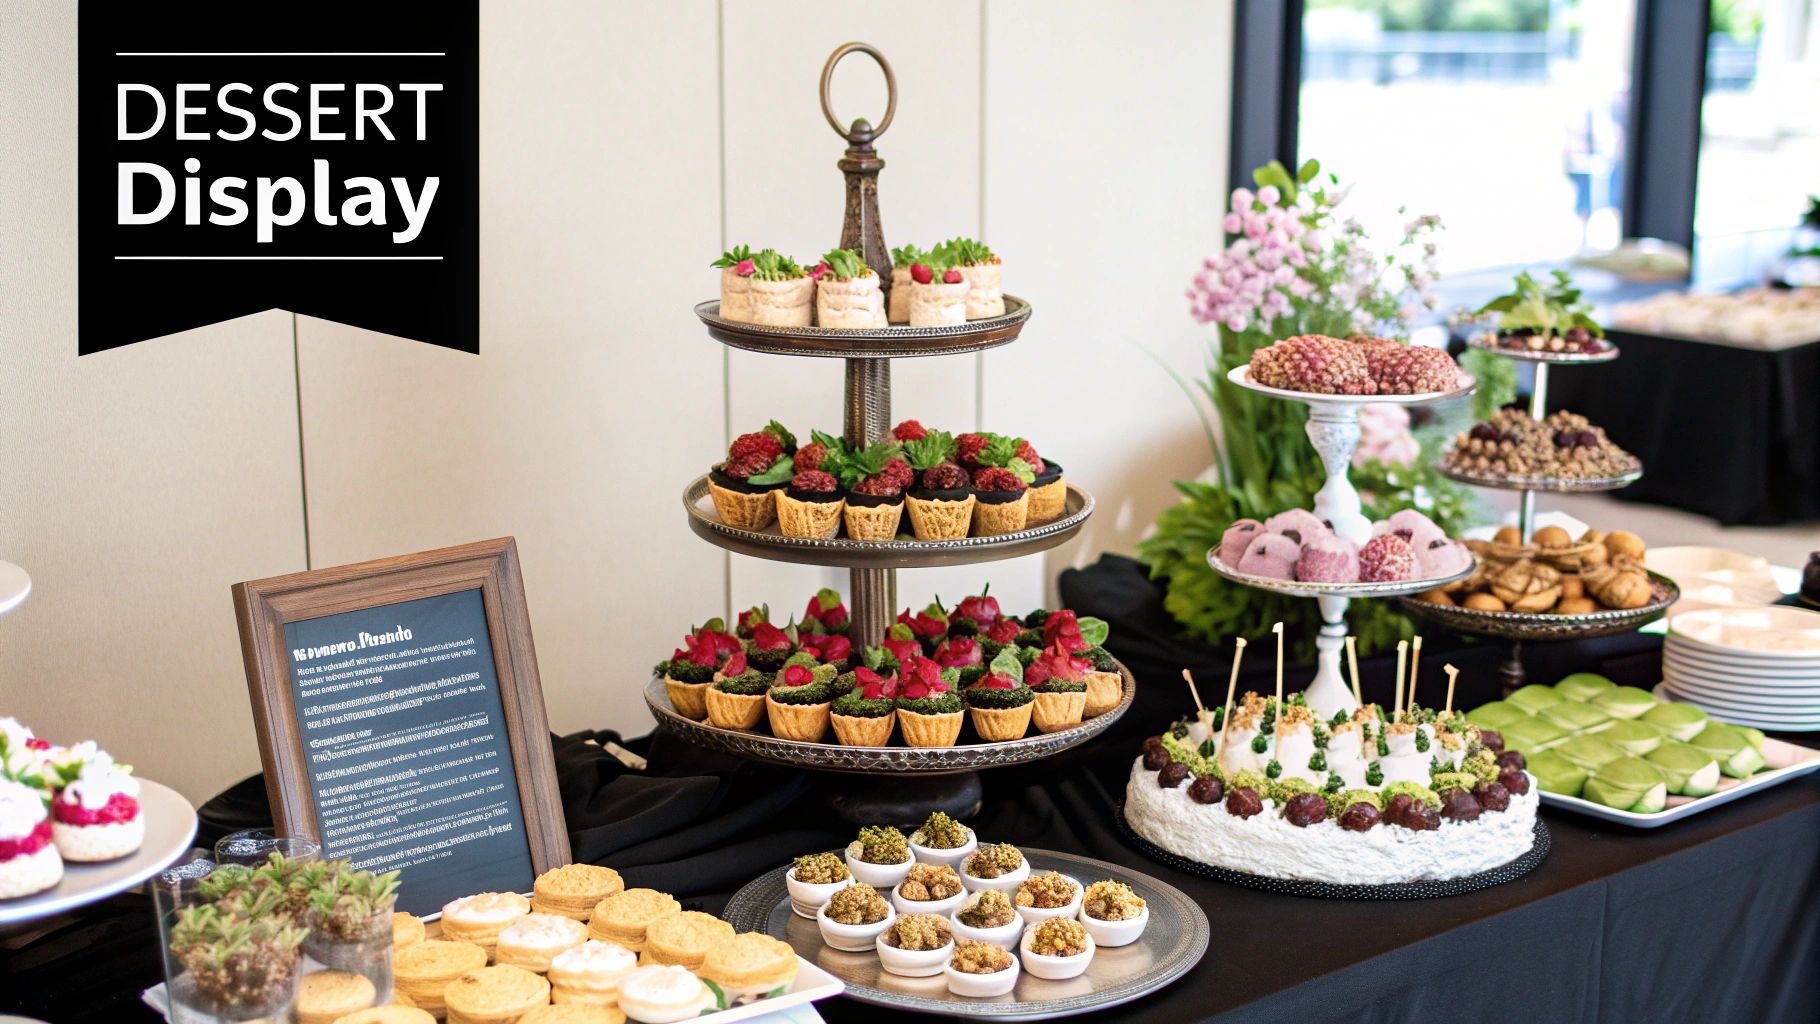
Reinventing the Buffet: Beyond Boring Food Lines
Traditional buffet lines often bring to mind long queues and uninspired food presentations. But modern catering display ideas are transforming these practical food lines into engaging culinary experiences. This new approach focuses on creating an immersive environment that invites guests to explore and enjoy the food.
Creating Multi-Dimensional Displays
A key element of reinventing the buffet is incorporating multi-dimensional displays. Rather than simply arranging dishes on a single table, consider using varied heights and depths to create visual appeal.
Tiered stands, for example, can showcase appetizers or desserts. Raised platforms can highlight main courses. This adds a sense of drama and abundance to the presentation.
Unexpected materials can also add a unique touch. Consider repurposed architectural elements, like vintage window frames or reclaimed wood, to create a distinctive backdrop. This not only adds visual interest but also tells a story and sets the mood for the event.
Strategic Food Placement
The placement of food plays a vital role in a successful buffet. Carefully consider the flow of traffic and place food items to minimize congestion. This means positioning popular dishes at separate stations to avoid long lines.
Creating separate stations for salads, main courses, and desserts, for instance, encourages guests to circulate and explore the entire buffet. Creating visual journeys through the layout also enhances the dining experience. Think of the buffet as a narrative, guiding guests through different culinary chapters with each station.
The growth of gourmet and specialty catering has fueled the demand for attractive displays. The catering services market is expected to reach USD 674.1 million by 2025. This expansion reflects the desire for personalized and visually impressive food arrangements. Appealing displays can increase customer interest by as much as 30% compared to standard catering.
Mixing Textures, Heights, and Serving Vessels
Finally, mixing textures, heights, and serving vessels can elevate even the most familiar dishes. Instead of using standard chafing dishes, consider incorporating unique serving pieces. You might be interested in: 5 Essential Supplies for Any Catering Company. This adds visual appeal and creates an Instagram-worthy experience for guests.
Serving salads in rustic wooden bowls or desserts on vintage china plates, for example, adds a touch of elegance and personality.
Remember, maintaining food safety and service efficiency is crucial. Ensure all serving vessels are food-safe and that the buffet layout allows for efficient service. This lets caterers maintain high standards while still delivering a memorable and visually appealing dining experience.
Interactive Food Stations That Create Memorable Moments
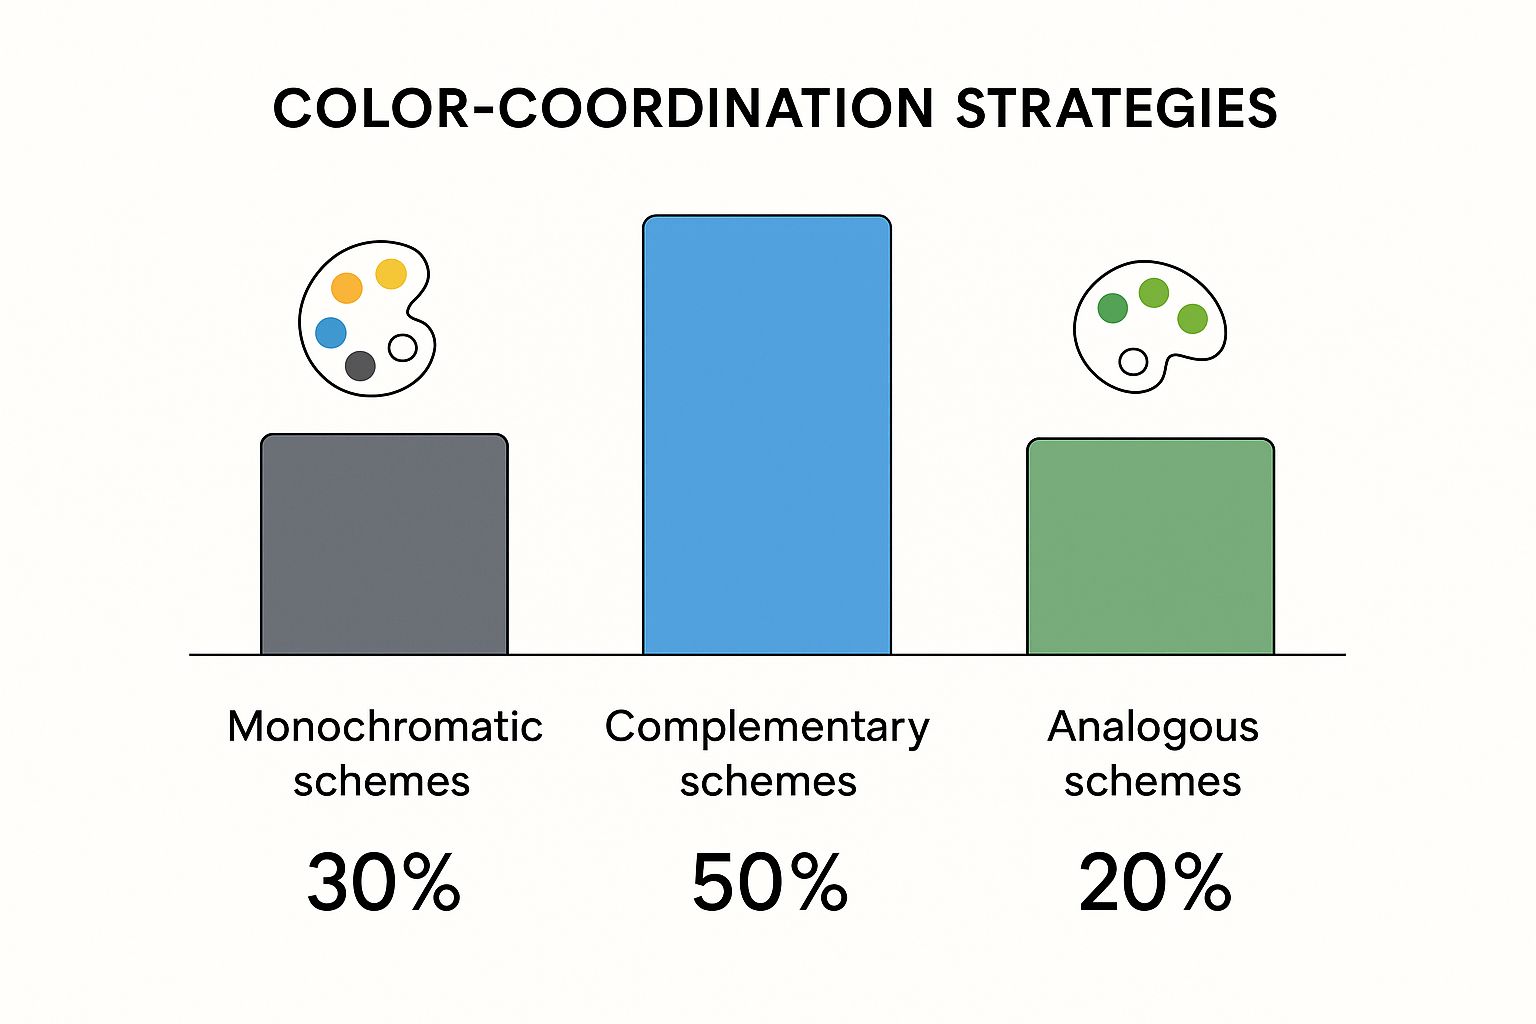
The infographic above illustrates some interesting data on color coordination for catering displays. It compares monochromatic, complementary, and analogous color schemes, revealing that complementary schemes are the most popular, used in 50% of displays. Monochromatic follows at 30%, with analogous schemes making up the remaining 20%. This data suggests that contrasting colors in your food displays are key for grabbing guests’ attention.
Interactive food stations are changing the way we think about catering. Instead of passively receiving their meals, guests become active participants, resulting in a more engaging and memorable experience. This increased engagement taps into the psychology of interaction, creating a stronger impression and a sense of excitement.
Designing Engaging Action Stations
Designing an interactive food station involves carefully balancing captivating chef showmanship with practical serving efficiency. Think of a live pasta-making station. Guests are entertained by watching the chef create their meal, adding a theatrical flair to the dining experience. However, the station must also be designed for efficient flow to avoid long lines and keep guests happy.
Here are some key factors to consider:
Event Type: A formal corporate event might call for a sophisticated carving station, while a casual wedding reception could feature a build-your-own-taco bar.
Budget: Interactive experiences can be adapted to suit any budget. A simple DIY popcorn bar is a much more cost-effective option than a chef-manned crepe station.
Dietary Restrictions: Always offer options for guests with dietary needs. This could include gluten-free pasta at the pasta bar or vegan toppings at the burger station.
Logistics of Interactive Stations
Beyond the creative concepts, practical logistics are crucial for success:
Power Requirements: Make sure you have enough power outlets to handle equipment like blenders, warming trays, and other necessary appliances.
Staff Training: Your staff needs to be properly trained to manage interactive stations efficiently and handle guest requests with grace.
Space Planning: Adequate space is essential for guests to comfortably interact with the station and avoid overcrowding.
Interactive food stations can range from elaborate chef-attended experiences to simpler self-serve setups. A chef-attended carving station, for example, brings an air of sophistication and allows for customized portions. On the other hand, a self-serve trail mix bar offers a casual, customizable snacking experience.
To further illustrate the possibilities and considerations, let’s examine a comparison of some popular concepts:
Before diving into specific examples, let’s take a look at a comparison of some popular interactive food station concepts. The table below highlights the key differences and similarities in terms of space, staffing, preparation, and guest appeal.
Station Type
Space Required
Staff Needed
Preparation Time
Guest Appeal Rating
DIY Pizza Station
Medium (10×10 ft)
2
2 hours
High
Hot Chocolate Bar
Small (5×5 ft)
1
1 hour
Medium
Bloody Mary Bar
Small (5×5 ft)
1
1 hour
Medium
S’mores Station
Medium (8×8 ft)
1
30 minutes
High
Chef-Attended Carving Station
Large (12×12 ft)
2
3 hours
High
Self-Serve Trail Mix Bar
Small (4×4 ft)
0
30 minutes
Medium
As the table demonstrates, each station type has unique requirements. Planning accordingly will ensure a smooth and enjoyable experience for your guests.
Examples of Interactive Food Stations
Here are a few more ideas to inspire you:
DIY Pizza Station: Guests can create their dream pizzas with a variety of toppings.
Hot Chocolate Bar: Ideal for winter events, offering different flavors, toppings, and marshmallows for a cozy treat.
Bloody Mary Bar: A fun brunch option that lets guests customize their cocktails.
S’mores Station: A crowd-pleasing classic, especially for outdoor gatherings. Consider incorporating creative event giveaways for an added touch.
By thoughtfully considering both the creative elements and the practical logistics, caterers can design truly memorable interactive food stations. These stations showcase culinary expertise while creating lasting impressions on guests. Even small details like using Eco-Friendly Disposable Food Containers can significantly enhance the overall experience.
Seasonal Storytelling Through Themed Display Concepts
Catering displays can be so much more than just presenting food. They can be powerful storytelling tools. Smart caterers use seasonal elements and thematic concepts to create cohesive presentations that amplify an event’s message. This goes beyond simple decor; it’s about crafting immersive environments that transport guests and build a genuine atmosphere.
Weaving Seasonal Narratives
Seasonal ingredients offer a natural starting point for themed displays. A fall harvest theme, for example, could incorporate pumpkins, gourds, and colorful autumn leaves. This creates a visual connection to the season and provides opportunities to showcase seasonal dishes. Consider incorporating unique giveaways at interactive food stations to create a memorable experience. Draw inspiration from successful event giveaway strategies. A winter wonderland theme, conversely, might feature ice sculptures, sparkling snowflakes, and a menu focused on comfort food.
Developing Thematic Concepts
Thematic concepts can transport guests to another time or place. A “Roaring Twenties” theme might feature Art Deco-inspired displays, flapper dresses, and a menu reflecting the era’s culinary trends. This immersive experience adds a layer of entertainment and engagement. Alternatively, a “Tropical Getaway” theme could use vibrant colors, lush greenery, and exotic fruits to evoke a sense of escape.
Cost-Effective Thematic Elements
Creating immersive environments doesn’t require extravagant spending. Repurposing materials is a smart strategy. Wooden crates used for a rustic theme can be repainted and reused for a vintage display. Sourcing elements from nature, like branches, flowers, and stones, offers a cost-effective and visually appealing solution.
Balancing Presentation and Practicality
While creative vision is essential, practicality is important. Temperature control is crucial for food safety. Ensure hot foods stay hot and cold foods stay cold, regardless of the display’s complexity. Serving efficiency is also key. Even the most beautiful display is ineffective if guests face long lines. A seamless flow and accessible food arrangements are essential. Guest comfort matters. Ensure there’s enough space to navigate the displays comfortably, especially in high-traffic areas.
Creating Signature Branded Moments
Themed displays offer a prime opportunity to create signature branded moments without the cost of custom fabrication. Incorporating a company logo into ice sculptures or using brand colors in floral arrangements subtly reinforces brand identity. These personalized touches elevate the event and create lasting impressions. Small details, like custom-printed napkins, can enhance the thematic experience.
Unexpected Serving Vessels That Elevate Ordinary Foods
Forget standard chafing dishes and plain white platters. Today’s successful caterers are ditching the conventional and embracing unique serving vessels to transform even the simplest dishes into memorable experiences. This shift in presentation elevates the entire dining experience, making it more engaging and visually appealing.
From Repurposed to Custom-Made
The possibilities are endless when it comes to alternative serving options. Repurposed architectural elements can add an unexpected touch, while custom-designed pieces offer a unique flair.
Imagine serving appetizers on miniature slate tiles. Or perhaps presenting desserts in vintage teacups. These small details add personality and visual interest. Custom-made pieces can even become a signature element of your brand, setting you apart from the competition and leaving a lasting impression.
Practical Considerations for Serving Vessels
Creativity is essential, but practicality is equally important. Temperature retention is key, especially for hot or cold dishes. Stoneware, known for its heat retention, is a great choice for warm appetizers.
Durability is also a must. Serving vessels will be transported and handled frequently, so choose robust materials that can withstand the rigors of catering events. Easy cleaning is another important factor. Select materials that are simple to clean and sanitize, streamlining your post-event cleanup process. For more information on easy-to-clean options, you might be interested in: Eco-Friendly Disposable Food Containers.
Budget-Friendly Approaches to Building Your Collection
Building a distinctive collection of serving vessels doesn’t have to be expensive. Vintage sourcing can uncover unique and affordable pieces, from antique silver platters to charming ceramic bowls.
Multi-purpose investments, like wooden crates used for both display and transport, can stretch your budget further. Rental options are also a smart choice for specialized pieces needed only occasionally. This gives you access to a wider variety without the cost of outright purchase.
Food Safety and Creative Presentation
While embracing creativity, always prioritize food safety. Ensure all materials are food-safe and comply with health regulations. When repurposing items, thorough cleaning and sealing with a food-safe sealant is crucial to prevent contamination.
Consider how your chosen vessels will impact serving efficiency and guest comfort. Balancing creative presentation with practical functionality is key to a successful and enjoyable catering experience. This balance allows you to showcase your culinary talent while maintaining the highest standards of food safety and guest satisfaction.
Strategic Lighting and Technology for Show-Stopping Displays
In the competitive catering world, captivating displays are key to attracting attention and making an event memorable. Strategic lighting and smart use of technology can transform ordinary food presentations into extraordinary visual experiences, encouraging guests to share photos on social media and boosting your brand’s visibility. This section explores accessible lighting techniques and technology integration to elevate your catering displays, turning them into true conversation starters.
The Power of Portable Lighting
Lighting plays a vital role in showcasing food’s textures, colors, and overall appeal. Many venues, however, pose lighting challenges. Portable lighting solutions offer a practical fix, overcoming these limitations to create the perfect ambiance.
Battery-Operated Lights: These offer flexibility, ideal for venues with limited power outlets. Small, battery-powered spotlights can highlight specific dishes or create dramatic shadows.
Plug-and-Play Systems: Simple, user-friendly lighting systems are easy to find, eliminating the need for complex electrical setups. These systems often feature adjustable brightness and color temperature controls, letting you customize the lighting for each unique event.
For example, strategically placed uplights can wash a wall with color, creating a beautiful backdrop that complements your food display. String lights or lanterns can also add a touch of whimsy and warmth to outdoor events.
Integrating Technology for Enhanced Guest Experience
Technology offers exciting new ways to enhance catering displays and better engage guests. These additions can be both practical and visually appealing.
LED Accents: Subtle LED strip lighting incorporated into displays adds a modern touch and highlights architectural features. For instance, illuminating the edges of a tiered cake stand adds elegance and makes desserts even more tempting.
QR-Enabled Information Systems: Interactive QR codes placed near dishes can give guests details about ingredients, allergens, and nutritional values. This addresses practical needs while offering a modern, tech-forward approach.
These technological integrations not only improve the guest experience, they can also streamline operations. Digital displays, for example, can be instantly updated with menu changes or special announcements. This eliminates the need for printed materials and reduces waste.
Maximizing Impact While Minimizing Disruption
The key to using lighting and technology effectively is to enhance the food, not overshadow it. Consider these best practices:
Balance: Use lighting and technology strategically to showcase the food’s natural beauty without being distracting. Avoid overly bright or flashing lights that detract from the presentation.
Integration: Seamlessly integrate technology into the display, ensuring it complements the overall aesthetic. Hide wires and cables, opting for devices that blend with the decor.
Simplicity: Keep the technology user-friendly for both your team and your guests. Complex systems can be cumbersome and disrupt the event’s flow.
By following these guidelines, you can create catering displays that are both visually impressive and technologically advanced, truly enhancing the guest experience and leaving a lasting impression.
Ready to elevate your catering presentations with high-quality, eco-friendly disposable packaging? Visit MrTakeOutBags.com today to explore our wide selection of takeout containers, bags, and other catering essentials that enhance both presentation and practicality.
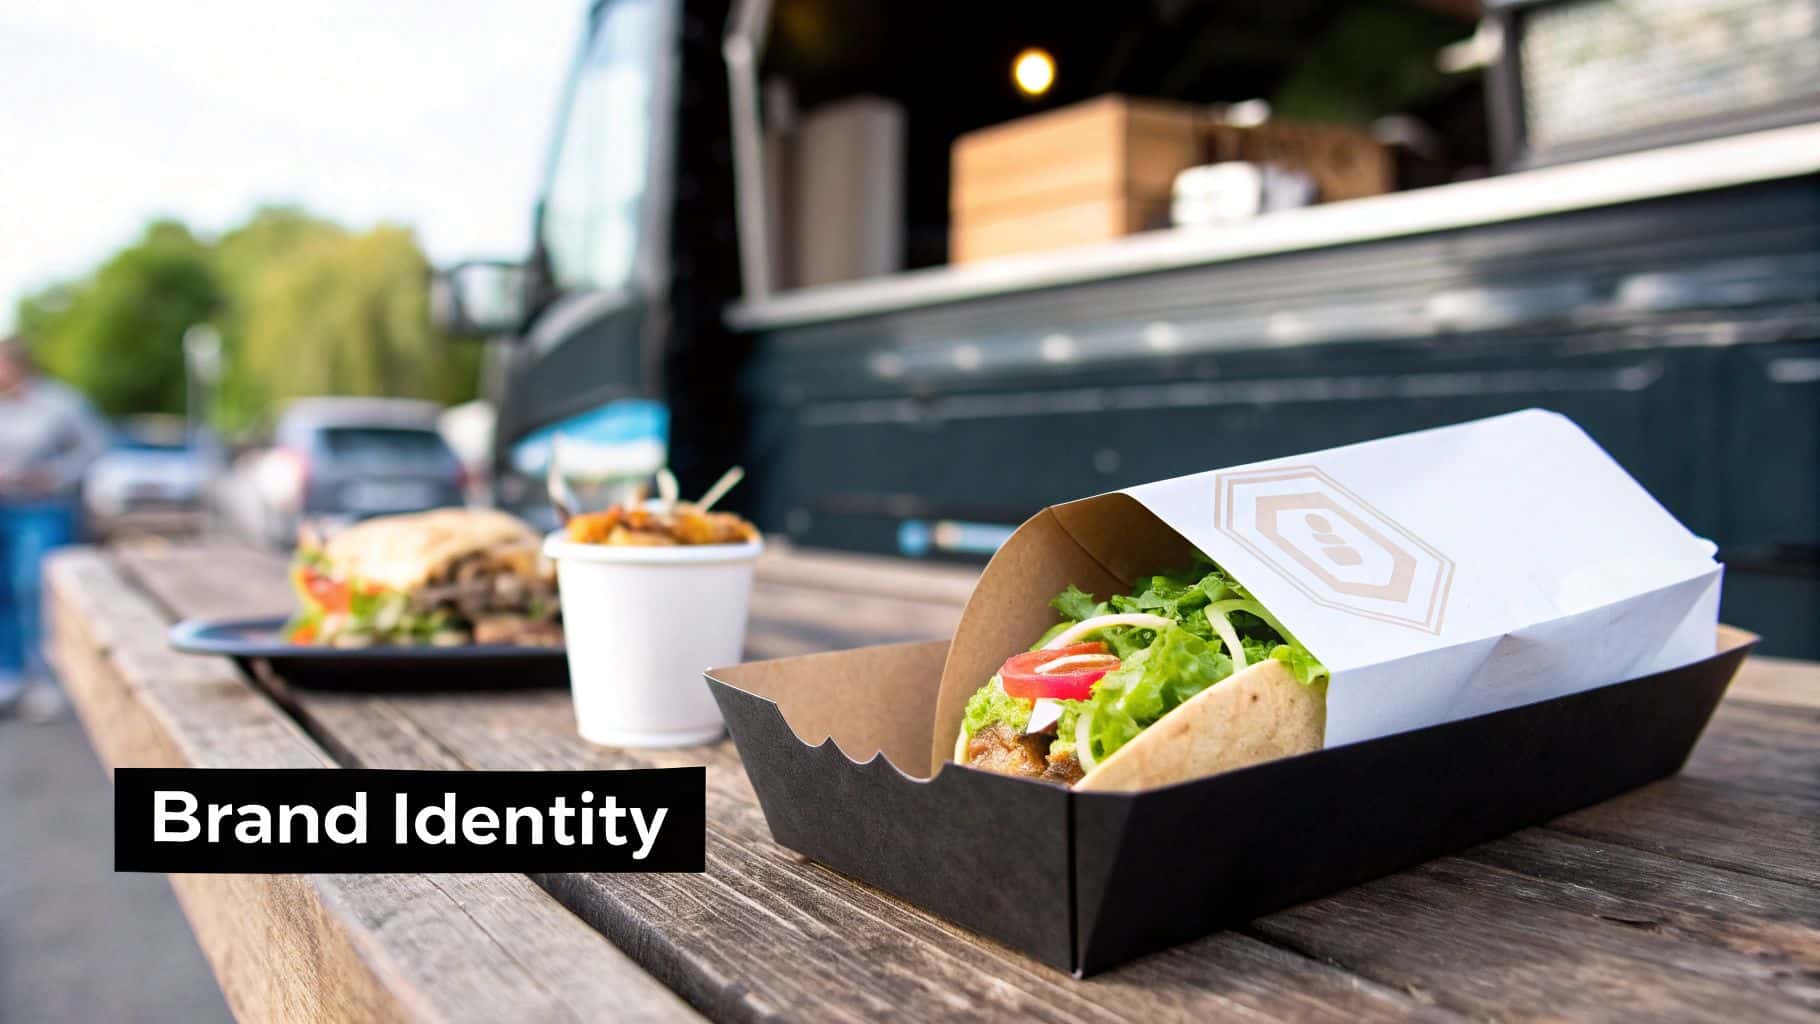
The food truck scene has dramatically changed. Simple, grab-and-go meals have been replaced by diverse menus featuring sophisticated dishes and unique dining experiences. This shift has directly impacted what customers expect, especially when it comes to food truck packaging. A basic paper bag just doesn’t cut it anymore.
Customers now want packaging that reflects the quality of their food and contributes to a positive brand experience. Food truck owners need to consider packaging as an extension of their brand, not just something to put food in.
Imagine a gourmet burger served in a flimsy styrofoam container. The contrast between the high-quality food and the cheap packaging can negatively impact customer perception. But that same burger presented in premium, eco-friendly packaging elevates the entire experience. This seemingly small detail can significantly influence customer satisfaction and loyalty.
Meeting the Demands of a Growing Market
The increased demand for high-quality food truck packaging isn’t just about changing consumer preferences. It’s also driven by the remarkable growth of the food truck industry. In recent years, the global food truck market has expanded, fueled by urbanization and the rising popularity of mobile food platforms.
Between 2018 and 2023, the market experienced substantial growth. Projections show the market reaching $26.3 billion by 2027, up from $19.4 billion in 2022. This represents a CAGR of 6.2%. This surge in food trucks translates to a greater need for specialized, efficient packaging solutions. More detailed statistics can be found here: Food Truck Industry Trends. This growth also presents logistical hurdles, like managing inventory within a small space. Inventory Reorder Strategies can help address this.
From Practicality to Brand Enhancement
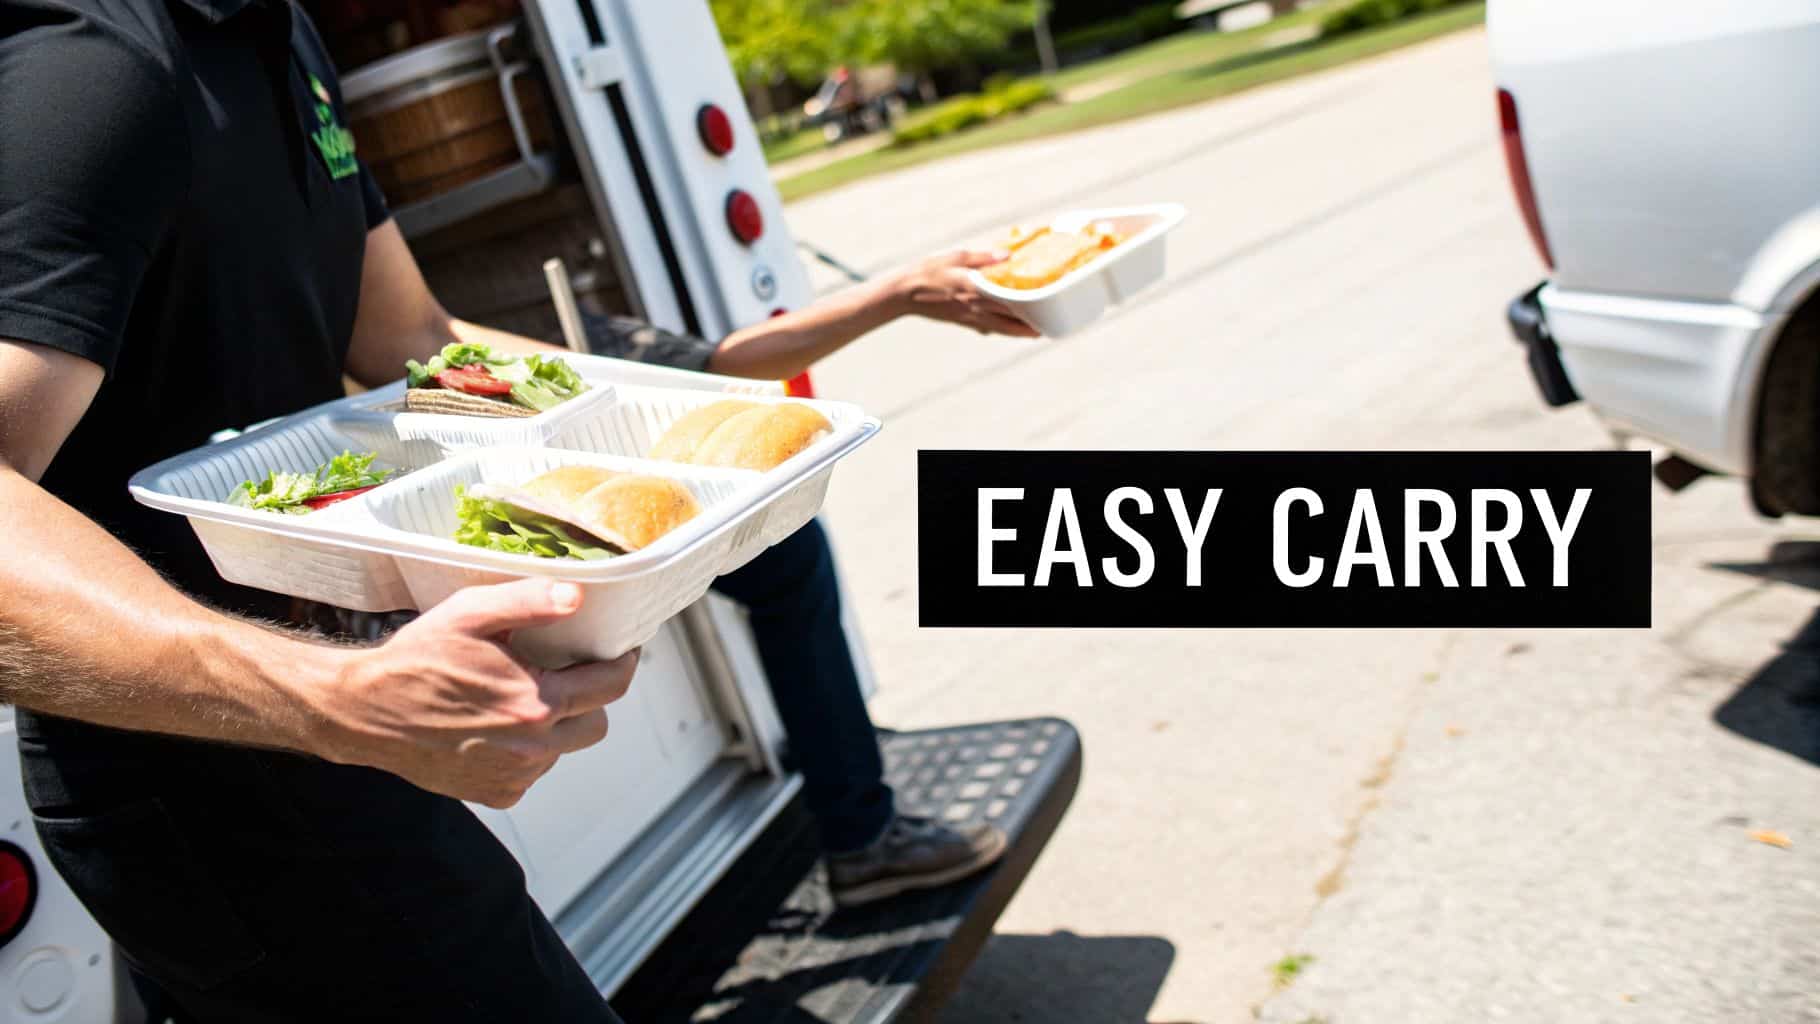
Modern food truck packaging needs to balance several key factors. Functionality is paramount. The packaging must effectively contain the food, prevent spills, and maintain the right temperature. It should also be easy for customers to handle and eat on the go.
Beyond practicality, packaging plays a crucial role in brand building. Thoughtful packaging communicates your brand’s story, values, and personality. It creates a memorable experience customers will want to share, turning your packaging into a powerful marketing tool. This reinforces the idea that food truck packaging isn’t an expense; it’s an investment in your brand’s success.
Choosing Materials That Make or Break the Experience
The right food truck packaging can truly elevate a dish. Conversely, the wrong choice can lead to frustrated customers and compromised food quality. Understanding the nuances of different packaging materials is essential for food truck success. It’s all about a seamless experience, keeping food at its best while reinforcing your brand.
Material Matters: A Deep Dive into Food Truck Packaging
Choosing the right material means balancing several factors. Temperature management is key, especially for hot or cold items. No one wants lukewarm fries or a melted milkshake. Sogginess is another issue, particularly for fried foods or dishes with sauces. The right packaging maintains texture and prevents disappointment.
Durability matters, too. Packaging needs to withstand transport, handling, and on-the-go eating. A flimsy, leaky container creates a messy, unsatisfying experience. Finally, consider the environmental impact. Eco-friendly options are increasingly important to consumers and show your commitment to sustainability.
Balancing Cost and Quality: Where to Invest and Where to Save
Navigating food truck packaging requires smart decisions about cost versus quality. Premium, sustainable options are often more expensive. However, this investment can enhance your brand and attract eco-conscious customers.
You can save in some areas without sacrificing quality. For example, use basic containers for items like condiments or utensils. Learn more in our article about the best types of food trays. But, investing in high-quality packaging for signature dishes creates a memorable experience and justifies a premium price.
Packaging for Every Cuisine: Tailoring Your Approach
Different cuisines have unique packaging needs. Hot, oily foods need packaging that can handle high temperatures and prevent grease from seeping through. Salads and fresh items require breathable containers to prevent wilting.
The table below compares different packaging materials, helping you choose the best fit for your food truck:
To help you choose the right packaging, we’ve put together a comparison table. It details the pros and cons of various materials, focusing on their suitability for different food types:
Food Truck Packaging Material Comparison: Comparing different packaging materials based on cost, durability, sustainability, and suitability for various food types.
Material Type
Cost Per Unit
Temperature Retention
Eco-Friendliness
Best For Food Types
Storage Efficiency
Cardboard/Paperboard
Low
Low
Recyclable
Dry foods, sandwiches, pastries
High
Bioplastics (PLA)
Medium
Low
Compostable
Cold foods, salads
Medium
Bagasse (Sugarcane)
Medium
High
Compostable
Hot foods, bowls
Medium
Aluminum Foil
Low
High
Not Easily Recyclable
Hot foods, wraps
High
Plastic (PET, PP)
Low
Medium
Not Easily Recyclable
Beverages, sauces
High
This table highlights the trade-offs between cost, functionality, and sustainability. While cardboard is affordable and recyclable, it’s not ideal for hot or messy foods. Bioplastics and bagasse offer compostable options, but they can be more expensive.
The Future of Food Truck Packaging is Sustainable
The food packaging industry is constantly evolving. Consumer awareness and environmental concerns are driving significant growth in this market. In 2024, this market was valued at $80.04 billion and is projected to reach $108.38 billion by 2029, a CAGR of 6.3%. Find more detailed statistics here: Food Packaging and Processing Industry Growth. This growth underscores the importance of sustainability in the food truck industry.
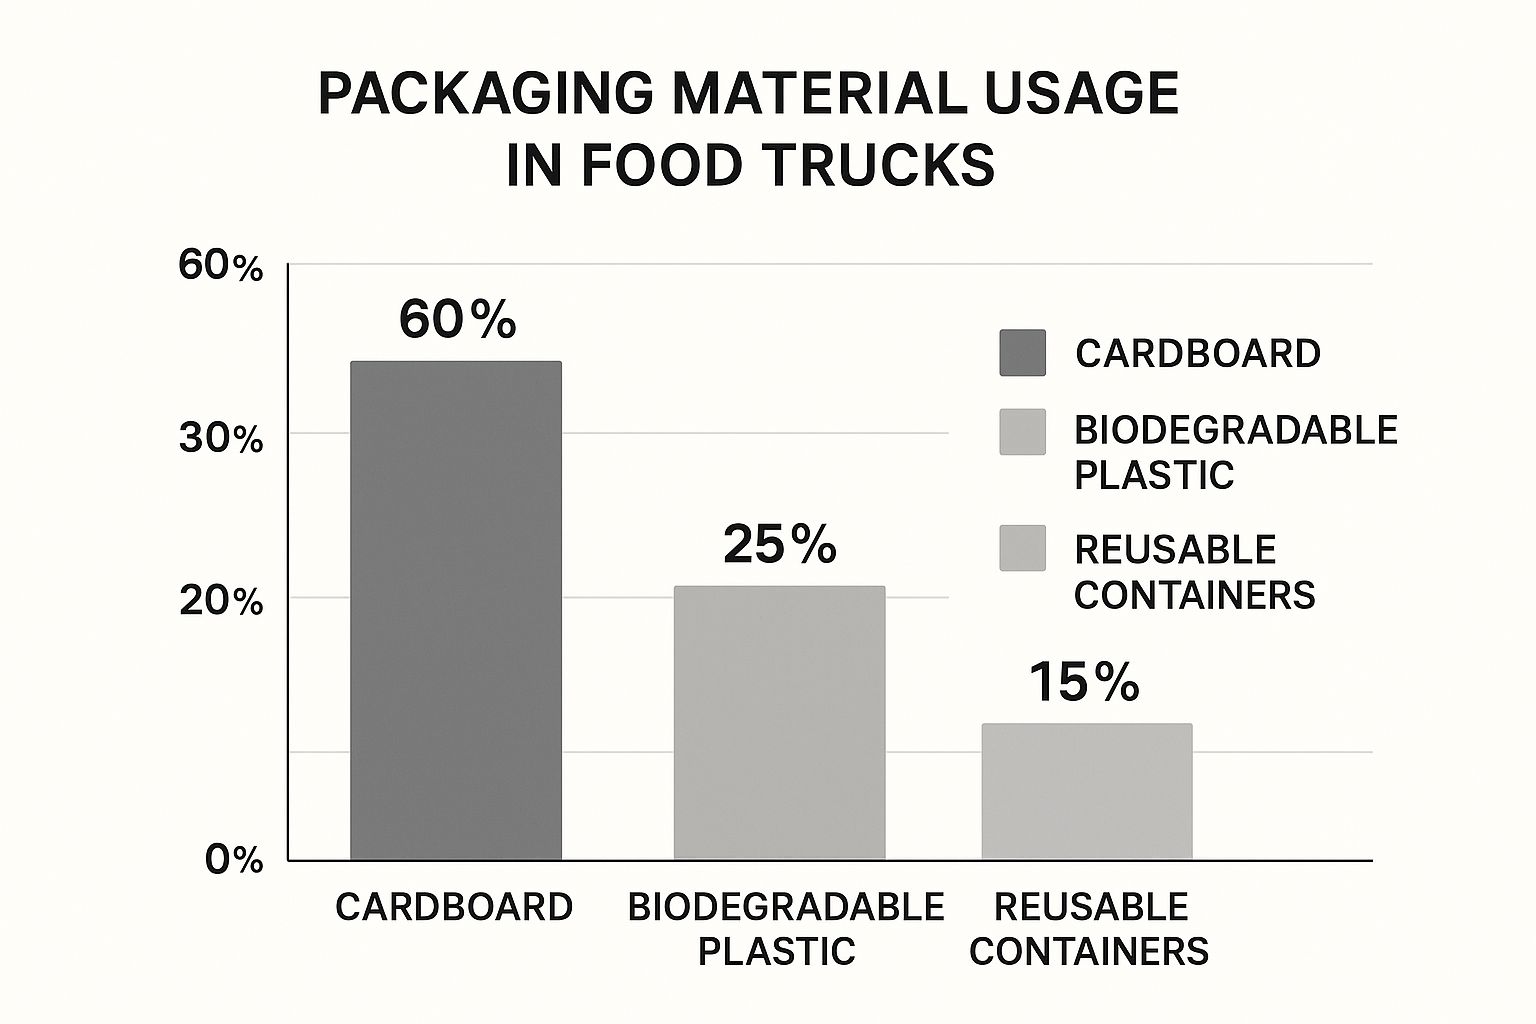
The following data chart illustrates the projected growth of sustainable packaging materials within the food truck industry between 2025 and 2029:
As the chart shows, bioplastics and bagasse are projected to see the highest growth, indicating increased demand for compostable solutions. This chart clearly demonstrates the rising demand for eco-friendly packaging. You might be interested in: How Sustainable Takeout Packaging Evolved. Food trucks that embrace these trends will attract environmentally conscious customers and contribute to a more sustainable future.
Sustainable Packaging That Won’t Break Your Budget
Balancing eco-consciousness with budget realities is a constant challenge for food truck operators. Finding affordable, sustainable packaging can feel overwhelming. But it doesn’t have to be. Smart choices in eco-friendly packaging can actually boost your brand image and even save you money over time.
Eco-Friendly Packaging: Beyond the Buzzwords
The term “eco-friendly” gets thrown around a lot these days. But what does it truly mean for your food truck? It’s about looking beyond the marketing jargon and finding practical, impactful solutions. Compostable containers made from plant-based materials are a fantastic alternative to traditional plastic. Using recycled materials is another way to reduce waste and shrink your environmental footprint. These choices demonstrate a genuine commitment to sustainability, resonating with today’s values-driven customers.
Investing Wisely: Maximizing Returns on Eco-Friendly Choices
While some sustainable packaging options might have a higher upfront cost, they can offer significant long-term benefits. Reusable containers, for example, require a larger initial investment but eliminate the need for constant repurchasing. This not only saves money in the long run but also minimizes waste. Promoting your sustainable practices can also attract environmentally conscious customers, enhancing your brand appeal and potentially driving sales.
Market Trends and Insights
The broader snack food packaging market offers valuable insights into current trends. Valued at $20.8 billion in 2024, this market is projected to reach $32.3 billion by 2034, growing at a CAGR of 4.5%. Despite regulatory pressures, plastic still holds a dominant position. However, food trucks, particularly those focused on gourmet or health-conscious offerings, are increasingly adopting sustainable solutions. This shift is driven by both brand enhancement and evolving environmental regulations. Learn more about market trends: Snack Food Packaging Market Forecast.
Practical Strategies for a Greener Food Truck
Transitioning to sustainable packaging doesn’t have to be a drastic overnight change. Start small. Simple swaps like switching to paper straws or offering discounts to customers who bring their own containers can make a difference.
Partnering with local composting facilities to handle food waste and compostable packaging creates a closed-loop system, further minimizing your environmental impact. These practical steps can create a more sustainable business model without sacrificing your budget.
Transforming Packaging Into Powerful Brand Ambassadors
Your food truck’s packaging is more than just a container; it’s an extension of your brand. It communicates your story even after the customer has finished their meal. Smart food truck operators recognize this, turning ordinary takeout containers into memorable experiences. This encourages social media sharing and, crucially, repeat business. Investing in the right packaging isn’t just practical; it’s a strategic marketing investment.
Creating Packaging Worth Sharing
How do you create packaging that customers want to share on social media? It begins with knowing your audience and reflecting your brand’s personality in your packaging design. A bright, colorful design might work well for a food truck specializing in fun, festival food. Meanwhile, a minimalist, eco-friendly design might better suit a health-conscious brand.
For food trucks aiming to minimize their environmental footprint without significant expense, sustainable promotional items can be a great option. Consider adding interactive elements like QR codes linking to your social media or offering discounts to boost engagement and loyalty.
Customization Options For Every Budget
Custom packaging doesn’t have to be expensive. There are affordable solutions for all budgets. Simple branded stickers can add personality to plain containers. Custom-printed boxes and wrappers create a more premium feel. This lets even smaller food trucks establish a unique brand identity. The table below shows the potential return on investment (ROI) for different customization levels.
To help you evaluate the costs and benefits of different approaches, we’ve put together an ROI analysis:
Customization Level
Initial Investment
Implementation Complexity
Marketing Value
Customer Perception Boost
Recommended For
Branded Stickers
Low
Low
Moderate
Low-Medium
Starting businesses, limited budgets
Stamped Logo
Low-Medium
Low
Medium
Medium
Simple branding, cost-effective upgrade
Custom-Printed Wrappers
Medium
Medium
High
High
Established brands, premium offerings
Fully Custom-Printed Boxes
High
High
Very High
Very High
High-end brands, strong brand identity
As you can see, even small investments in custom packaging can yield significant returns in terms of marketing value and customer perception.
Extending The Brand Experience
The brand experience shouldn’t end when the customer leaves. Encourage social sharing by prominently displaying your social media handles on your packaging. Consider contests or giveaways that incentivize customers to post photos of their meals.
Include small extras like stickers or thank-you notes to create a personalized touch and foster stronger relationships. These small gestures can turn one-time customers into loyal advocates, generating valuable word-of-mouth marketing and driving repeat business.
Navigating the Food Safety Compliance Maze
Food safety is crucial for any food business. For food trucks, the unique challenges go beyond simply avoiding fines. It’s about building customer trust and protecting your hard-earned reputation. This section explores the regulations and offers practical advice for maintaining a safe and compliant food truck, focusing on the vital role of packaging.
Understanding the Regulatory Landscape
Food trucks navigate a complex regulatory environment. Local health departments enforce specific rules for food handling, storage, and packaging. These regulations vary regionally, so understanding your area’s specific requirements is essential. Staying informed and compliant is key to avoiding penalties and keeping your license.
This proactive approach demonstrates your commitment to customer safety and builds community trust. By prioritizing compliance, you’re not just following the rules, you’re building a brand known for its integrity.
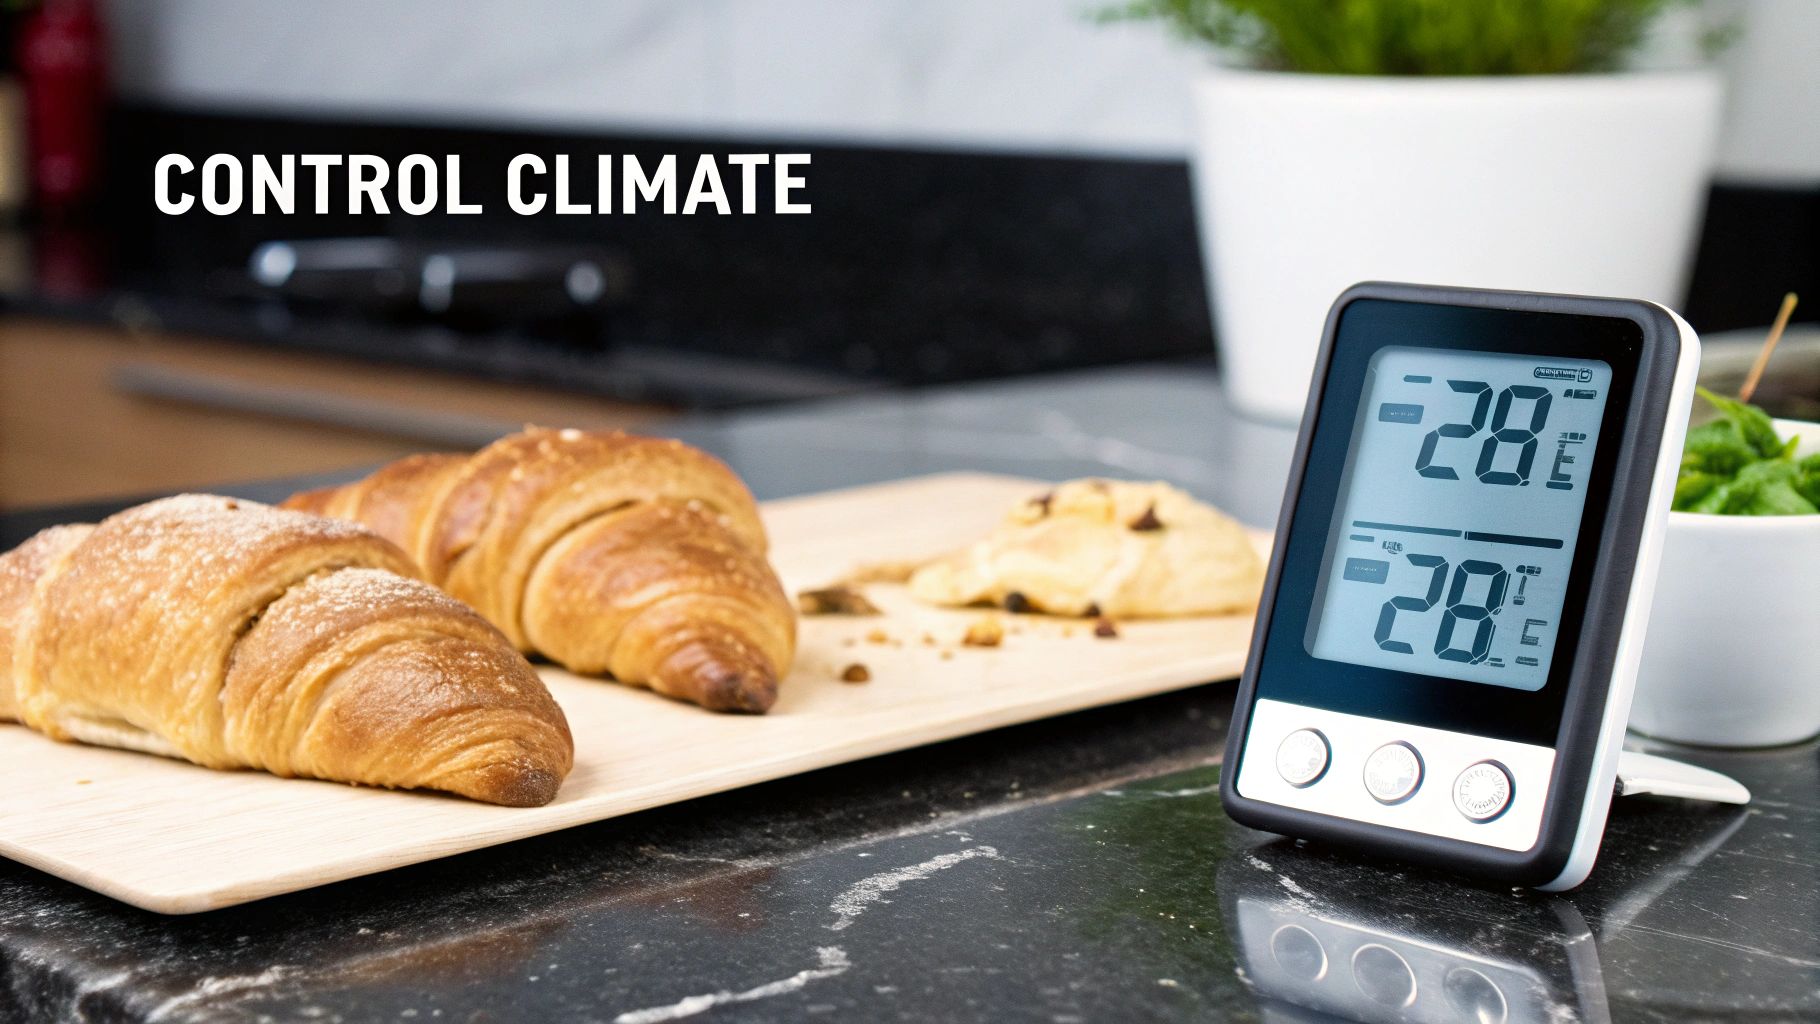
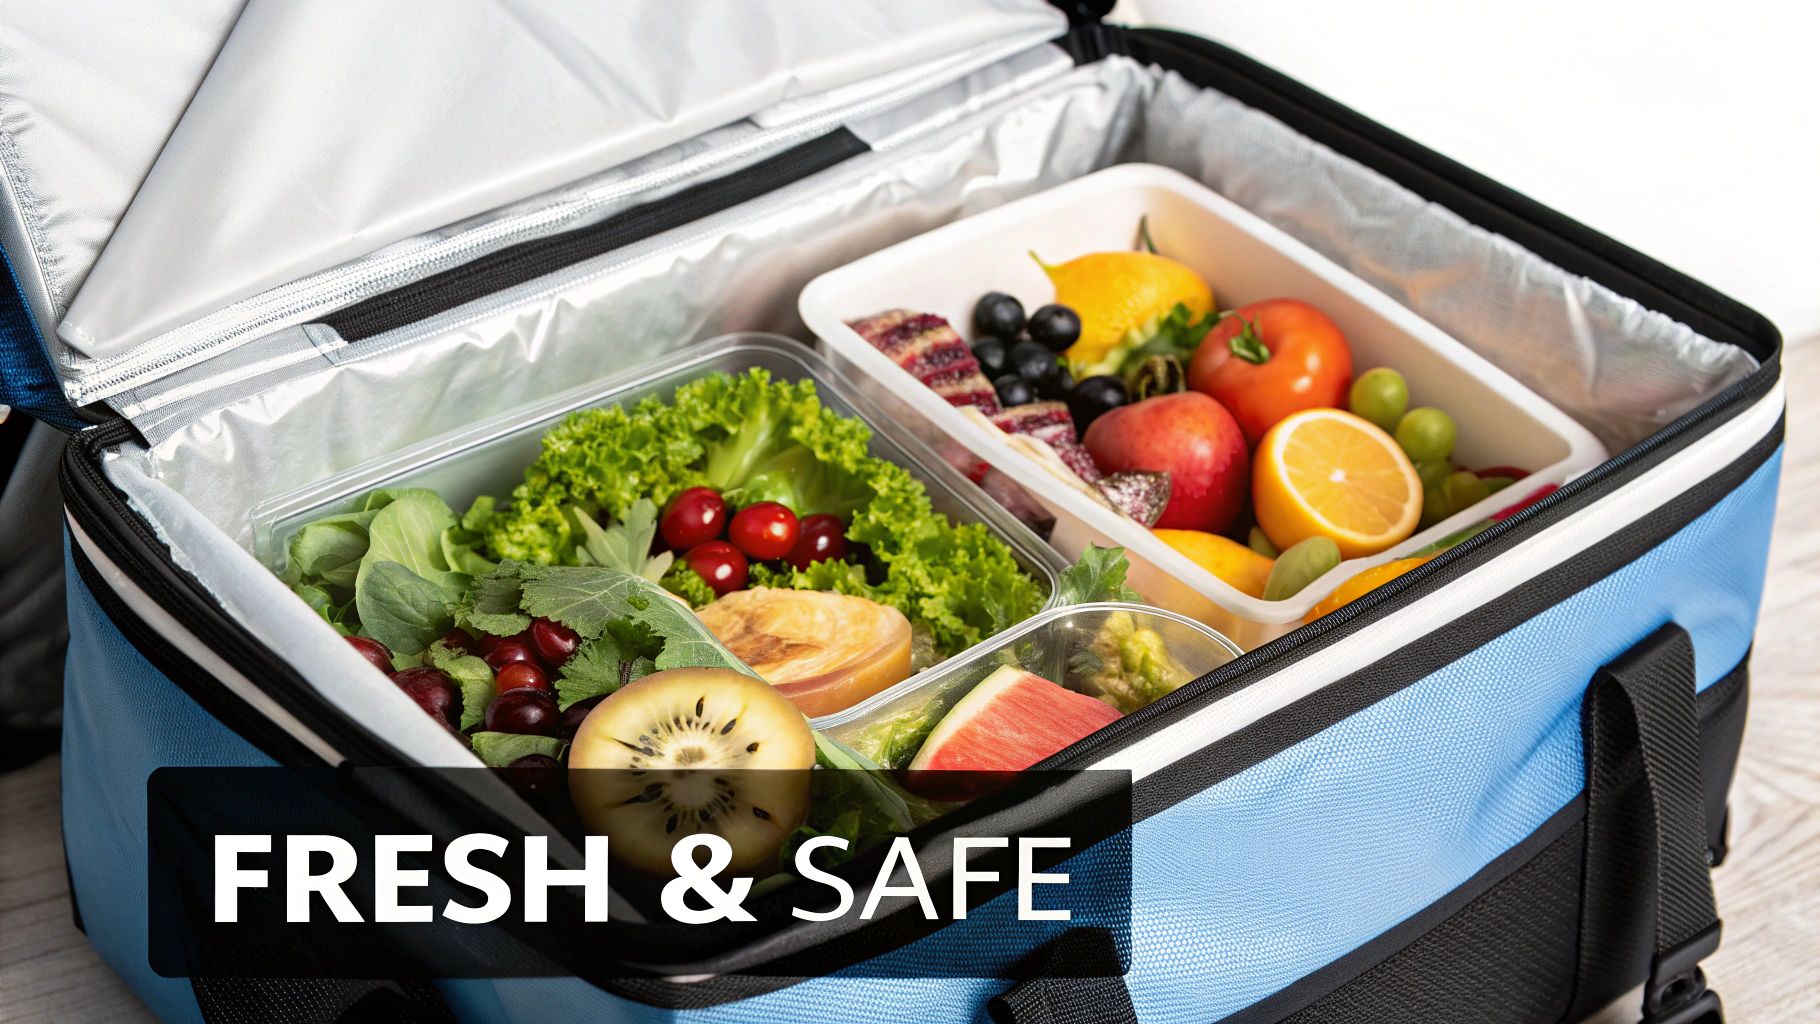
Temperature Control and Cross-Contamination
Maintaining proper temperature control in a food truck’s limited space can be tough. Using insulated food truck packaging for hot and cold items is vital. It prevents bacterial growth and maintains food quality. Smart packaging also helps prevent cross-contamination.
Using separate containers and utensils for different food types minimizes allergen spread. This protects vulnerable customers and showcases your dedication to a safe dining experience. Every detail matters when it comes to ensuring your food is both delicious and safe.
Food allergies are a serious concern. A robust allergen management system is essential. Clearly label all packaged foods with ingredients and potential allergens. Training your staff to handle allergen inquiries and avoid cross-contamination during preparation and packaging is also crucial.
These measures protect your customers and limit your liability. Taking these steps demonstrates a true commitment to customer well-being and builds confidence in your brand.
Training Your Team: The Key to Consistent Safety
Consistent food safety relies on a well-trained team. Regular training on food handling, packaging procedures, and allergen awareness ensures everyone follows the same protocols. This consistency builds a culture of safety and minimizes errors that could compromise customer health.
Empowering your staff with knowledge and skills protects both your customers and your business. Investing in training is an investment in the long-term success of your food truck.
Staying Ahead of the Curve: Future-Proofing Your Operations
Food safety regulations are constantly evolving. Staying informed about emerging trends and best practices is essential for your food truck’s future. Attending industry conferences, subscribing to relevant publications, and connecting with local health inspectors helps you anticipate changes and adapt proactively.
This forward-thinking approach keeps you ahead of the curve. It demonstrates your commitment to the highest safety standards, a significant advantage in a competitive market.
Mastering Inventory in Minimal Space
Operating a food truck presents unique inventory management challenges. Every square inch is precious, and efficient organization is essential. Running out of food truck packaging during a rush is a nightmare, while overstocking leads to wasted space and spoilage. This section explores optimizing your limited storage.
Clever Storage Solutions for Tight Spaces
Think vertically. Maximize wall space with shelves and racks. Use stackable containers for items like cups, lids, and napkins. Store bulkier items like boxes and bags under the counter. Consider clear containers for quick stock level assessments.
Vertical Shelving: Wall-mounted shelves are ideal for frequently used items.
Stackable Containers: Opt for clear, stackable bins for easy visibility.
Under-Counter Storage: Use under-counter space for bulk items.
Label Everything: Clear labels speed up restocking and prevent confusion.
Forecasting Your Packaging Needs
Accurately predicting packaging needs minimizes waste and shortages. Your menu is key: different items require different packaging. A burger needs a box, while a salad might need a container and lid.
Consider event types and seasonal changes. Festivals mean higher demand. Seasonal menus require different packaging. You might need soup containers in winter and ice cream cups in summer. This flexibility helps adjust inventory based on demand.
Building Strong Supplier Relationships
Reliable suppliers are essential. Develop strong relationships with your packaging suppliers. Open communication ensures timely deliveries and helps manage unexpected demand. Discuss your storage limitations. Suppliers may offer flexible delivery schedules or smaller packaging quantities. A strong supplier partnership is crucial.
Contingency Planning for the Unexpected
Even with planning, unexpected rushes happen. A contingency plan is key. Identify a backup supplier. Keep a small reserve of essential packaging off-site. This reserve can prevent costly service disruptions.
Simple Inventory Tracking That Works
A simple inventory system prevents stockouts and minimizes waste. Use a spreadsheet or an inventory app like Sortly to track stock levels. Regularly update your inventory after every event or shift. This identifies trends and informs ordering decisions. Efficient inventory management balances supply and demand, even in small spaces.
For food truck packaging and inventory optimization advice, visit MrTakeOutBags.com. They offer a wide selection of high-quality, eco-friendly packaging and personalized consultations.
Why Your Storage Method Makes or Breaks Baked Goods
Picture this: you’ve just pulled a batch of perfect, gooey chocolate chip cookies from the oven. Or maybe you treated yourself to an artisan sourdough loaf from your favorite local bakery. But fast forward 24 hours, and that initial joy turns to disappointment. Your soft cookies are now rock-hard, and that beautiful loaf of bread has become an expensive doorstop. If this sounds familiar, you’re not alone. Most people accidentally ruin their baked goods with simple storage mistakes. The best way to store baked goods isn’t some well-kept secret; it’s about understanding what happens when your treats are exposed to air, moisture, and temperature.
The Science of Staling and Freshness
When bread or cake goes stale, it’s not just a matter of it drying out. The real culprit is a process called starch retrogradation. As soon as a baked item cools down, its starch molecules start to recrystallize. This action squeezes out moisture and hardens the crumb, which is why bread gets tough and cakes become dry and crumbly.
Temperature and humidity play a huge role in this process. For example, putting bread in the refrigerator actually makes it go stale much faster than leaving it at room temperature because the cold speeds up starch retrogradation. This common misunderstanding is a big contributor to food waste. Industry reports show that 30% to 40% of all bakery products are wasted after they’re made, often because they spoil too quickly.
Why One-Size-Fits-All Fails
Every baked good has its own unique needs. A crusty sourdough loaf needs to breathe a bit to keep its signature crunchy exterior. On the other hand, a frosted cupcake requires an airtight seal to protect its delicate icing and keep the cake moist. Tossing both into the same plastic container is a recipe for a texture disaster—one might turn soggy while the other dries out completely.
Learning how to properly store different types of treats is the first step toward enjoying them for longer. A few simple adjustments can make all the difference.
Mastering Room Temperature Storage Techniques
Getting room temperature storage right is often what separates a happy home baker from a disappointed one. The secret isn’t just about grabbing any old container; it’s about understanding which of your creations will do best on the countertop and how to give them the perfect little home. The best way to store baked goods at room temperature comes down to one key concept that professional bakers have mastered: the difference between breathable storage and an airtight seal.
Breathable vs. Airtight: A Tale of Two Textures
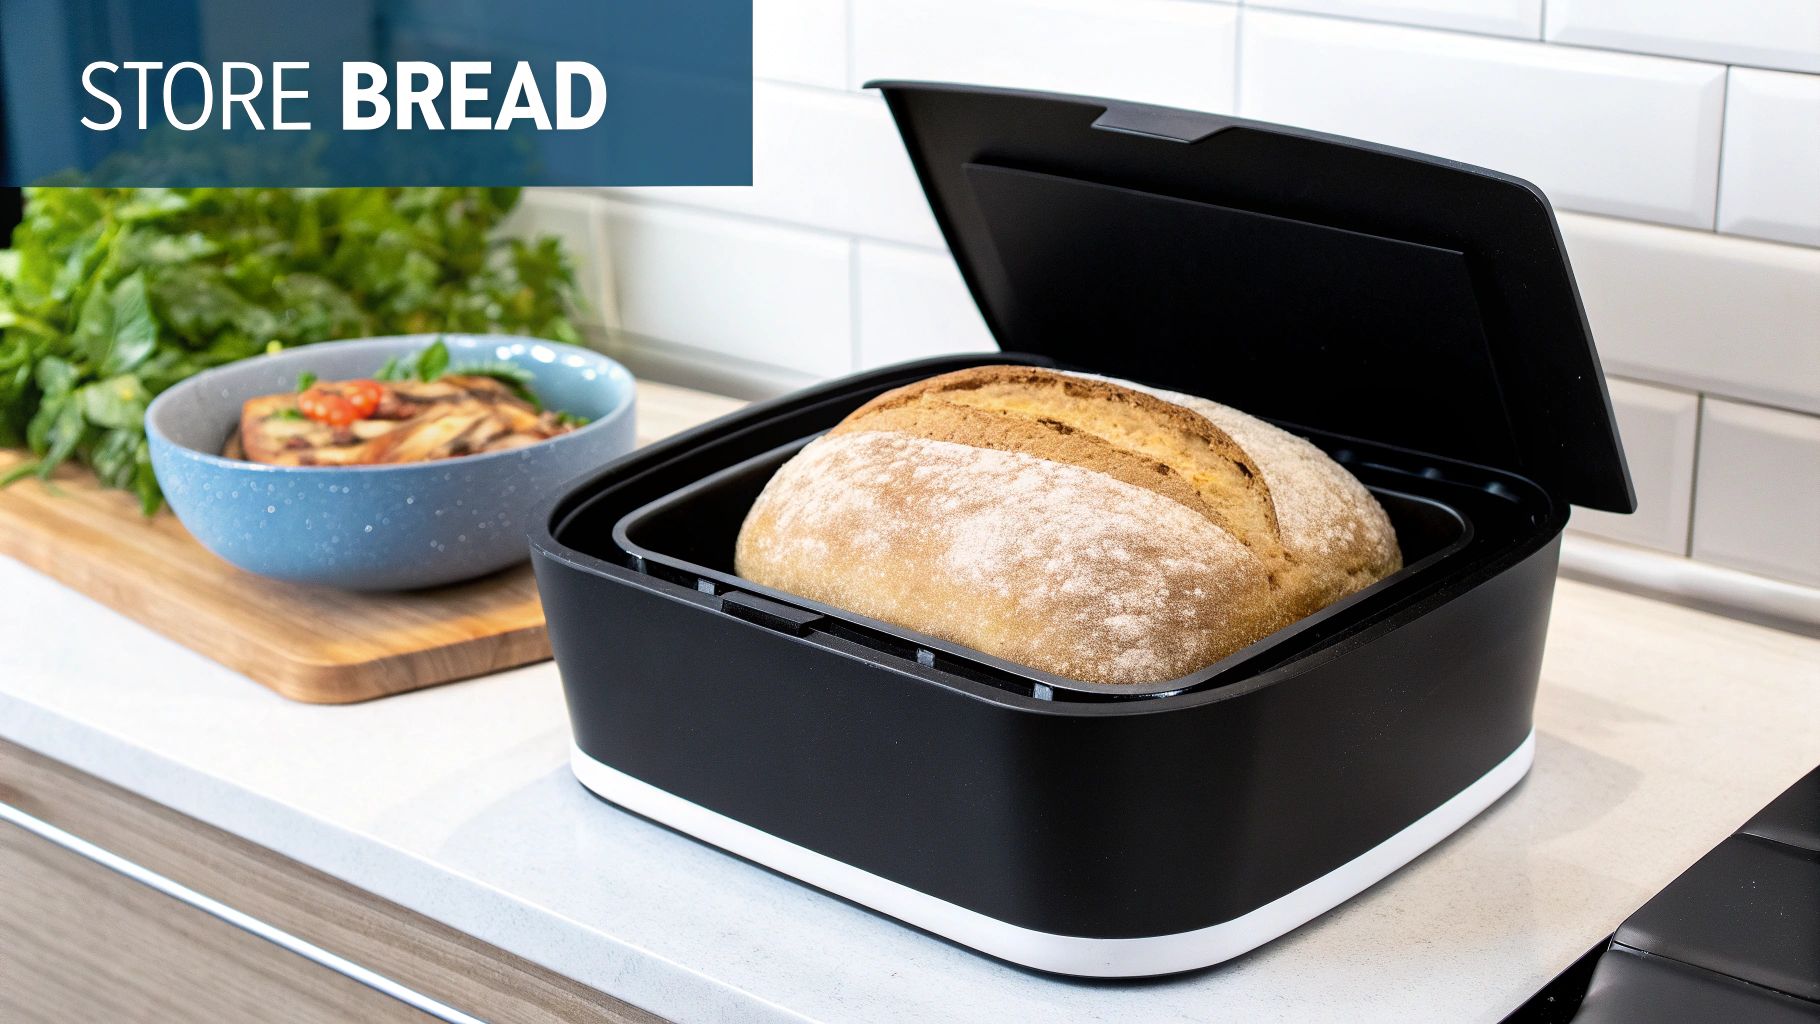
Imagine your baked goods have their own personalities. That crusty artisan loaf you just pulled from the oven needs to breathe to keep its amazing crunchy exterior. If you wrap it in plastic, you’ll trap moisture, and that beautiful crust will turn soft and leathery overnight. For items like these, a simple paper bag or a classic bread box works wonders. They allow just enough air to circulate, preventing sogginess while keeping the bread from drying out too fast.
On the flip side, soft goodies like frosted cookies, muffins, or a slice of vanilla cake would be completely ruined by that same method. They depend on an airtight container to lock in every bit of moisture and keep them from going stale. Leaving them out in the open will quickly turn your tender, moist treats into dry, crumbly disappointments.
Navigating Common Kitchen Scenarios
So, what do you do when you have a few different types of baked goods? A frequent mistake is to store them all together in one container. If you put a batch of chewy brownies in with some crisp shortbread cookies, the cookies will soak up moisture from the brownies and lose their snap. To preserve the unique texture of each treat, it’s always best to store them separately.
Don’t forget that your kitchen’s humidity plays a big part, too. In a particularly humid environment, even a loaf of bread in a paper bag might get moldy faster than usual. Food science tells us that at a comfortable room temperature of 20–22°C (68–72°F), bread stored with some air circulation stays fresh for about 2 to 3 days. Higher humidity can definitely shorten that window. As this bakery products market analysis shows, environmental factors matter. By paying attention to these details, you can adjust your storage strategy and keep everything tasting just-baked for longer.
When Cold Storage Actually Works in Your Favor
It might seem counterintuitive, but your refrigerator isn’t always the enemy of freshness. While it’s a fact that putting crusty bread in the fridge will speed up the staling process—thanks to a science called starch retrogradation—there are specific times when cold storage is the absolute best choice for safety and quality. The real trick is knowing which of your baked creations need the chill and how to store them properly.
For Safety’s Sake: When Refrigeration Is a Must
Some baked goods are non-negotiable candidates for the fridge. If it has dairy, eggs, or cream in its filling, topping, or frosting, it must be kept cold to stay safe. Think about these delicious treats:
Cheesecakes and custard tarts
Anything with a cream cheese frosting (like carrot cake or red velvet)
Cream-filled éclairs or donuts
Cakes layered with fresh fruit and whipped cream
Leaving these items at room temperature for more than a couple of hours creates a perfect environment for harmful bacteria to grow. When you’re unsure, it’s always best to refrigerate. The texture might change a little, but food safety is the top priority.
To help you decide what goes where, here’s a quick guide comparing different types of baked goods and their ideal storage conditions.
Refrigeration Guide for Different Baked Goods
A comprehensive comparison showing which baked goods benefit from refrigeration vs. those that should avoid it, including optimal storage times and preparation tips.
Baked Good Type
Refrigerate?
Storage Time
Special Notes
Cheesecake
Yes
Up to 5 days
Must be refrigerated due to dairy and egg content. Keep it covered to prevent drying out.
Cakes with Dairy/Cream Frosting
Yes
3-4 days
This includes buttercream, cream cheese, and whipped cream frostings.
Fruit Pies (e.g., Apple, Cherry)
No (initially)
2 days at room temp, then 2 more in the fridge
They can sit out for the first couple of days. Refrigerate after that to prevent spoilage.
Custard or Cream Pies
Yes
2-3 days
Any pie with an egg or dairy-based filling (pumpkin, pecan) must be refrigerated.
Yeast Breads (e.g., Crusty Loaves)
No
1-2 days at room temp
Refrigeration accelerates staling. Freeze for long-term storage instead.
Muffins and Quick Breads
No (unless they have dairy frosting)
3-4 days in an airtight container
Refrigeration can make them dense and dry.
Frosted Cookies
It Depends
Varies
If the frosting is a simple sugar glaze, no. If it’s a cream cheese or buttercream frosting, yes.
This table shows that dairy is the biggest factor. Anything with a creamy, custard-like, or fresh cheese element needs to be chilled to stay safe and delicious.
The Right Way to Refrigerate
When you do use the fridge, technique matters. Proper storage prevents your treats from drying out or, worse, absorbing the smell of last night’s leftovers. For a cake with delicate frosting, try the “flash freeze” method: place it in the freezer uncovered for about 15 minutes just to harden the frosting. Once it’s firm, you can loosely wrap it in plastic wrap and put it in an airtight container without smushing your beautiful decorating work.
A crucial tip: always let refrigerated baked goods return to room temperature before serving them. Giving them 30–60 minutes on the counter makes a huge difference. This simple step allows the fats in buttercreams and pastries to soften, which brings out the full depth of their flavors. For example, a slice of cold cheesecake is good, but one that has sat out for 30 minutes offers a much creamier texture and a richer, more complex taste.
Unlocking the Power of Proper Freezing Methods
Freezing is your secret weapon in the battle for freshness, and it’s hands-down the best way to store baked goods for the long haul. When done right, freezing essentially hits the “pause” button on the staling process, locking in amazing texture and flavor for months. But many people make the mistake of just chucking a plastic-wrapped loaf into the freezer and crossing their fingers. A little strategy is the difference between a frosty, disappointing brick and a treat that thaws to near bakery-fresh perfection.
The Double-Wrap System for Success
The biggest enemy of your frozen goodies is freezer burn. This happens when moisture escapes and air seeps in, creating those dreaded dry, icy patches. The trick used by professional bakers is the double-wrap system. First, wrap your item tightly in plastic wrap or a beeswax wrap. Then, tuck that wrapped item into a second, more durable layer, like a zip-top freezer bag or an airtight container. Make sure to squeeze out as much air as you can before sealing it up. This two-layer defense is incredibly effective at protecting the quality of your bakes.
For the best results, your freezer should be at or below -18°C (0°F). At this temperature, your well-packaged treats can last for up to 3 months or even longer. Following this method can seriously extend the life of your baked goods.
Smart Portioning and Organization
Before you start wrapping, think about how you’ll eventually eat what you’re freezing. Instead of freezing a whole cake, why not slice it first? You can freeze the individual slices with small squares of parchment paper between them to stop them from sticking together. This works great for cookies, brownies, and dinner rolls, too. This way, you only need to thaw what you need, which prevents waste and avoids the quality loss that comes from refreezing.
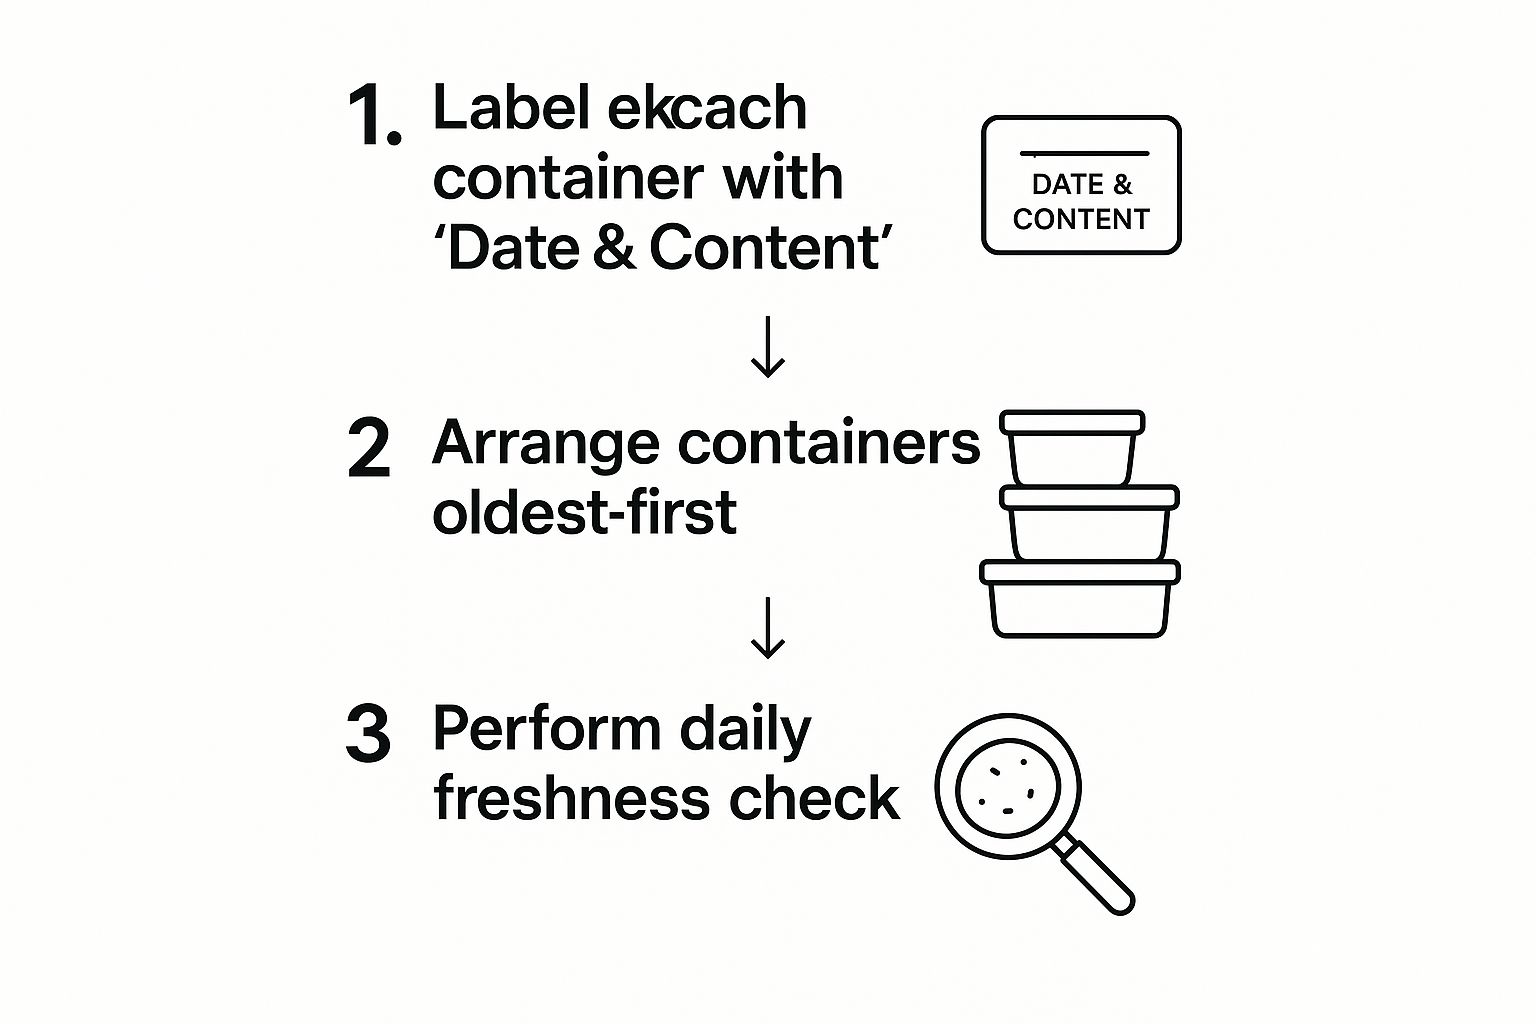
To keep your freezer from turning into a chaotic mess, a simple labeling system is your best friend. This infographic lays out an easy process for keeping everything organized and fresh.
As you can see, a straightforward “first-in, first-out” approach is key. It ensures you always reach for the oldest items first, so no forgotten treasures are left to languish at the back of the freezer.
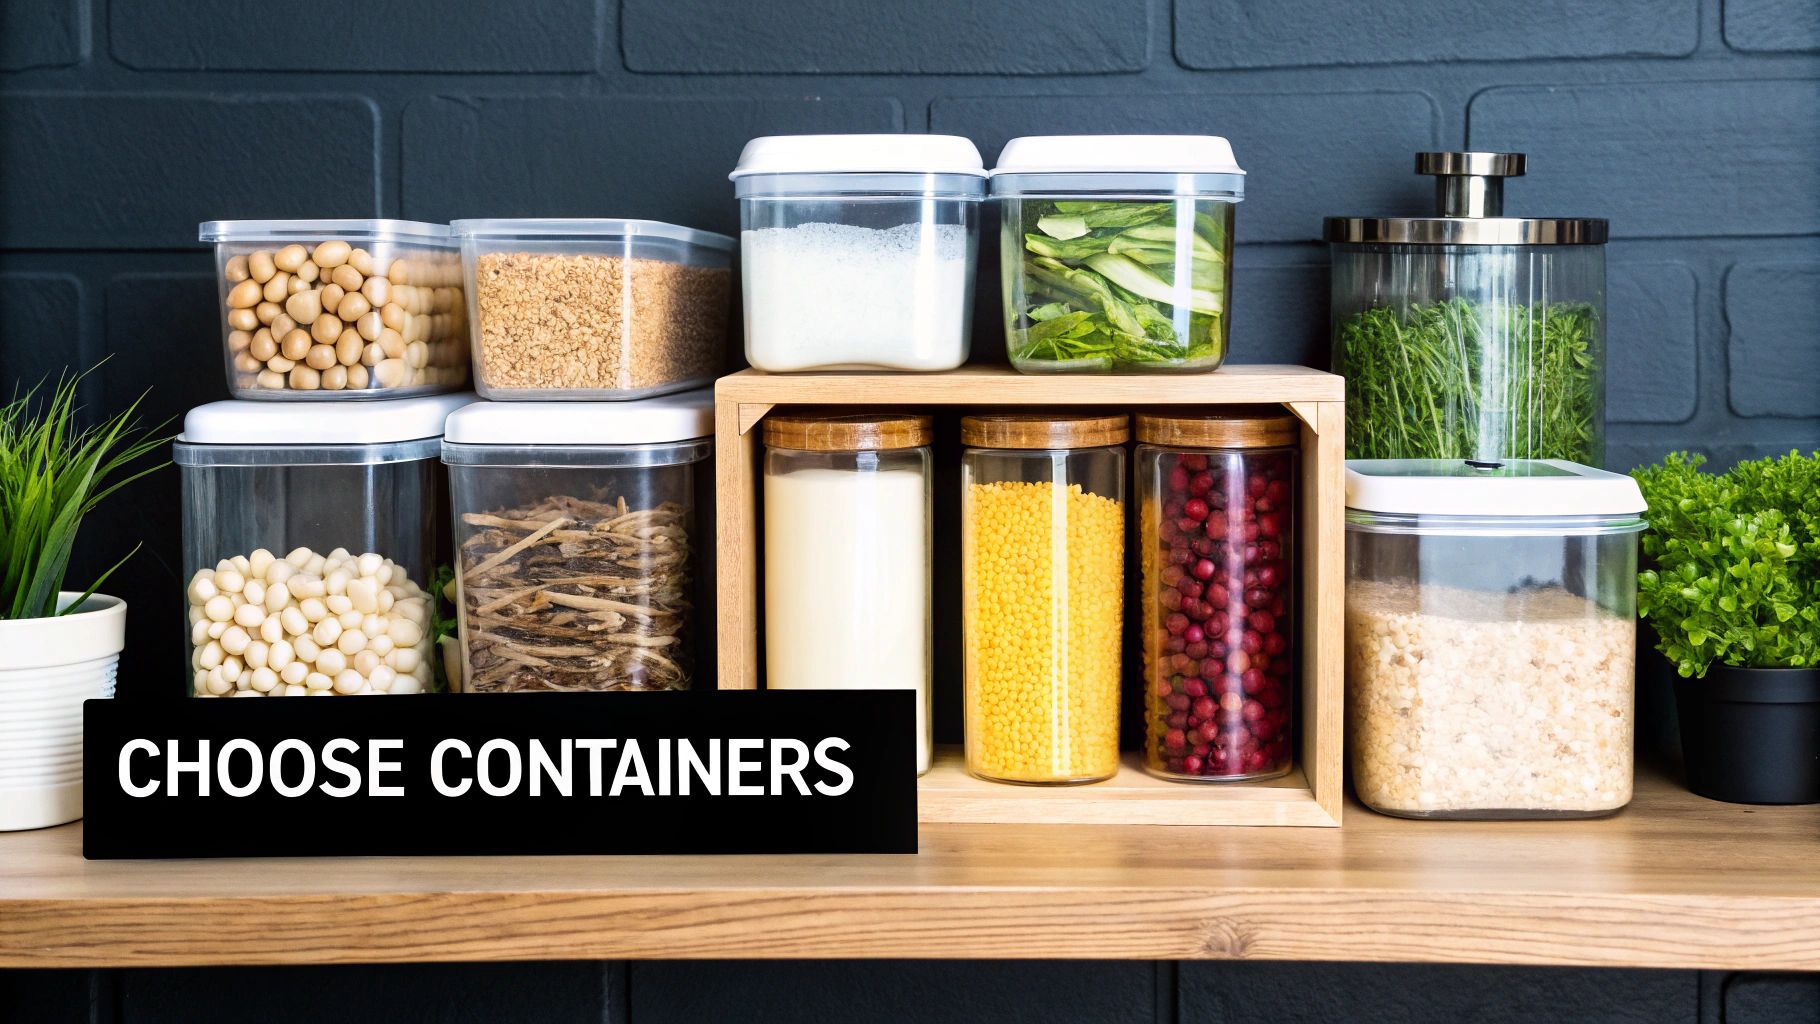
Choosing Storage Containers That Actually Work
The container you choose can literally make or break your baked goods. It’s not about grabbing just any plastic box from the cupboard. Finding the best way to store baked goods really comes down to matching the right material to the specific texture you want to preserve.
Airtight vs. Breathable Options
Your choice ultimately boils down to how you manage moisture. Airtight containers, like glass boxes with locking lids or sturdy zip-top bags, are fantastic for trapping moisture. This is exactly what you want for soft items like muffins, brownies, and cakes with buttercream frosting. By sealing them in, you keep them from drying out and preserve that tender, moist crumb you worked so hard to create.
On the other hand, anything with a crisp or crusty exterior needs room to breathe. Think of a rustic loaf of artisan bread or a batch of crunchy cookies. A traditional bread box isn’t just for looks; it allows for just enough air circulation to stop moisture from building up and turning that perfect crust into a soft, leathery disappointment. Even a simple paper bag or a reusable food wrap can do the trick, keeping the outside crisp without letting the inside go stale too quickly.
Comparison of Common Storage Containers and Their Ideal Uses
Container Type
Best For
Effectiveness Rating
Cost
Pros/Cons
Glass w/ Locking Lids
Cakes, muffins, brownies, soft cookies
★★★★★
Moderate
Pro: Completely airtight, non-porous. Con: Heavy, can break.
Plastic Containers
Most baked goods (short-term)
★★★★☆
Low
Pro: Lightweight, affordable. Con: Can absorb odors/stains.
Metal Tins/Boxes
Crunchy cookies, biscotti
★★★☆☆
Low to Moderate
Pro: Blocks light, good for gifting. Con: Not always fully airtight.
Bread Box (Wood/Metal)
Artisan bread, crusty rolls
★★★★☆
Moderate to High
Pro: Balances moisture perfectly for crust. Con: Bulky, single-purpose.
Zip-Top Plastic Bags
Quick storage, portioning items
★★★☆☆
Very Low
Pro: Inexpensive, flexible. Con: Less protection, can trap too much moisture.
Paper Bags/Wraps
Crusty breads, croissants (very short-term)
★★☆☆☆
Very Low
Pro: Breathable, prevents sogginess. Con: Offers minimal protection from staling.
This table shows that having a few different types of containers on hand is your best bet. A glass container is perfect for that decadent chocolate cake, while a simple metal tin will keep your shortbread perfectly snappy.
Beyond the Basic Box
Don’t overlook the simple things. Placing a sheet of parchment paper between layers of cookies in a tin is a pro-baker trick that stops them from sticking and merging into one giant cookie mass. For anyone running a bakery or just baking a lot at home, it’s worth exploring specialized packaging. You might be surprised to learn how eco-friendly bakery packaging can also provide fantastic storage solutions. Read our blog post about it to find out more about sustainable options.
Ultimately, investing in a variety of containers means you’re prepared for anything you decide to bake. It gives you the flexibility to store every creation properly, making sure that the last bite is just as delightful as the first.
Fixing Storage Disasters and Preventing Future Failures
Even with the most careful planning, storage mishaps can happen to anyone. Maybe those perfectly crisp gingersnaps you baked went soft overnight, or a beautiful layer cake dried out even though you covered it. Before you think about tossing them, let’s talk about some proven rescue techniques. Knowing how to fix these common problems is a big part of mastering the best way to store baked goods.
Reviving and Restoring Your Treats
Most baked goods can be brought back from the brink with a little know-how. If your crusty artisan bread has gone stale, a quick spritz of water and a few minutes in a hot oven work wonders. This re-steams the inside while crisping up the crust again.
For soggy cookies, spread them out on a baking sheet and pop them in a low-temperature oven (300°F or 150°C) for about 5-10 minutes. This little trick helps draw out the extra moisture and brings back their satisfying snap. A dry, crumbly cake can often be revived, too. Just brush each slice with a simple syrup (made by heating equal parts sugar and water until the sugar dissolves) to add moisture and flavor back in.
Preventing Future Failures
The best defense is a good offense, and that means adapting your storage strategy to your specific situation.
Seasonal Humidity: Live in a humid climate? Your trusty airtight container might actually be trapping too much moisture, creating a perfect environment for mold. Try adding a small food-safe desiccant packet or even a simple slice of bread to the container to absorb that excess moisture.
Limited Space: When you’re baking for a holiday or a big party, your freezer is your best friend. You can bake many items ahead of time, wrap them well, and freeze them. This not only keeps them fresh until you need them but also frees up precious counter space.
Transportation: If you’re gifting your delicious creations, think about the packaging. Sturdy boxes are essential for protecting delicate items like frosted cupcakes, while proper wrapping is key to preventing things from drying out during their journey.
Commercial bakeries have gotten really good at keeping things fresh, often using advanced packaging to reduce spoilage. Some have seen spoilage rates drop by up to 30% just by improving their storage methods. You can learn more about trends in bakery preservation and apply some of those same principles right in your own kitchen.
Your Complete Storage Success Blueprint
Let’s turn all this information into a practical system you can actually stick with. The best way to store baked goods isn’t about memorizing strict rules; it’s about building a flexible framework that fits your baking habits and your kitchen. Whether you’re trying to keep your daily bread fresh or managing a whole spread for a party, having a simple game plan makes a world of difference.
The Everyday vs. The Special Occasion
First, think about your daily routine. For that one loaf of sourdough you bake on weekends, the goal is straightforward: keep the crust crisp and the inside soft for a few days. A fantastic, low-effort method is to place it cut-side down on a wooden board and pop it inside a bread box. This simple setup maintains the perfect moisture balance without you having to think twice.
However, when you’re prepping for a big get-together, your strategy needs to shift toward batch preservation. This is where your freezer becomes your best friend. You can get ahead by pre-slicing cakes or cookies, putting parchment paper between the layers, and storing them in the freezer until the big day.
Creating Your Personal Action Plan
The real secret is adapting to your specific kitchen and lifestyle. If you live in a tiny apartment, a large bread box might not be practical, but a reusable beeswax wrap can do the job just as well. For those who love to bake in large quantities, investing in quality freezer-safe containers and a solid labeling system will be a game-changer.
Confidence in making these smart storage choices comes from understanding the why behind them, not just blindly following a chart. For businesses or home bakers who love to gift their creations, looking into specialized packaging for baked goods can help achieve that professional-level freshness and presentation.
Ready to put these principles into action with packaging that truly works? Explore the full range of bakery and takeout solutions at MrTakeOutBags.com to keep your creations tasting their absolute best.
The numbers swirling around the food service industry trends are huge, but what do they really mean for your restaurant on a Tuesday afternoon? It’s one thing to hear that the global market is growing, but it’s a totally different challenge to turn that broad trend into a tangible opportunity for your own kitchen. The reality is complicated: while the industry is expanding, profitability is still a tightrope walk for many operators.
Recent data shows the global foodservice market hit about $3.09 trillion in 2024 and is expected to climb past $4.1 trillion by 2033. This growth signals a strong recovery, with U.S. sales alone jumping 82% since 2020.
From Statistics to Strategy
So, how do you make sure your business gets a slice of that growing pie? The secret lies in understanding the difference between revenue and actual profit. While the top-performing restaurants might see profit margins around 10%, the industry average often lingers in a much tougher 3-5% range. This isn’t just about crunching numbers; it’s about making smart, strategic moves.
To put these numbers into perspective, let’s look at the key metrics shaping the industry’s future. The table below breaks down the projected growth in market size, employment, and profitability.
Metric
2023
2025 Projected
2033 Projected
Market Size
$2.84 Trillion
$3.25 Trillion
$4.1 Trillion
Industry Employment
15.5 Million
16 Million
17.5 Million
Average Profitability
3-5%
4-6%
5-7%
This data confirms that while sales are on the rise, the real work is in making that growth count on your bottom line.
As you can see, sales and employment are bouncing back, but the most successful establishments aren’t just passively riding this wave. They are proactively managing rising costs and operational pressures by asking some tough questions:
Where are the hidden inefficiencies in our daily operations?
How can we design our menu to be both popular with customers and profitable for us?
Are we using technology effectively to cut costs without compromising the guest experience?
Answering these questions is your first step toward turning these huge industry shifts into profitable, practical strategies for your restaurant. It’s about finding your footing in this new environment and ensuring your growth is built to last.
Technology Solutions That Actually Work
Let’s cut through the tech hype and focus on what genuinely moves the needle in a restaurant. Smart automation isn’t about flashy robots; it’s about solving real-world problems like rising labor costs and evolving customer expectations. The right tech integrations can be a game-changer, but choosing wisely is key to seeing a return on investment instead of a new set of headaches.
Evaluating ROI Over Hype
Many restaurant owners get tripped up by investing in tech that doesn’t solve a core operational issue. Before committing, ask yourself: Does this tool reduce waste, speed up service, or free up my staff for more valuable customer interactions? The goal is to find solutions that directly address your biggest pain points.
Technology adoption has become a critical driver of change, particularly as the ongoing labor shortage pushes restaurants toward automation. Consider this: by 2025, digital ordering is expected to account for an estimated 70% of sales in some markets. That’s a massive jump from 40% in 2023. This shift helps offset rising labor costs, which have climbed from 30% of revenue to around 36%. Adopting tech is no longer a luxury but a necessity for staying competitive.
To put this into perspective, let’s look at how different technologies can impact key business metrics.
Inside Food Service Industry Trends: Technology That’s Changing the Game
Technology Type
Labor Cost Impact
Customer Satisfaction
ROI Timeline
Integrated POS System
Reduced front-of-house labor by 10-15% due to streamlined order taking and payment processing.
Increased by 20% due to fewer order errors and faster service.
6-9 Months
Kitchen Display System (KDS)
Decreased ticket times by an average of 2-4 minutes, allowing for higher table turnover.
Improved by 15% from more accurate and faster order fulfillment.
9-12 Months
Automated Inventory Mgt.
Cut food waste costs by 5-8% by preventing over-ordering and tracking spoilage.
Maintained consistency as popular items were less likely to be out of stock.
12-18 Months
Online Ordering Platform
Opened a new revenue stream, increasing overall sales by 25% without adding front-of-house staff.
Grew by 30% among takeout/delivery customers who value convenience.
3-6 Months
This data shows a clear pattern: targeted technology directly improves efficiency and the customer experience, leading to a measurable return. The key is to match the solution to a specific operational weakness.
The infographic below further illustrates the significant growth in delivery, a key area where technology plays a major role.
This visualization highlights how crucial a streamlined digital ordering and delivery system is for capturing a growing segment of the market.
Real-World Application and Results
The most successful tech implementations are seamless and solve problems without creating new ones. A great example is an integrated Point of Sale (POS) system that connects front-of-house orders directly to kitchen display systems and inventory management. This reduces errors, tracks stock in real-time, and provides valuable sales data.
Beyond operational technologies, effective digital marketing is critical. Businesses can boost reservations and foot traffic by implementing targeted and proven restaurant SEO strategies. Implementing these tools might seem daunting, but starting with a single, high-impact solution and building from there is a practical approach that minimizes disruption.
Sustainability That Drives Profits, Not Just PR
The big push for sustainability is more than just a passing trend; it’s a core expectation that’s changing how the food service industry operates. The great thing is, “going green” doesn’t have to hurt your wallet. In fact, many successful restaurant owners are finding that sustainable practices can actually boost their bottom line by cutting down on waste and building a loyal customer base. It all starts with a practical approach to where you get your ingredients and how you run your business.
Sourcing Smartly for Profit and Planet
Building relationships with local suppliers is a fantastic first move. While it might seem a bit pricier at first, it often results in fresher ingredients, lower transportation costs, and a compelling story that connects with your diners. Think about it: a farm-to-table pizzeria can easily charge more for a margherita pizza made with local heirloom tomatoes and fresh basil. This not only covers any extra cost but also attracts customers who value quality and community support.
You can start small:
Connect with one or two local farms for your high-volume items, like seasonal vegetables or dairy.
Create seasonal specials on your menu. This lets you use ingredients when they are at their freshest and most affordable, reducing your need for expensive, out-of-season produce.
Showcase your partnerships on your menu and social media. Let customers see that you’re invested in supporting local producers.
More Than Just Food
Real sustainability goes beyond your shopping list. This is where running an efficient business and being environmentally responsible come together perfectly. Making simple changes, like switching to eco-friendly takeout containers, not only lessens your environmental impact but can also keep food tasting better on its way to the customer.
Performing a waste audit can be an eye-opener, revealing surprising ways to save money by reducing food spoilage and fine-tuning your orders. A complete approach to sustainability also considers a company’s operational footprint and its broader environmental, social, and governance (ESG) goals. For instance, being clear about your company’s long-term sustainability objectives is becoming essential for maintaining a strong brand reputation.
Capitalizing on Changing Consumer Spending Patterns
A fascinating shift is happening in the food service world. For the first time since the pandemic, people are spending more money at restaurants than they are on groceries. With foodservice now grabbing a huge 56.4% of the market, it’s clear that diners are craving experiences and convenience more than ever. This isn’t just a number to glance over; it’s a real change in how people are spending their money, offering a great opportunity for restaurant owners. The trick is to dig into what today’s customers really want and adjust your services to match.
Adapting to New Dining Priorities
So, what does this shift actually mean for your restaurant? It’s about more than just the food on the plate. It’s about building a complete experience, whether someone is dining in your establishment or getting their meal to go. Customers are signaling they’re ready to pay for things they value, which looks different for various groups.
Convenience Seekers: This group is all about easy online ordering and delivery that is both quick and dependable. They want a frictionless process from start to finish.
Experience Chasers: These diners are looking for a unique atmosphere, top-notch service, and a meal that feels special—like a real event.
Value Hunters: They’re on the lookout for family meal deals, loyalty points, and menu items that strike a balance between high quality and affordability.
As the image shows, this trend affects everyone, from a quick-service spot to a high-end restaurant. Every type of operation needs to think about how it can cater to these new spending habits. For many, that means getting their off-premises game right. If you’re looking for practical tips on this, a great place to start is figuring out the best packaging. Making sure your service style aligns with what your customers are looking for is the best way to tap into this renewed spending.
Menu Innovation That Drives Revenue
Your menu is far more than a list of what’s available; it’s one of the most powerful sales tools you have. This is where sustainability and profitability truly meet. The most successful restaurants are mastering menu innovation, creating dishes that both delight customers and protect their bottom line. This isn’t just about throwing a trendy ingredient on a plate. It’s about designing a menu that fits your brand identity and what your kitchen can realistically handle.
Finding that sweet spot between industry trends and operational reality is what turns a short-lived gimmick into a dependable revenue source.
Balancing Trends with Practicality
A well-crafted menu tells a story and feels authentic to your brand. Imagine a local café introducing a line of “newstalgia” treats, like a gourmet take on a classic childhood cereal bar. This taps into customer nostalgia using high-margin ingredients, creating something fresh without needing a massive operational change.
Here are a few practical ways to get creative with your offerings:
Introduce LTOs:Limited-Time Offers are fantastic for creating a sense of urgency and testing new ideas without full commitment. You could try a seasonal root vegetable hash for brunch or feature a unique mushroom-based burger for a month to see how your regulars respond.
Deconstruct Entrees: Try offering main proteins and sides separately. This gives customers more control over their meal and their spending. Someone on a budget might be more inclined to order a la carte than to skip an entree entirely because of the price.
Focus on Texture: Sometimes, the smallest change makes the biggest impact. Adding elements like a crunchy chili crisp to a dish or a velvety cold foam to a drink costs very little but creates a premium experience that customers are happy to pay more for.
Using Data to Refine Your Offerings
While creativity is key, your decisions should be backed by solid data. This is where menu engineering comes in. It’s the process of analyzing your menu’s profitability and popularity to make smarter, more strategic choices about what you offer.
This classic analysis grid helps you see your menu in a new light. It can reveal that a popular dish (Plowhorse) is actually hurting your margins and needs a price bump, or that a high-profit item (Puzzle) just needs a little more promotion to become a customer favorite. By understanding this data, you can make targeted adjustments that directly boost your revenue.
Strategic Infrastructure Investment Opportunities
The restaurant construction market is slated to become a $378.27 billion industry by 2029, and it’s tempting to jump on the growth bandwagon. But experienced owners know that just building more isn’t the answer. The real win is in making smart infrastructure choices that reflect today’s food service industry trends, making your operations smoother and keeping customers happy.
Before you even think about signing a lease for a new spot or knocking down walls in your current one, take a hard look at what your guests actually want. It’s less about cramming in as many tables as possible and more about creating a versatile space that offers a genuine experience.
Optimizing Your Physical Space
Modern restaurant design has to be adaptable. Imagine creating different “zones” inside your restaurant. You could have a quiet, intimate corner for date nights, a lively bar area with high-top tables, and a comfortable section for families. This kind of thoughtful layout broadens your appeal and can serve different customer moods all under one roof.
This image captures the delicate balance between a restaurant’s vibe and its practical function. See how the lighting, seating, and decor all come together to create a specific atmosphere? Your own investment should strive for that same harmony, where every choice you make supports both your brand and how your team works.
Smart Investments for Modern Operations
Looking past the decor, your infrastructure upgrades should tackle real-world operational challenges. With takeout and delivery continuing to drive a huge chunk of revenue, having a well-thought-out area for off-premise orders is no longer a luxury—it’s essential.
Dedicated Pickup Zones: Don’t let delivery drivers and takeout customers crowd your host stand. A separate, clearly signed area prevents bottlenecks and keeps your dining room from feeling chaotic.
Enhanced Kitchen Flow: Your kitchen layout might be perfect for dine-in service, but can it handle a rush of online orders? Consider reorganizing the line to support a high volume of to-go tickets without slowing down service for seated guests.
Packaging Stations: Give your staff the space and tools they need to assemble orders quickly and correctly. This includes having the right disposable food containers ready to go, which is key for making sure food stays hot and fresh on its way to the customer.
Key Takeaways for Foodservice Success
Keeping up with the food service industry trends isn’t just about knowing the latest trends; it’s about putting them into practice in your daily operations. Your path forward rests on three key areas: smart technology use, genuine sustainability, and a solid grasp of what your customers want. Don’t feel like you have to do everything at once. A better approach is to pick the changes that will make the biggest difference for your specific business.
Start by identifying your single biggest headache. Is it soaring labor costs? Mounting food waste? Or maybe you’re struggling to bring in new faces? Your answer to that question will tell you exactly where to begin.
Your Action Plan
For many restaurant owners, the best place to start is by improving the customer experience from the moment they walk in. A huge part of this is making sure your staff is top-notch. Investing in effective hospitality customer service training can transform a decent meal into an unforgettable one, which is what builds loyalty and brings people back.
Next, it’s time to take a hard look at your menu and how you run things behind the scenes. Give yourself some concrete goals:
Benchmark Progress: Challenge yourself to cut food waste by 5% in the next three months. You can achieve this by implementing a more precise inventory tracking system.
Warning Signs: Are your utility bills creeping up every month? That’s a clear signal to start researching more energy-efficient kitchen equipment.
Milestone Goals: Plan to introduce a limited-time offer (LTO) that features a local supplier within the next quarter. It’s a great way to test the waters of sustainable sourcing and see how your customers respond.
This image shows just how broad the food service industry trends worldwide are, from cozy cafes to massive catering companies. The core principles of success, however, are the same no matter your size. The goal is always to focus on profitable and sustainable growth.
Ready to perfect your packaging and elevate your customers’ takeout experience? Explore our extensive collection of high-quality, reliable packaging solutions at MrTakeOutBags.com and find the perfect fit for your business today.
Understanding the Regulatory Landscape That Actually Matters
Trying to navigate the world of food packaging regulations can feel like you’re piecing together a puzzle without all the pieces. The real secret isn’t to memorize every single rule, but to understand the system and what regulators truly care about. You’ll find success when you start to see the patterns that distinguish strict, non-negotiable requirements from the broader priorities of bodies like the FDA in the U.S. and the EFSA in Europe.
For example, while both agencies have massive rulebooks, their main focus is always on consumer safety. They need absolute certainty that nothing harmful will seep from your packaging into the food. This is why things like migration testing for plastics are a deal-breaker, whereas the exact font size on a non-critical part of your label might not draw as much attention during an inspection.
From Requirements to Priorities
Think of it like this: a requirement is the letter of the law, but a priority is its spirit. A company that just scrapes by meeting the bare minimum is always walking a thin line. On the other hand, a business that gets the why behind the rules can weave compliance into its daily operations. This proactive approach means focusing on:
Material Safety: Intentionally choosing certified food-safe materials and always demanding proper documentation from your suppliers. Don’t just take their word for it.
Label Accuracy: Making sure that allergen warnings and nutritional information are perfect. A mislabeled allergen is a huge red flag for regulators because of the immediate health risks involved.
Traceability: Having a reliable system in place to quickly track down a specific product batch if a recall ever becomes necessary.
The Growing Influence of Sustainability
We’re also seeing a major shift in priorities, pushed by both customer demand and new legislation. Sustainability is no longer just a nice-to-have footnote in food packaging regulations; it’s moving to the front page. Projections show that by 2025, 60% of all food packaging will be recyclable, biodegradable, or reusable.
This isn’t just a passing trend; it’s a direct result of growing regulatory pressure and a market that increasingly values environmental responsibility. This change is also happening at the local level.
Building a Compliance System That Actually Works
Vague promises and crossed fingers won’t protect you when an inspector shows up. Real compliance with food packaging regulations is built on a solid, actionable system, not just good intentions. This means moving beyond a simple checklist and creating a living process that grows and changes with your business.
A smart approach starts with assigning clear ownership. Who on your team is the point person for tracking regulatory updates? Is it the procurement manager who orders the packaging or the quality assurance lead? Without a designated owner, important tasks will inevitably fall through the cracks. For small bakeries, this might be the owner themselves. For a larger catering company, it could be a dedicated operations manager.
Creating an Early Warning System
Next, think about building an “early warning system” for potential issues. This isn’t as complex as it sounds. It could be as simple as a quarterly review meeting where your team discusses:
Any new packaging materials being considered.
Feedback from your suppliers about material availability or changes.
New markets you plan to enter and their specific rules.
Customer complaints related to packaging integrity or labeling.
This proactive mindset helps you spot problems before they turn into expensive recalls or legal troubles. A great example is when a supplier informs you that their go-to plastic resin is being reformulated. An effective system triggers an immediate response: requesting updated compliance documents and checking if the new formula still meets FDA or EFSA standards for food contact.
To help you structure your strategy, here’s a look at how different-sized companies can approach compliance.
Compliance Strategy Framework Comparison
A comparison of different compliance approaches based on company size and complexity
Company Size
Recommended Approach
Key Focus Areas
Resource Requirements
Small Business (e.g., local bakery)
Basic & Reactive
Supplier documentation, basic labeling, staff training
Low (often owner-managed)
Medium Business (e.g., regional distributor)
Structured & Proactive
Dedicated compliance role, regular supplier audits, early warning system
Medium (part-time or dedicated staff)
Large Enterprise (e.g., national brand)
Integrated & Predictive
Full compliance team, automated tracking systems, in-house testing
High (dedicated team, specialized software)
As the table shows, your strategy needs to match your operational scale. A small bakery can manage with diligent record-keeping, while a national brand needs a much more robust, tech-supported framework.
The visual below shows the variety of common packaging types, each with its own set of compliance considerations.
This graphic drives home the point that a one-size-fits-all compliance strategy rarely works. The rules for a glass jar are very different from those for a paper carton. Your system must be flexible enough to handle the specific food packaging regulations for every material you use, making sure nothing is overlooked.
Mastering Material Safety Without a Science Degree
When you hear the term “migration testing,” you might picture a lab coat and a Ph.D., but the concept is actually straightforward. Regulators just need assurance that your packaging won’t transfer unwanted chemicals into the food it’s holding. Getting a handle on this basic idea is the key to mastering material safety for your business. It’s not about becoming a chemical engineer; it’s about asking smart questions and getting the right documents from your suppliers.
Think about it this way: a plastic container holding acidic tomato sauce will react differently than one holding dry pasta. Factors like heat, acidity, and fats can all encourage substances to move, or “migrate,” from the packaging into the product. Your role is to make sure you’re using the right tool for the right job.
Asking the Right Questions
Before you invest in a new type of packaging, it’s time for a frank conversation with your supplier. Your main goal is to secure a Declaration of Compliance (DoC). This document is your official confirmation that the material is safe for how you plan to use it.
When you talk to them, be ready with the specifics. Here’s what you should cover:
Intended Use: Don’t just say “food.” Be precise. Are you packaging hot, oily soup or cold sandwiches?
Temperature Conditions: Will the food be frozen, kept in a fridge, or heated in a microwave directly in the container?
Food Type: Is your product mostly acidic (like citrus), fatty (like cheese), or dry (like crackers)?
A trustworthy supplier will have no problem providing a DoC that verifies the packaging has been tested for your exact needs. If they seem hesitant or vague, consider that a major red flag.
Beyond Safety: The Rise of Recycled Content
Today, material safety is also tied to sustainability. Global food packaging regulations are changing fast, with a growing emphasis on recyclability and the use of post-consumer materials. For example, new rules expected around 2025 will require many plastic packaging types to include a certain percentage of recycled content. This move merges consumer protection with environmental responsibility.
Turning Sustainability Rules Into Business Opportunities
Shifting sustainability rules, especially those around Extended Producer Responsibility (EPR), are changing how businesses think about their packaging. These new rules don’t have to be just another line item on your expense report; they can be a real chance to innovate and pull ahead of the competition. Instead of viewing them as a hassle, smart companies are finding ways to turn compliance with these food packaging regulations into a genuine advantage, uncovering cost savings and new market opportunities along the way.
From Compliance Cost to Competitive Edge
The main idea is to look at your packaging materials not just for their primary function, but for their entire lifecycle. Can your current containers be easily recycled where your customers live? Could you switch to a lighter material to cut down on shipping costs and EPR fees? Imagine swapping a heavy glass jar for a lightweight, recyclable pouch. This simple change could lower both your material costs and the fees associated with disposal.
Another effective strategy is to build a closer relationship with your suppliers. Start a conversation about their sustainability goals and what new materials they’re working on. A great partner will be able to offer materials that are not only compliant but also cost-effective and appealing to your customers. This kind of collaboration can lead to better packaging that meets regulations and wins over eco-conscious shoppers. These projects could range from using mono-materials for easier recycling to adopting packaging with better product protection.
Navigating Upcoming EPR Reforms
Looking ahead to 2025, regulations around the world are getting tougher to reduce waste. The United Kingdom, for instance, is overhauling its EPR system, putting more of the financial weight for packaging’s end-of-life costs directly on manufacturers. This is a strong signal that the cost of doing nothing will only increase.
Building a Supply Chain That Supports Your Success
Your commitment to food packaging regulations is only as strong as your weakest supplier. A solid compliance strategy has to reach beyond your own operations and into every part of your supply chain. This means you can’t just take a supplier’s word that their materials are safe; you have to actively verify it. Building these strong, compliant relationships starts with asking detailed questions before you even place an order.
Think of it as hiring a critical team member. You wouldn’t bring someone on board without checking their references, and you shouldn’t start a partnership with a packaging supplier without seeing their documentation. This process isn’t about micromanaging; it’s about setting clear, shared expectations from the very beginning. It protects both you and your partners from expensive mistakes and recalls down the road.
Vetting Your Partners and Auditing Effectively
A great way to start is by creating a simple supplier questionnaire. Ask potential partners to provide their food-grade certifications, Declarations of Compliance (DoC) for the specific materials you’re buying, and information about their own traceability systems. A trustworthy supplier will have this information ready to go and will appreciate your diligence. If you get hesitation or vague answers, consider it a major red flag.
Beyond the initial paperwork, occasional audits are crucial. This doesn’t have to be a formal, white-glove inspection. It can be as straightforward as:
Regularly requesting updated compliance documents, especially if a material formulation changes.
Physically checking incoming packaging shipments to ensure they match what you ordered and are correctly labeled with batch numbers.
Having a backup supplier identified. Even the best partners face disruptions, and having a pre-vetted alternative can be a lifesaver.
To help you organize this process, a simple checklist can ensure you cover all your bases with every supplier, every time.
Supplier Compliance Checklist
This table outlines the essential requirements and documentation you should collect from your packaging suppliers to ensure they meet your standards.
Requirement Category
Specific Requirements
Documentation Needed
Verification Method
Material Safety
Materials are approved for food contact.
Declaration of Compliance (DoC)
Review and file the DoC for each specific material.
Quality Control
Consistent material quality with no defects or contaminants.
Certificate of Analysis (CoA)
Perform spot-checks on incoming shipments against the CoA.
Traceability
All packaging is clearly marked with batch or lot numbers.
Supplier’s internal traceability records.
Confirm that batch numbers are present and legible upon delivery.
Regulatory Standing
Supplier holds a GFSI-recognized certification (like BRC or SQF).
Current and valid certification documents.
Check the certificate’s validity on the issuing body’s website.
Using a checklist like this turns a big task into a manageable one. It makes sure that you’re not just hoping for compliance but are actively building a supply chain you can depend on.
Staying Ahead of Changes Before They Hit You
The smartest businesses don’t just react to new food packaging regulations; they see them coming and prepare in advance. This forward-thinking approach isn’t about having a crystal ball—it’s about knowing where to look for early signs and building flexibility into your operations so you’re never caught off guard.
Interpreting Proposed Regulations
Your first line of defense is keeping an eye on official government sources. For instance, the U.S. Food and Drug Administration (FDA) regularly provides updates on food contact substances and other packaging materials.
The trick is to watch for proposed rules, not just the final regulations. These proposals are a clear signal of where the industry is heading, giving you precious lead time to figure out how they might affect your business and what adjustments you’ll need to make.
Building Flexibility into Your Operations
Once you have this insight, your next move is to build agility. This means avoiding being locked into a single packaging type or supplier. A great strategy is to have ongoing conversations with your suppliers about the innovative materials they are developing.
A few proactive habits can make a huge difference:
Subscribe to newsletters from regulatory bodies like the FDA or the European Food Safety Authority (EFSA).
Attend industry webinars where experts break down emerging regulatory trends.
Keep an open line of communication with your packaging suppliers about new materials and potential changes on their end.
This approach keeps you prepared, ensuring you’re not scrambling when a new rule finally drops. It’s about turning regulatory changes from a potential headache into a strategic advantage for your business.
Key Takeaways and Your Next Actions
Trying to figure out food packaging regulations can feel overwhelming. The key isn’t to solve everything at once, but to make smart, targeted choices that protect your business. Your path to compliance starts with building a solid base of knowledge and taking a few proactive steps.
Your Immediate Action Plan
To get rolling, let’s focus on the tasks that will give you the most bang for your buck. These aren’t long-term projects; they’re things you can do this week to seriously lower your risk.
Audit Your Top 5 Products: Grab the Declarations of Compliance (DoC) for the packaging you use on your five best-selling menu items. Are the documents current? Do they actually cover how you use them (like for hot, acidic foods)? If you can’t find these documents, your number one priority is to get them from your supplier.
Talk to Your Primary Supplier: Set up a quick 15-minute call. Ask them one straightforward question: “What regulatory changes are you tracking that might affect us in the next 12 months?” Their answer is gold, giving you a peek into the future.
Review Your Labels: Look closely at your packaging for any claims like “organic,” “recyclable,” or “compostable.” Do you have the proper certifications to back these up? Misleading claims are a common headache that’s surprisingly easy to avoid.
Building a Long-Term Compliance Framework
Once you’ve handled the urgent stuff, it’s time to create a system that makes managing food packaging regulations a regular part of your routine. This is about building good habits, not just checking off a list. Think of this as your 90-day goal.
First, assign clear ownership for compliance. Even if you’re a small shop, one person needs to be the go-to for tracking new rules and supplier paperwork. Second, create a simple supplier scorecard. You can use this to rate your partners on things like how well they communicate, the quality of their documentation, and if they give you a heads-up on changes. Finally, schedule a quarterly compliance check-in on your calendar. This dedicated time ensures that compliance stays on the radar and doesn’t get buried under daily tasks.
Ready to find packaging partners who make compliance easier? At MrTakeOutBags.com, we provide clear documentation and expert advice to help you navigate the complexities of food safety. Explore our extensive selection of compliant packaging solutions and let our team support your success.
Why Your Catering Checklist Can Make or Break Everything
Let’s be honest: a single catering mistake can unravel months of careful event planning and damage your professional reputation. It’s easy to think of a catering checklist as just another to-do list, but it’s much more than that. Think of it as your safety net in a high-pressure environment—the one document standing between a smooth event and a total disaster.
The Hidden Costs of Poor Planning
Even the most experienced planners can be caught off guard by unexpected costs and last-minute problems. A generic template won’t help you when a key vendor suddenly cancels or a guest has a severe allergic reaction to an undeclared ingredient. I’ve personally seen events go sideways because of small oversights that a detailed checklist would have easily caught.
For instance, forgetting to confirm the power requirements for food warmers can result in cold meals and disappointed guests. Not having enough staff for a plated dinner service can cause long delays and frustration. These aren’t just small hiccups; they’re the kinds of failures that can harm your reputation. The difference between a wedding remembered for its perfect meal and one known for its calamari shortage often boils down to thorough documentation.
Why Your Checklist Is Your Best Defense
A well-made catering checklist does more than just keep track of tasks; it also offers a huge psychological advantage. It helps you shift from being stressed and reactive to feeling prepared and in control. As the catering industry continues to grow—reaching a market size of USD 154.71 billion in 2024—so do client expectations and competition.
Having every detail planned out, from specific dietary restrictions to the exact types of disposable catering supplies required, is your best strategy against chaos. This organized approach ensures no detail is overlooked.
Foundation Planning That Prevents Last-Minute Chaos
Before your mind wanders to menus and appetizers, it’s worth remembering that the real success of your event is decided long before the first dish is served. The foundational planning stages are where you lay the groundwork that prevents those all-too-common last-minute disasters. Ask any seasoned planner, and they’ll tell you this early phase is everything.
Nailing the Numbers and Location
Getting an accurate guest count can feel like trying to hit a moving target, but it’s the cornerstone of your entire plan. A huge part of avoiding last-minute chaos is mastering the Save the Date and RSVP process. Here’s a pro tip I’ve learned over the years: always plan for a 5-10% buffer on your final guest count. This simple strategy can save you from the nightmare of running out of food or chairs.
Your venue choice directly impacts your catering success. Before you sign any contracts, you need to ask some practical questions:
Is there a dedicated catering prep area with enough power outlets and running water?
What are the restrictions on setup and breakdown times?
Are there exclusive vendor agreements you have to follow?
I once catered an event at a historic barn that looked stunning but had only two power outlets for the entire catering team. We spent the day juggling food warmers and coffee makers—a stressful situation a simple site visit could have easily prevented.
Timing, Supplies, and Communication
Creating a detailed timeline is non-negotiable for a smooth operation. When you can visualize the key deadlines, it helps keep everyone on your team and your vendors on track and accountable.
To help you get started, here’s a sample timeline that outlines the key milestones and who’s responsible for what.
Event Planning Timeline: Key Milestones
Timeline
Task Category
Specific Actions
Responsible Party
6-12 Months Out
Initial Planning
Define event goals, budget, and guest list. Research and book the venue.
Event Planner/Client
4-6 Months Out
Vendor Selection
Research and hire the caterer. Finalize the photographer, entertainment, etc.
Event Planner/Client
2-3 Months Out
Menu & Logistics
Finalize the menu with the caterer. Discuss dietary needs. Plan rentals (tables, linens).
Event Planner & Caterer
1 Month Out
Final Counts
Send final RSVP reminders. Give a near-final guest count to the caterer.
Client
2 Weeks Out
Final Confirmation
Provide the final guaranteed guest count. Confirm delivery/setup times.
Event Planner/Client
1 Week Out
Last-Minute Details
Confirm final floor plan. Share the timeline with all vendors. Check the inventory of supplies.
Event Planner & Caterer
Event Day
Execution
Manage vendor arrivals and setup. Oversee event flow and service.
Event Planner & Caterer
This timeline shows that a structured approach is essential. Making firm decisions well before the event day gives your team the time it needs to execute flawlessly.
A key part of this is building out your catering checklist to ensure you have all your supplies ready. Finally, establish a clear communication plan with your client and vendors from day one. This helps manage expectations and address things like dietary restrictions early, preventing menu chaos down the line.
Menu Planning That Actually Satisfies Everyone
Putting together a menu is more than just picking out tasty dishes; it’s about crafting an experience. A great menu finds the sweet spot between crowd-pleasing staples and a few more interesting options, making sure there’s something for every palate without sending your kitchen into a panic. Your catering checklist needs a dedicated section for this, moving beyond a simple food list to a thoughtful plan for delighting a diverse group.
Imagine you’re catering a corporate luncheon. You could build your menu around a classic grilled chicken entree and a versatile pasta salad. To add a modern touch and accommodate different dietary preferences, you might include a quinoa bowl with roasted vegetables and a lemon-tahini dressing. This strategy satisfies the majority while also impressing guests who appreciate contemporary, health-conscious choices.
Handling Dietary Needs with Grace
Dealing with dietary restrictions and allergies is a standard part of event planning now, not an afterthought. The goal is to manage these needs smoothly, without making any guest feel like they’re an inconvenience. Instead of preparing completely separate (and sometimes less exciting) meals, focus on making your main dishes flexible.
Here are a few practical ways to do this:
Set up build-your-own stations: A taco bar, a loaded baked potato station, or a pasta bar lets guests customize their plates, easily avoiding ingredients they can’t or don’t want to eat.
Serve sauces and dressings on the side: This simple adjustment can make many dishes instantly suitable for guests who are avoiding gluten or dairy.
Use clear, attractive labels: Neatly label each dish, noting if it is vegan, gluten-free, or contains common allergens like nuts. This empowers guests to make their own informed and safe choices with confidence.
Sourcing and Portioning for Success
A memorable menu begins with quality ingredients. Forging relationships with local suppliers can give you access to fresher, seasonal produce that makes your food stand out, and it can even be a cost-effective choice. It’s always smart to have a backup plan for your star ingredients, just in case of supply chain hiccups.
Getting the portion sizes right is just as important. A good rule of thumb is to plan for about 1.25 lbs of food per person in total, but you’ll want to tweak this number based on the event’s timing, duration, and service style. The catering industry is also seeing a growing interest in unique cuisines and specific dietary accommodations, making careful planning and food safety more important than ever.
Choosing Vendors Who Won’t Let You Down
The quality of your food is a big deal, but a caterer’s reliability under pressure is what truly separates a professional from an amateur. Your catering checklist needs a serious vetting process because the partner you select can make or break your entire event. This goes way beyond taste tests; it’s about seeing how they react when things don’t go according to plan.
Vetting for Real-World Scenarios
When you’re interviewing potential caterers, you need to dig deeper than their sample menus. Ask pointed questions that get to the heart of their problem-solving skills. I always like to ask, “Can you describe a time when a key ingredient was unavailable at the last minute, and how you adapted?” Their answer reveals more about their resourcefulness than any tasting session ever could.
Another fantastic question is, “What’s your communication plan if our guest count unexpectedly increases by 15% on the day of the event?” You’re looking for flexibility and a collaborative spirit. A caterer who seems rigid or resists reasonable adjustments during these initial chats could become a major headache later. Remember, you’re not just hiring someone to cook; you’re partnering with a logistics expert who must perform flawlessly when it counts.
To systematically compare your options, a weighted evaluation table can be a lifesaver. It helps you move beyond a gut feeling and objectively score each vendor on the factors that matter most to you.
A Complete Catering Checklist for Evaluating Vendors
Criteria
Weight (1-5)
Evaluation Questions
Scoring Scale (1-5)
Experience & Reputation
5
How many events similar to ours have they handled? Can they provide recent, relevant references? What do online reviews say?
1: No relevant experience; 5: Extensive, proven track record with glowing reviews.
Menu Quality & Flexibility
5
Do they offer creative, high-quality menu options? Are they willing to customize dishes for dietary needs? How was the tasting?
This table forces you to think critically about each caterer’s strengths and weaknesses. By assigning a weight to each category, you ensure that the most important factors, like experience and menu quality, have the biggest impact on your final decision.
Decoding Contracts and Spotting Red Flags
When you start getting proposals, it’s time to put on your detective hat. Vague language around staffing levels, potential overtime charges, or contingency plans is a massive red flag. A professional contract will spell out everything in crystal-clear terms, from payment schedules to cancellation policies. Always insist on a clause that details their responsibilities for things like equipment rentals and post-event cleanup.
A refusal to provide references or show proof of insurance should be an immediate deal-breaker. There’s no excuse. A professional caterer will be proud to let you speak with past clients and will understand that liability coverage is non-negotiable. By being thorough in your selection process, you build a foundation of trust that helps ensure your event is a seamless success.
Day of Execution That Runs Like Clockwork
All the planning, lists, and careful organization lead to this single moment: event day. This is where a detailed catering checklist stops being a planning document and becomes your live operational script. Your success now hinges on sharp coordination, clear communication, and the agility to handle the unexpected. Think of it less like a military operation and more like a well-rehearsed theater production where every team member knows their role, their cues, and how to improvise on the fly.
Roles and Communication Protocols
On the day of the event, any confusion is a major problem. Before the first guest even walks in, your team lead should hold a quick huddle to go over the game plan. Everyone, from the servers and bussers to the kitchen staff, needs a totally clear picture of their specific duties and the overall flow of service. For example, assign a single person as the main contact for the client. This prevents them from getting mixed, and often conflicting, requests from multiple team members.
You’ll also need a simple but solid communication system. For bigger events, this might mean using discreet earpieces or a dedicated channel on a messaging app. For smaller gatherings, clear hand signals or designated check-in points can be just as effective. The goal is to have a system that works smoothly under pressure, letting you quickly share updates on everything from refilling appetizers to cleaning up a spill on the dance floor.
Managing Service Flow and Troubleshooting
Keeping food at the right temperature is a massive part of a great event. This is especially true for hot dishes that have to travel from an off-site kitchen to the venue. Once you’re on-site, your checklist should include scheduled temperature checks for buffet items and close coordination between the kitchen and servers for plated meals to ensure food is served promptly.
With the U.S. catering industry pulling in revenues of $72 billion in 2023, client expectations are through the roof. A solid checklist is no longer a “nice-to-have”; it’s critical for managing the complex details that lead to top-quality service. This detailed approach is essential in an industry that has experienced significant growth and is projected to continue expanding. Ultimately, day-of execution is all about proactively managing the small stuff so every guest has a perfect experience, from their first bite to their last.
Learning From Every Event To Improve Your Process
The event isn’t truly over when the last guest leaves. In fact, for the most successful planners, this is when some of the most important work begins. The time immediately following an event is a goldmine for insights, and it’s your best opportunity to turn a good event into a great, repeatable process. Your goal should be to make your catering checklist a living document that gets smarter after every single gig.
Gathering Actionable Feedback
To get feedback that you can actually use, you need to act while memories are still fresh. Don’t just ask your team, “How did it go?” That’s too broad. Instead, ask specific, open-ended questions that encourage detailed answers.
For instance, pulling your lead server aside and asking, “What was the biggest bottleneck during dinner service?” will give you far more useful information than a generic question. The same goes for clients. Instead of “Did you enjoy the food?” try, “Which dish seemed to be the biggest hit with your guests?” For collecting feedback from a larger group, digital survey tools can be incredibly effective for getting structured responses quickly.
This kind of detailed feedback helps you spot patterns. You’ll start to see what parts of your process are rock-solid and which ones need a complete overhaul before the next event.
Updating Your Process
Now, what do you do with all this great information? Document it. If you don’t write it down, it’s easy to forget. Create a dedicated section in your event files for post-event notes. A simple structure with bullet points works wonders:
What went right: The new mini quiche appetizer was a massive hit; the 1-to-15 staff-to-guest ratio was perfect for this type of seated dinner.
What went wrong: We ran low on ice an hour into the cocktail reception; our point of contact with the DJ was unclear, causing confusion during announcements.
Action items: Add “Confirm venue’s ice machine capacity or order supplemental ice” to the pre-event checklist. Establish a single, named point of contact with all outside entertainment vendors.
Thinking about your internal operations is just as important. As you review notes from past events, you might notice that managing payments and receipts is becoming a time sink.
By consistently refining your catering checklist and procedures, you’re not just planning one-off events; you’re building a reliable, intelligent system. This ensures every future client benefits from the full depth of your experience. For all your event needs, from elegant containers to practical disposables, explore the wide selection at MrTakeOutBags.com.
Understanding Why Insulated Food Packaging Matters Now
The world of food packaging has moved far beyond simple containers. These days, smart businesses know that insulated food packaging isn’t just a basic cooler anymore; it’s a critical part of their operation that can make or break their success. This is about more than just keeping things cold—it’s about adapting to a major shift in how people eat and what they expect.
Think about the journey your food takes. Whether it’s a gourmet meal kit traveling across the country or a hot lunch being delivered across town, your customers have one non-negotiable expectation: it has to arrive perfectly fresh. That expectation is a powerful driver, pushing everyone from local meal prep services to major food brands to get serious about their packaging. They get that the right packaging is a direct link to customer happiness and repeat business.
The Real Drivers of Change
So, what’s really pushing this change? It’s a mix of things that all point toward needing better temperature control. The massive growth of food delivery apps and direct-to-consumer food brands has introduced a whole new world of logistical puzzles. A soggy salad or a lukewarm soup isn’t just a small mistake; it’s a reason for a customer to click on a competitor for their next order.
On top of that, food safety rules are getting tighter. Keeping food at a consistent temperature isn’t just a good idea—it’s often a legal requirement to prevent foodborne illnesses. Businesses are realizing that spending on quality insulated food packaging is a smart move that protects both their customers and their reputation. The key motivations really boil down to a few core needs:
Meeting Consumer Expectations: Creating a restaurant-quality experience for customers enjoying their meal at home.
Ensuring Food Safety: Following strict temperature guidelines to stop food from spoiling.
Reducing Waste: Cutting down on product loss caused by temperature changes during shipping.
Strengthening Brand Image: Showing customers a clear commitment to quality and care.
This isn’t some small trend; it’s a huge market adjustment. The global market for insulated food containers was valued at USD 1.6 billion in 2020 and is expected to grow at an annual rate of 5.5% through 2025. This growth isn’t just a number; it reflects the real-world scramble from businesses trying to solve these exact problems.
Choosing Materials That Actually Work For Your Needs
Picking the right material for your insulated food packaging is a classic balancing act. It’s easy to just grab the cheapest option to save a few bucks, but that can quickly backfire with spoiled products and angry customers. On the other hand, the most advanced, expensive material might be overkill for a quick trip across town. The goal is to match the material’s capabilities to your actual shipping needs.
Understanding Insulation Performance
The effectiveness of an insulation material is measured by its R-value, which tells you how well it resists heat flow. Simply put, a higher R-value means better insulation. A meal kit company shipping frozen steaks across several states for a weekend delivery needs a much higher R-value than a local bakery delivering still-warm pastries.
This visual gives you a clear look at how common insulation materials stack up in terms of their thermal performance.
As you can see, there’s a huge performance gap between something like vacuum-insulated panels and standard foams. But performance is just one part of the story. You also have to factor in your budget, how long your products will be in transit, and your company’s sustainability goals. Expanded polystyrene (EPS) foam, for example, is a cost-effective workhorse, but its environmental impact is a significant concern for brands that prioritize being green.
To help you weigh these factors, here’s a breakdown of the most common materials.
Comparing Materials for Insulated Food Packaging
This table compares their performance, general cost, and environmental footprint to guide your decision.
Material Type
Temperature Retention
Cost Range
Sustainability Rating
Best Use Cases
EPS Foam
Good (24-48 hours)
$
Low (Difficult to recycle)
One-way shipping, cost-sensitive applications
Polyurethane (PUR) Foam
Excellent (48-96 hours)
$$$
Moderate (Recyclable in some areas)
Multi-day shipping, high-value perishables, and pharmaceuticals
Vacuum Insulated Panels (VIPs)
Superior (96+ hours)
$$$$
High (Reusable, but complex)
International shipping, clinical trials, extreme temperature control
Natural Fibers (Cotton, Jute)
Moderate (up to 48 hours)
$$
High (Biodegradable, compostable)
Eco-conscious brands, meal kits, and short-duration shipping
Insulated Liners/Bags
Fair (up to 24 hours)
$
Varies (Some are recyclable)
Local deliveries, grocery, and adding insulation to existing boxes
This comparison highlights that there’s no single “best” material. The right choice depends entirely on your specific circumstances, balancing insulation needs with budget and brand values.
Matching Materials to Real-World Scenarios
Let’s look at how this plays out for two very different businesses:
A National Meal Kit Service: This company ships boxes that will be in transit for 48-72 hours, filled with delicate proteins and fresh produce. For them, spending more on higher-performance options like polyurethane foam or even vacuum-insulated panels makes sense. The extra cost is an investment that prevents product spoilage, which would be far more expensive in refunds and lost customer trust.
A Local Catering Company: They’re just delivering hot food for an event an hour away. A much simpler solution, like a durable insulated fabric bag or a standard foam cooler, is more than enough. Since the delivery window is so short, they don’t need to pay a premium for extreme, long-duration temperature control.
By honestly evaluating your needs against material performance and cost, you can find your ideal solution. Don’t just look at the upfront price; think about the total cost of ownership, which includes potential losses from deliveries that don’t go as planned.
Getting Your Packaging Size And Design Right
Choosing the right materials is a big win, but it’s only half the story. How you size and design your insulated food packaging is just as important. Picture this: you’re shipping a single, perfect frozen cupcake in a cooler box big enough for a whole cake. All that extra room, the air gap, is working against you. Air is a terrible insulator, and a large air gap means your gel packs are busy chilling the air instead of your product. This is a common misstep that can lead to melted goods and disappointed customers.
The Physics of a Perfect Fit
Your main goal should be a high product-to-container ratio. This simply means you want as little empty space as possible. By doing this, you let the product’s own temperature stability, or its thermal mass, do some of the work. It’s the same reason a full freezer stays cold longer than an empty one during a power outage. Your packaging needs to be just big enough to snugly fit your food and the coolants.
I’ve seen this principle work wonders for businesses shipping items with unusual shapes, like whole fish or wheels of artisanal cheese. Instead of just grabbing a standard box, they use custom-molded inserts or flexible insulated liners that hug the product’s contours. This smart move not only boosts thermal performance by cutting down on air gaps but can also slash shipping costs by reducing the package’s size and weight.
Smarter Design, Better Results
Beyond just getting the size right, a clever design can solve some tricky shipping puzzles. What if you need to ship frozen and refrigerated items together? Some businesses use modular systems. They create separate insulated compartments inside one box, using dividers to maintain different temperature zones. It’s a practical way to keep frozen steaks from accidentally freezing fresh veggies, ensuring everything arrives in perfect condition.
To nail your packaging strategy, here are a few tips from the field:
Measure everything with precision: Don’t guess. Know the exact dimensions of your products, including their primary containers.
Remember the coolants: Leave just enough room for gel packs or dry ice to surround the product effectively.
Run some tests: Before you place a bulk order, do a few trial shipments. See how your setup performs under real-world transit conditions. It’s the best way to confirm your size and design choices are solid.
Mastering Temperature Control That Works in the Real World
Getting temperature control right is what separates successful food delivery operations from the rest. The difference often boils down to small, consistent actions that protect your food from the kitchen all the way to the customer’s hands. This process starts even before the food goes into the package.
Pre-Cooling and Smart Loading
One of the most effective yet frequently skipped practices is pre-cooling. Think of your insulated food packaging like a personal thermos. If you pour hot coffee into a room-temperature thermos, the container itself absorbs some heat, making your drink cool down faster. The same idea applies here.
Keeping your packaging in a chilled environment before packing ensures it doesn’t steal the cold from your food. For hot items, storing insulated delivery bags in a warm, dry area can help maintain that fresh-from-the-oven heat.
How you load your containers is just as crucial. The goal is to minimize empty space, much like a game of Tetris. This is where staff training really makes a difference. Here are a few proven methods:
Place gel packs strategically—on the bottom, top, and sides—to create a “blanket” of cold air.
Position frozen items at the bottom so the cold air can naturally sink and circulate.
Use simple cardboard dividers to separate hot and cold items if they’re traveling in the same container.
Monitoring and Adapting
You can’t fix what you don’t measure. Using simple tools like temperature loggers can give you incredibly useful data. These small devices travel with a shipment, recording the temperature throughout the journey. This data shows if your packaging strategy is holding up or if there are weak spots, like a package sitting on a hot delivery truck for too long on a particular route.
This attention to detail is becoming more common as the market grows. The global insulated packaging market was valued at around USD 11.4 billion in 2020 and is expected to hit USD 15.8 billion by 2025, a jump driven by the increasing demand for temperature-sensitive shipping. By using these real-world temperature control methods, you not only protect your products but also build a reputation for quality and reliability.
Navigating Food Safety Rules Without Going Crazy
Following food safety rules isn’t just about dodging a fine; it’s about building the trust that keeps your customers coming back for more. When you’re shipping meals and other temperature-sensitive foods, your insulated food packaging is a critical line of defense in your safety plan—and you can bet regulators know it. The good news? Staying compliant doesn’t have to be a complicated mess.
Core Compliance: What Inspectors Look For
Inspectors from agencies like the FDA or your local health department are focused on one main goal: stopping foodborne illness before it starts. For packaged foods, this boils down to keeping products out of the “danger zone,” which is typically between 40°F and 140°F. This is the temperature range where bacteria can grow quickly, and it’s where your packaging and handling procedures get put under the microscope.
Having clear documentation is your best friend during an audit or inspection. This doesn’t mean you need a mountain of paperwork. Instead, focus on keeping simple but essential records.
Temperature Logs: Keep consistent records from your temperature monitoring devices. This shows you’re actively tracking performance from your facility to the customer’s door.
Supplier Certifications: Have files ready that show your insulated food packaging materials are certified as food-safe.
Standard Operating Procedures (SOPs): These are just simple, written guides for your staff. They outline exactly how to pack orders to maintain the correct temperature, ensuring everyone is on the same page.
Staying Ahead of the Curve
Food safety regulations are always adjusting to new science and changing consumer habits. Being proactive will save you major headaches down the road. For instance, if you’re shipping through a heatwave, it’s smart to double down on your precautions.
Ultimately, a strong quality control system shows a real commitment to safety that goes beyond just checking boxes. It’s about protecting your customers and preserving your brand’s hard-earned reputation.
Smart Cost Management And Measuring What Matters
When it comes to insulated food packaging, grabbing the cheapest option off the shelf can feel like a win, but it’s often a fast track to losing money on spoiled products and dealing with unhappy customers. True cost management is about more than just the price per box. It’s about understanding the total cost of ownership—a figure that includes everything from the raw materials and shipping to labor costs and even the financial sting of a one-star review.
Think of it this way: a slightly more expensive box that’s designed for quick assembly can shave precious seconds off your packing time. Over thousands of orders, those seconds translate into significant labor savings. Similarly, investing in better insulation might bump your upfront packaging cost by 15%, but if that investment cuts your spoilage rate in half, you’ve made your money back and then some. The return is immediate and protects your bottom line.
Measuring What Truly Counts
To get the full picture, you need to track the real-world performance of your packaging. This means looking beyond basic expenses and focusing on the Key Performance Indicators (KPIs) that tell the whole story of your operation’s health.
Here are a few metrics that matter most:
Spoilage Rate: This is the percentage of your products that are damaged or compromised because of temperature failures. It’s the most direct financial yardstick for your packaging’s effectiveness.
Customer Complaint Frequency: How often are customers reaching out about food arriving at the wrong temperature or lacking freshness? This KPI is a direct line to your brand’s reputation.
Labor Efficiency: Take a stopwatch to your packing line. How long does it actually take your team to assemble and pack an order? A streamlined process can be a hidden source of major savings.
To help you get a handle on these numbers, we’ve put together a framework for a cost-benefit analysis.
Key Metrics for Measuring Packaging ROI
This table outlines the key metrics and how to calculate them, giving you a clear path to evaluating the true return on your packaging investment.
Cost Category
Calculation Method
Typical Range
Impact Level
Measurement Frequency
Material Costs
(Price per Unit) x (Total Units)
$0.50 – $5.00 per unit
High
Per Order/Batch
Labor Costs
(Time to Pack) x (Hourly Wage)
30-90 seconds per box
Medium
Weekly/Monthly
Spoilage Rate
(Spoiled Units / Total Units Shipped) x 100
1% – 5%
High
Monthly
Customer Complaints
(Complaints / Total Orders) x 100
< 2%
High
Weekly/Monthly
Return Shipping
Cost per returned item
$10 – $30 per return
Medium
As Incurred
This table is a starting point. By regularly tracking these metrics, you can move from guessing what works to knowing what pays off. The goal is to see how an initial investment in quality packaging directly reduces long-term costs like spoilage and customer churn.
The demand for reliable temperature-controlled shipping isn’t slowing down. In fact, market projections show the insulated packaging industry growing from USD 17.71 billion in 2025 to a massive USD 29.00 billion by 2032. This surge highlights a global need for effective solutions in food delivery.
Funding these kinds of quality improvements is a common challenge. Many businesses look into various financing options to upgrade their packaging without a huge upfront capital expense.
Your Roadmap To Insulated Food Packaging Success
Now that you have a solid handle on the different materials, sizing options, and temperature control basics, it’s time to map out your strategy. Finding success with insulated food packaging isn’t about guesswork; it comes from a thoughtful, step-by-step approach. Breaking the process down into manageable phases helps avoid operational headaches and sets you up for success right from the start.
The Initial Assessment Phase
Before you even think about buying a single bag or box, you need to take a good, hard look at your current operations. This is your chance to collect the baseline data that will inform every decision you make down the line. What are your most common delivery distances and times? What are the specific temperature requirements for your menu items? You should also audit your current losses by tracking every spoiled or returned item due to temperature problems for a full month.
This audit gives you a clear picture of where you stand. For example, a bakery might discover that 90% of its deliveries are within a five-mile radius and take less than an hour. In that scenario, a simple insulated bag could be perfectly adequate. On the other hand, a seafood supplier shipping fresh fish overnight across three states will obviously need a more high-performance solution. This phase isn’t about finding the final answers; it’s about asking the right questions to guide your search.
Supplier Selection and Testing
With your needs clearly defined, you can start conversations with suppliers. Don’t just flip through a catalog. Ask for samples that fit your specific requirements and then put them through a real-world gauntlet. Pack your products exactly as a customer would receive them and send them out on your most difficult delivery routes.
Test on your longest delivery route. This will show you the maximum stress the packaging can handle.
Test during the hottest part of the day. Heat is your biggest enemy, so see how the packaging performs under pressure.
Use temperature loggers to collect hard data. Don’t just guess if it “feels” cold enough. The numbers will tell the true story.
This testing phase is where you confirm if a supplier’s promises hold up. A solution that looks impressive on paper might fall short in the real world. The goal is to find a partner, not just a vendor—someone who understands your unique challenges and can deliver reliable packaging every time.
By following this practical roadmap—assessing your needs, finding the right partners, and testing everything—you can roll out a packaging program that protects your products, keeps your customers happy, and supports your business’s growth.
Ready to find the perfect packaging solution for your business? Explore our extensive collection of insulated food packaging at MrTakeOutBags.com and get the quality products you need with the personal service you deserve.
Understanding What Food Packaging Safety Really Means
When we talk about food packaging safety, it’s easy to get tangled up in rules and regulations. But at its heart, it’s not about just meeting the bare minimum. It’s about shifting your thinking so that your packaging becomes the first, and most important, line of defense for your product and your customers.
From Compliance to Culture
Imagine two different businesses. One sees an upcoming FDA inspection as a test they need to cram for, frantically updating logs moments before the auditor shows up. The other operates with high standards every single day, making the inspection just another Tuesday. This is the difference between compliance and a true safety culture.
The same idea applies to food packaging safety. Companies that get it right don’t just follow the rules; they build safety into everything they do. They view their packaging not as a necessary expense, but as a direct investment in their brand’s reputation and customer trust. A caterer choosing a tamper-evident container over a basic clamshell isn’t just spending a few extra cents; they’re sending a clear message that they care about quality and safety.
Proactive Hazard Spotting
This forward-thinking approach is essential because the stakes are incredibly high. Food contamination is a serious global issue, with statistics showing that every 1 in 10 people worldwide is affected by it. This fact alone shows why we need packaging that does more than just hold food.
Ultimately, a strong safety system is about spotting potential problems before they turn into expensive mistakes. It means getting into the habit of asking practical questions about your packaging choices. “Could this seal break if the box is dropped during delivery?” or “Will the acid from this tomato sauce react with this material over time?”
True food packaging safety is about embedding these questions into your daily operations. When you do that, your packaging stops being a simple container and starts being your product’s most reliable guardian.
Making Sense Of FDA Rules Without Losing Your Mind
Diving into FDA regulations can feel like a full-time job, but it all boils down to one core principle: making sure nothing harmful moves from the package into the food. With the global food packaging market projected to grow at a CAGR of 5.30%, mastering these rules is no longer optional.
The U.S. FDA’s primary tool for this is the Food Contact Notification (FCN) program. Essentially, it’s a required scientific safety review for new materials before they can be used in packaging. For any business in the food industry, understanding how this works is a fundamental part of food packaging safety.
The Reality of Chemical Migration
The main concern driving all this regulation is chemical migration—the technical term for when substances from the packaging itself can transfer into the food it’s meant to protect. Different materials pose different levels of risk, which is why they are regulated differently. The smartest companies don’t just react; they create internal systems to manage documentation and build strong relationships with suppliers who are already compliance experts.
This infographic shows the maximum allowed chemical migration limits for some of the most common packaging materials.
You can see that materials like glass have nearly zero migration, making them an incredibly stable and safe option. Having this kind of knowledge helps you make better sourcing choices from day one.
To give you a clearer picture, let’s compare some of the key FDA regulations you might encounter. This table breaks down what’s required for different types of submissions, how long you can expect to wait, and what you should keep in mind for each.
Key FDA Food Packaging Regulations Comparison
A comprehensive comparison of major FDA regulations affecting food packaging, including requirements, timelines, and compliance costs
Regulation Type
Requirements
Approval Timeline
Key Considerations
Food Contact Notification (FCN)
Detailed chemistry, toxicology, and migration data for a specific substance from a specific manufacturer.
Becomes effective 120 days after FDA receipt, unless the FDA objects.
This is proprietary to the company that submits it (the notifier). It’s generally faster than a Food Additive Petition.
Generally Recognized as Safe (GRAS) Notice
Evidence showing general agreement on the substance’s safety among qualified experts.
FDA typically responds with a “no questions” letter within 180 days, though this can be extended.
This applies to the substance itself, not just one manufacturer. The burden of proof for “general recognition” is high.
Food Additive Petition (FAP)
Extensive safety, toxicology, and environmental data to establish safe conditions of use for a new additive.
Can take several years due to the in-depth, multi-stage review process.
This is the most rigorous path. If approved, it creates a new regulation that allows anyone to use the additive under the specified conditions.
The main takeaway here is that the FCN process is the most common path for new packaging materials, offering a predictable timeline. GRAS is for substances with a well-established safety profile, while a Food Additive Petition is a much bigger undertaking reserved for entirely new additives.
Building a Compliance-Ready Operation
Instead of viewing regulations as a hurdle, think of them as a practical guide to quality control. The key is to be proactive rather than waiting to react to a problem.
Vet Your Suppliers: Don’t just take their word for it. A reputable partner should readily provide a Letter of Guaranty, which confirms their products meet FDA standards for direct food contact. This document is your first and most important line of defense.
Document Intended Use: Compliance is all about the details. A plastic container that’s safe for a dry salad isn’t automatically suitable for a hot, acidic soup. You must clearly define and document the intended use for every packaging item, including food types and temperature limits. This simple step prevents major compliance headaches down the line.
Spotting And Eliminating Chemical Threats Before They Strike
Chemical contamination isn’t some far-off problem; it can be happening right under your nose. Certain substances like phthalates and bisphenol A (BPA), which were once staples in plastic manufacturing, can actually move from the packaging into the food itself. This process, called leaching, happens most often when packaging is heated or holds fatty foods, putting a serious dent in your food packaging safety efforts.
This isn’t just a hypothetical risk. A real wake-up call came from a 2024 report that found many everyday foods contain high levels of these exact chemicals, sometimes far exceeding safety limits. It’s a clear signal that choosing the right materials is essential for protecting your customers and your brand’s good name.
How To Get Ahead Of Chemical Risks
Switching away from these questionable materials doesn’t mean you have to wreck your budget. It’s about being intentional and asking the right questions long before you’re locked into a contract with a packaging supplier. Smart companies are already making these moves to prevent future problems and build a foundation of trust with their customers.
Here are a few practical ways to keep chemical threats out of your supply chain:
Dig Deeper with Your Suppliers: Don’t just settle for a simple “Is it food-safe?” answer. Ask for a complete material disclosure or a Letter of Guaranty that explicitly confirms the absence of BPA, phthalates, and other specific chemicals you’re worried about. A good partner will have this information ready; if they hesitate, consider it a warning sign.
Match the Material to Your Product: Not every plastic is suitable for every food. If you sell oily or acidic products, look into materials like PET (polyethylene terephthalate) or consider alternatives like glass and certified BPA-free options. Their chemical structures are much more stable, which dramatically lowers the risk of leaching.
Ask for Real-World Test Results: Your supplier should provide migration testing data that reflects how your customers will actually use the product. If you sell hot soup, you need to see test results performed under heated conditions, not just at room temperature. This is the only way to know if the packaging is truly safe for its intended purpose.
Building Quality Control Systems That Actually Catch Problems
Giving your packaging a quick once-over before it heads out the door just doesn’t cut it. That’s not a real quality check—it’s wishful thinking. A proper quality control (QC) system is your best defense, catching problems long before they have a chance to disappoint a customer. Real food packaging safety isn’t about luck; it’s built on solid, repeatable processes that you can count on.
Putting Your QC Plan Into Motion
A strong QC framework is more than a dusty binder on a shelf that gets reviewed once a year. It’s a living part of your daily operations. It all starts with your people. Continuous employee training is essential, making sure every team member knows the right way to handle materials and run the machinery. This is your first line of defense against human error, which is often where safety issues begin.
Your quality checks should also extend to your suppliers. Don’t just take their word for it or glance at a certification. Dig into their processes to confirm they meet your standards. Internally, you need to track key metrics like material consistency and seal integrity. If you suddenly see a 10% rise in faulty seals, that’s your early warning sign to check for a machine calibration problem or a bad batch of material.
Designing Tests That Reflect Reality
Your testing methods have to be based on the real world, not just a perfect lab setting. What happens to your packaging once it leaves your facility? It gets bumped, dropped, stacked, and exposed to changing temperatures. Your tests should replicate this journey as closely as possible.
Consider these practical tests to get a true picture of your packaging’s performance:
Seal Integrity Tests: These use pressure or vacuums to check if seals can handle altitude changes during shipping or just rough handling from a delivery driver.
Drop and Vibration Tests: Simulating the shakes and tumbles of a delivery truck will quickly reveal any structural weak points in your containers.
Temperature Stress Tests: Your packaging might sit in a hot truck or a cold freezer. These tests expose it to those extremes to see how it holds up.
To help you decide which tests are right for your operation, here’s a comparison of some essential quality control methods. This table breaks down what each test looks for, along with its relative cost, time commitment, and overall reliability.
Essential Quality Control Testing Methods
Comparison of different testing methods for food packaging safety, including costs, timeframes, and effectiveness ratings
Testing Method
Detection Capability
Cost Range
Time Required
Reliability Score
Seal Integrity Test
Detects micro-leaks, weak seals, and pinholes.
$$
Minutes per sample
4/5
Drop & Vibration Test
Identifies structural weaknesses, poor design, and potential for breakage in transit.
$$$
Hours
5/5
Temperature Stress Test
Reveals material warping, delamination, or seal failure under heat/cold.
$$$
Days
4/5
Migration Test
Checks for chemical leaching from packaging into food.
$$$$
Weeks
5/5
Visual Inspection
Catches obvious defects like misprints, tears, or incorrect assembly.
$
Seconds per sample
2/5
As you can see, no single test covers everything. While a quick visual inspection is cheap and fast, its reliability is low. The most effective QC systems use a combination of these tests to ensure packaging is safe, secure, and ready for the real world.
Balancing Sustainability Goals With Safety Requirements
Does going green with your packaging mean you have to worry about safety? It’s a common concern. Many restaurant owners feel stuck between meeting sustainability goals and upholding strict food packaging safety standards. The good news is that you don’t have to choose. Top businesses are already proving that you can protect both your food and the planet without any tradeoffs.
Rethinking Eco-Friendly Materials
The trick is to apply the same safety scrutiny to sustainable options as you would to any traditional material. Think about glass, for example. It’s not just recyclable; it’s also completely inert, meaning it won’t react with or leach into food, which makes it an incredibly safe choice.
Even newer options, like compostable bioplastics (PLA) made from corn starch, are perfectly safe when they come from a reliable source. It’s all about looking past the “eco-friendly” sticker and understanding the material itself.
Navigating the Shift Without Compromise
Making the switch to sustainable packaging is becoming the new standard. In fact, over 40% of companies are planning to use more sustainable packaging by 2025. This isn’t just a feel-good move; it’s a direct response to customer preferences and changing regulations. This global demand is fueling the creation of materials that are both environmentally friendly and safe for food.
So, how do you make the change without any sleepless nights? It comes down to being just as diligent with these new materials as you are with your current ones.
Verify Certifications: Don’t just take a supplier’s word for it. Always ask for the documentation that proves a recycled or compostable material is officially certified as food-grade.
Test for Your Use Case: Will that new plant-based bowl hold your piping-hot soup? Can it handle oily dressings without getting weak? Put potential containers through real-world tests in your own kitchen with your own menu items.
Ultimately, this isn’t about compromise. It’s about seeing that a high-quality container delivers on both environmental responsibility and absolute food packaging safety.
Managing Suppliers Who Actually Care About Safety
Your promise of food packaging safety is directly tied to the quality of the materials you bring in. A weak link in your supply chain can unravel all your hard work, which is why choosing a vendor is one of the biggest calls you’ll make for your business. You’re looking for a partner, not just a provider.
Qualification That Goes Beyond a Certificate
Any supplier can wave a food-safe certificate in your face, but that piece of paper doesn’t tell the whole story. To find out who is truly committed, you have to dig a little deeper. Instead of just taking their word for it, ask to see their Standard Operating Procedures (SOPs) for hygiene and material handling.
A partner who is proud of their process will have these documents ready to go. Go a step further and ask for their sanitation logs and records of staff training. If they get defensive or can’t seem to find them, that’s a major red flag. This diligence is especially important when you’re balancing safety with sustainability goals.
Building a Partnership on Communication
So, you’ve found a supplier that seems to check all the boxes. The work doesn’t stop there. To keep those high standards, you need to build a relationship with clear and consistent communication. Think of it as a partnership focused on shared success, not just a series of transactions.
Here’s how you can make that happen:
Put it in writing. Your contract should clearly spell out your non-negotiable quality and safety standards. Include everything from material specifications to the exact conditions for rejecting a shipment.
Schedule regular check-ins. Don’t just wait for an annual review. A quick quarterly phone call can help you catch small issues before they snowball into big problems.
Know who to call. If a shipment arrives and it’s not right, you need a clear process for who to contact and how to escalate the issue. Time is critical when a bad batch comes in.
Getting this partnership right is the foundation of your packaging strategy, whether you’re ordering custom bags, boxes, or specific disposable food containers.
Your Food Packaging Safety Action Plan
Knowing the rules of food packaging safety is one thing, but putting that knowledge into practice is what really counts. A solid food packaging safety program isn’t something you create once and forget about; it’s a living part of your operation that you constantly check and improve. The best place to start is with a straightforward, honest look at where your business currently stands.
Conducting Your Initial Safety Audit
Begin by asking some direct questions to find your biggest weak spots. This isn’t about pointing fingers; it’s about finding opportunities to make quick, meaningful improvements that protect your customers and your brand.
Supplier Verification: Can you pull out an up-to-date Letter of Guaranty for every single food-contact item you use? If not, it’s time to make a priority list and give yourself a deadline to track them all down.
Material-to-Food Mismatch: Are you packing that hot, acidic pasta dish in a container designed for a cold garden salad? Map out every item on your menu to its specific container to catch these common but critical safety gaps.
Staff Knowledge: Is your team 100% certain which containers can go in the microwave and which are a definite no-go? Consistent, simple training can prevent some major headaches and customer complaints down the road.
A big part of this process is verifying the claims your suppliers make. It’s always good practice to check official sources yourself. For instance, the FDA has a public database of all effective Food Contact Notifications (FCNs).
This tool gives you a clear view of which materials have been approved for specific uses, allowing you to confirm a supplier’s paperwork with official data. Your audit creates a starting point to track your progress. Seeing your list of fully-verified suppliers grow from 50% to 95% in six months is a fantastic measure of success. These real results are what turn your action plan from just a document into a true culture of safety.
Ready to partner with a supplier who takes safety as seriously as you do? Explore our full range of compliant packaging at MrTakeOutBags.com.